Setting up 08
29
En
English
Chapter 8
Setting up
Setting up TV channels
This section describes how to automatically search for and set up
TV channels.
Using Auto Installation
When the flat screen TV is switched on for the first time after
purchase, Auto Installation menu appears on screen. For language
and channel selections, follow the steps below.
1 Select “Language” (
/
).
2 Select a language (
/
).
You can select from among 18 languages; English, German, French,
Italian, Spanish, Dutch, Swedish, Portuguese, Greek, Finnish,
Russian, Turkish, Norwegian, Danish, Czech, Ukrainian,
Hungarian, and Croatian.
3 Select “Country” (
/
).
4 Select the country (
/
).
5 Select “Terrestrial Tuner” (
/
).
6 Select a tuner type (
/
).
Use / to select “Digital”, “Analogue”, “Both” (default), or “Off”.
7 Select “Aerial Power” (
/
).
This option is available only when you select “Digital” or “Both” in
step 6. Skip steps 7 and 8 when you select other options.
Caution
• When the “Aerial Power” setting is on, directly connect the
aerial to the ANT input terminal at the rear of the flat screen TV.
Connecting any device between the aerial and flat screen TV
may cause damage to the device.
8 Select “On” or “Off” (default)(
/
).
9 Select “Satellite Tuner” (
/
).
Use / to select “On” (default) or “Off”.
If you select “On”, select “Satellite Setup” then press
ENTER
to move
to the Satellite Setup screen.
If you select “Off”, the “Satellite Setup” menu dims.
10 Select “Start” (
/
then ENTER).
Auto Installation automatically starts. To quit Auto Installation
before it finishes, press RETURN.
Note
• You can start Auto Installation from the HOME MENU after
moving to another country, for example. Follow the steps below
before starting Auto Installation:
1 Press HOME MENU (
/
then ENTER).
2 Select “Setup” (
/
then ENTER).
3 Select “System Setup” (
/
then ENTER).
4 Select “Auto Installation” (
/
then ENTER).
The password entry screen appears. Enter your four-digit password
using buttons 0 to 9. See
Using a password
on page 60.
If no channel is found, check the antenna connections, and then
retry Auto Installation.
Note
• Channels obtained may vary depending on the installation
environment and weather conditions.
Setting up satellite TV channels
manually
You can also set up satellite TV channels manually without using
Auto Installation. For setup details, follow the steps below.
Note
• The “Digital Tuner Setup” option is only available in the DTV/SAT
mode. Press TV/DTV/SAT on the remote control to select the
DTV or SAT mode.
1 Press HOME MENU.
2 Select “Setup” (
/
then ENTER).
3 Select “System Setup” (
/
then ENTER).
4 Select “Digital Tuner Setup” (
/
then ENTER).
5 Select “Installation” (
/
then ENTER).
The password entry screen appears. Enter your four-digit password
using buttons 0 to 9. For the password, see
Using a password
on
page 60.
6 Select “Satellite Setup” (
/
then ENTER).
7 Select “Scan Type” (
/
then ENTER).
Use / to select “By Satellite”, “All Frequencies” or “SMATV”.
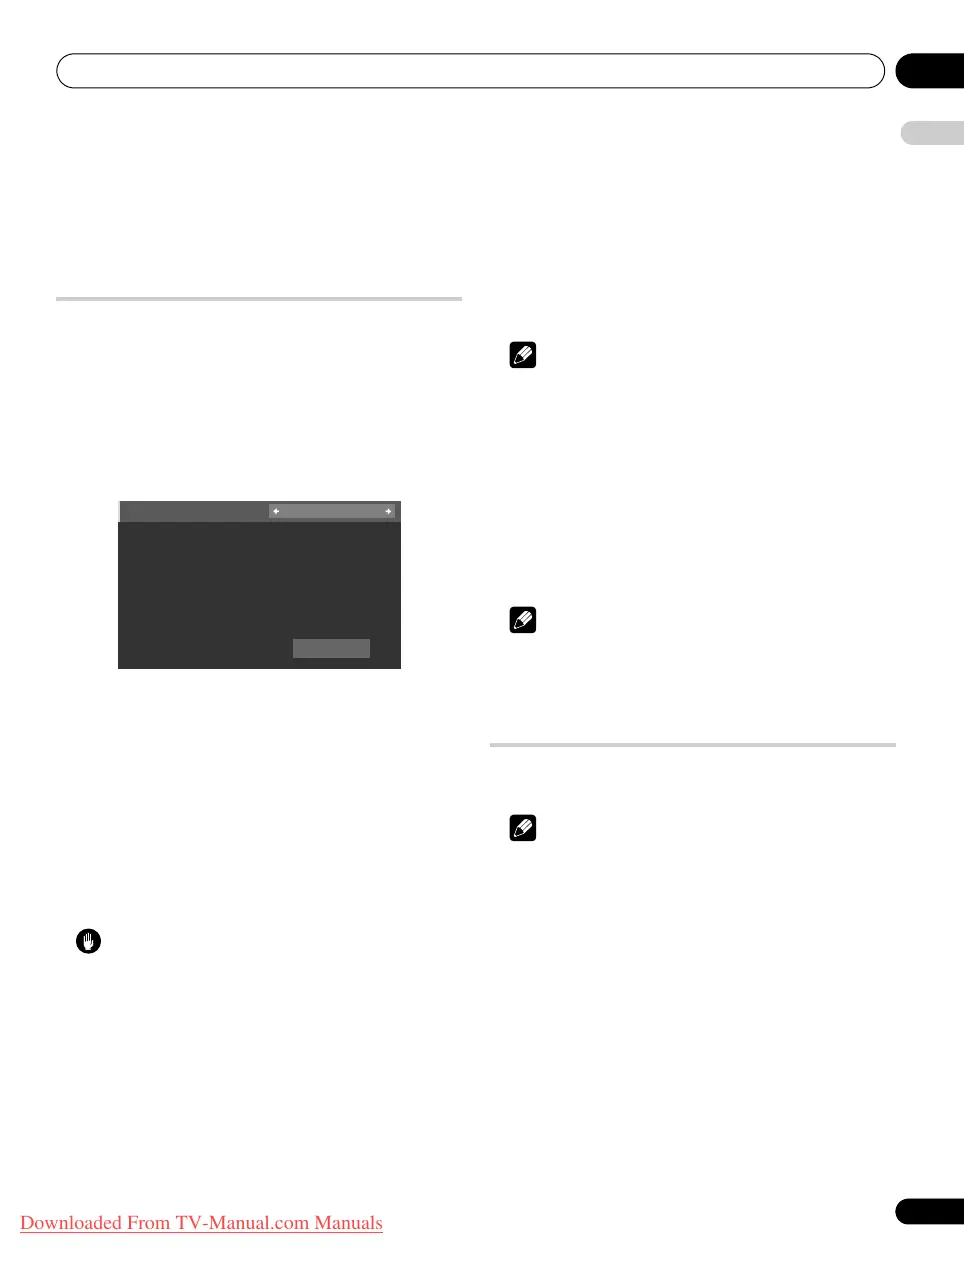
Start
Language : English
Country : Austria
Terrestrial Tuner : Both
Aerial Power : Off
Satellite Tuner : On
Satellite Setup
08_basic adjustments.fm Page 29 Friday, August 22, 2008 7:49 PM
Downloaded From TV-Manual.com Manuals
 Loading...