Using with other equipment 12
63
En
English
• Select the input source on the flat screen TV depending on the
terminal to which the output of the DVD/HDD recorder (DVR)
has been connected; for the above connection example, select
“INPUT 2”.
• When you complete the connections and setups, you can then
enjoy timeshift playback with the DVD/HDD recorder (DVR). You
can also select the 2-screen or picture-in-picture mode to watch
images coming from the DTV input source and an external input
source (“INPUT 2” for the above connection example) to which
the output of the recorder has been connected.
Note
• Some DVD/HDD recorders (DVRs) may not allow timeshift
playback. Check the operation manual that came with your
recorder.
• For details about connection and setting procedures, see the
operation manual that came with your DVD/HDD recorder
(DVR).
Switching the SCART output
Video and audio signals output from INPUT 2 and INPUT 3 sources
are the same as those used for the current image display. You can
however change the setting so that DTV/satellite TV signals are
always output regardless of the current image display.
1 Press
HOME MENU
.
2 Select “Setup” (
/
then
ENTER
).
3 Select “System Setup” (
/
then ENTER).
4 Select “SCART Output” (
/
then
ENTER
).
5 Select a desired parameter (
/
then
ENTER
).
6 Press
HOME MENU
to exit the menu.
Note
• The following operations are given higher priority over the above
setting:
•Presetting a DTV/satellite TV programme for recording
•Execution of WYSIWYR (page 62)
• While in analogue TV mode, no signal is output even if “Fixed on
DTV/SAT” is selected for “SCART Output”.
• When the Home Media Gallery screen is displayed, no signal is
output even if “Fixed on DTV/SAT” is selected for “SCART
Output”.
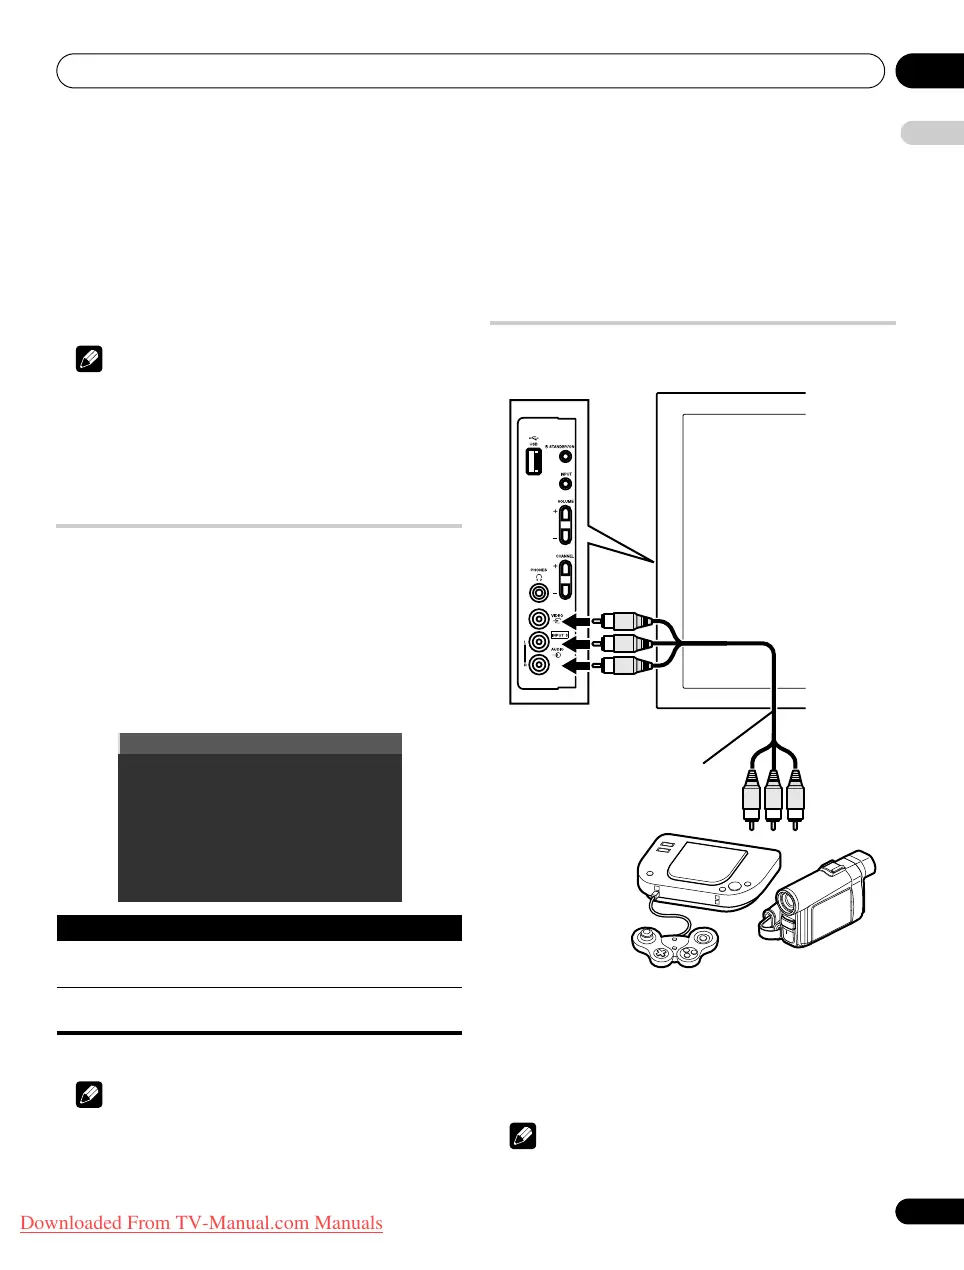
Connecting a game console or
camcorder
Use the INPUT 5 terminals to connect a game console, camcorder
and other audiovisual equipment.
Displaying an image from the game console or
camcorder
To watch an image coming from the game console or camcorder,
press INPUT 5 on the remote control unit or press INPUT on the flat
screen TV to select “INPUT 5”.
Note
• Connect external equipment to only terminals that are to be
actually used.
Item Description
Auto
(default)
Outputs video and audio signals coming from the
selected input source
Fixed on
DTV/SAT
Always output DTV/satellite TV signals
Audio/Video cable
Game console/camcorder
PDP-LX609H.book Page 63 Wednesday, August 6, 2008 4:00 PM
Downloaded From TV-Manual.com Manuals
 Loading...