EasyManuals Logo
Home>QRP Labs>Transceiver>QMX

QRP Labs QMX Assembly Manual

QRP Labs QMX
66 pages
To Next Page IconTo Next Page
To Previous Page IconTo Previous Page
Page #53 background imageLoading...
Page #53 background image
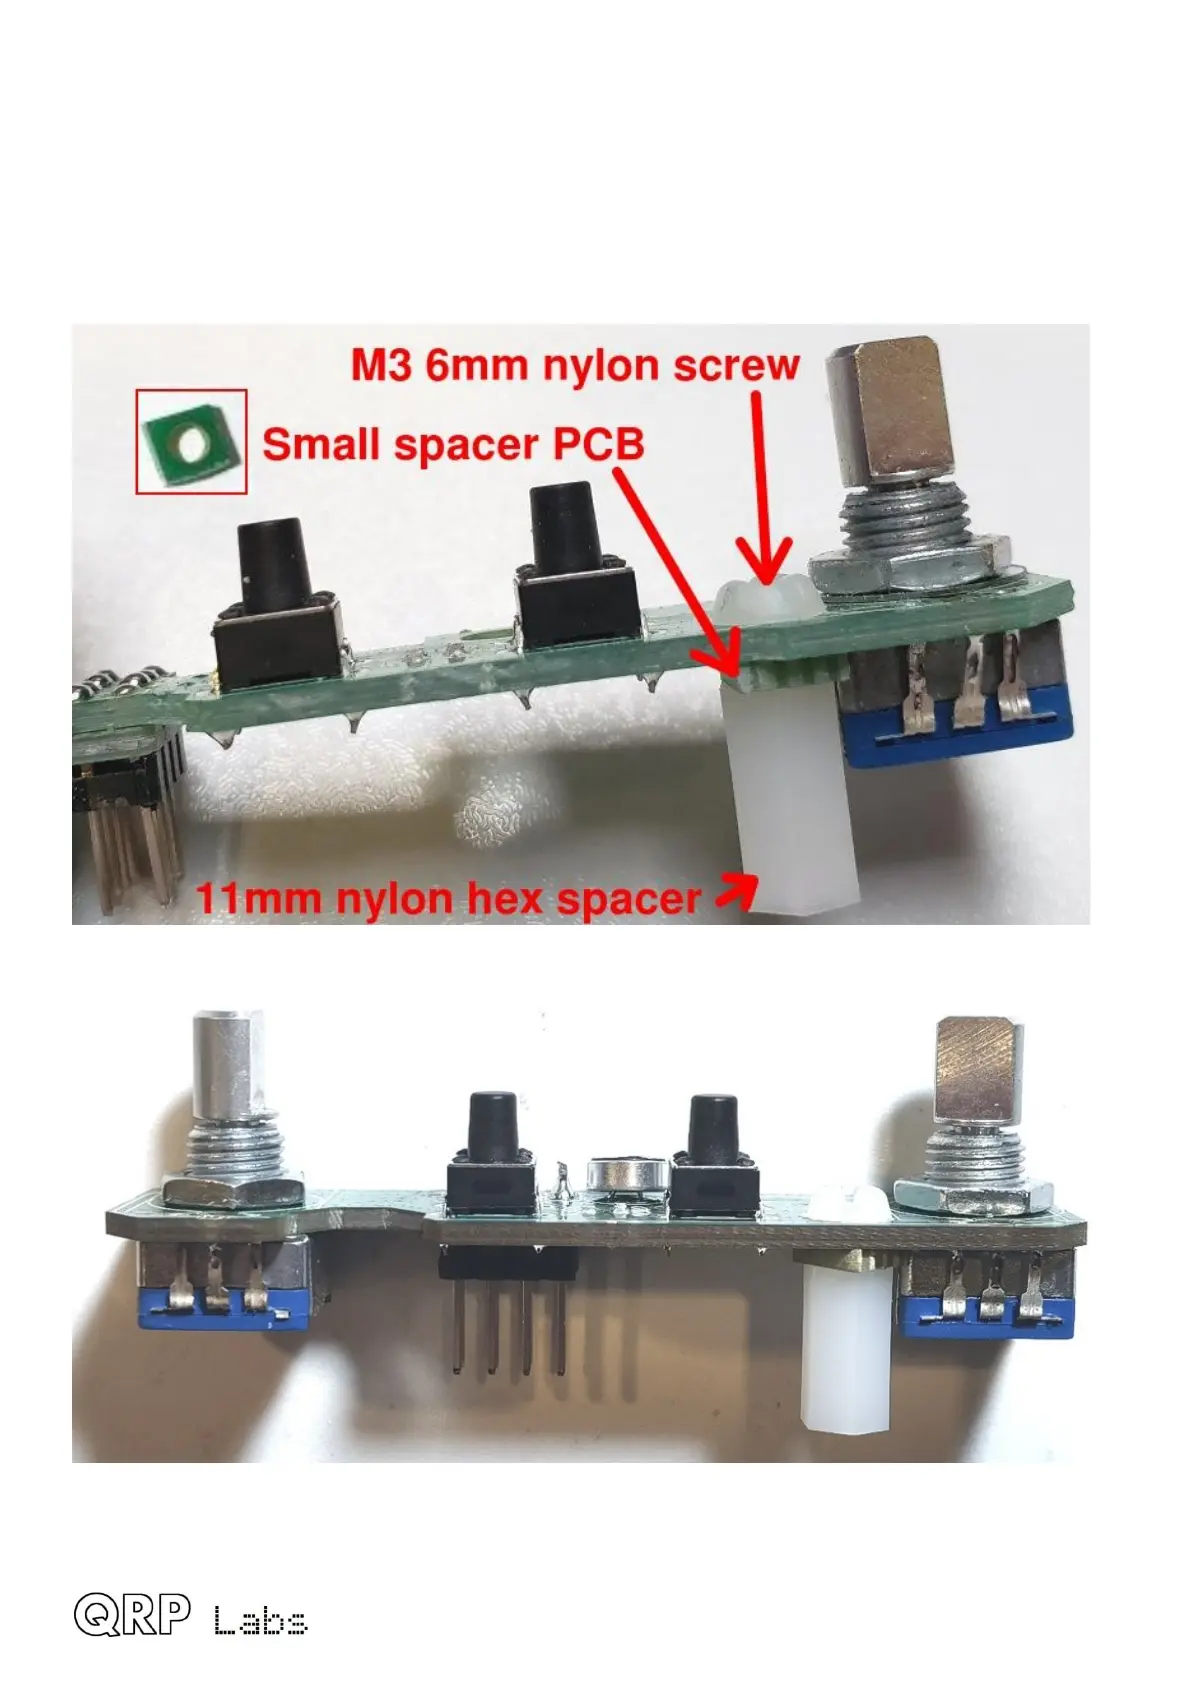
2.26 Install 11mm nylon hex spacer
The final 11mm nylon hex spacer is bolted to the controls PCB using an M3 6mm nylon screw.
Push the screw through the hole from the front side of the PCB. Thread the small square spacer
PCB that was broken out from the Display PCB panel, onto the screw. Then screw on the 11mm
nylon spacer.
This completes the Controls PCB assembly.
QMX assembly Rev 1.00e 53

Other manuals for QRP Labs QMX

Questions and Answers:

Question and Answer IconNeed help?

Do you have a question about the QRP Labs QMX and is the answer not in the manual?

QRP Labs QMX Specifications

General IconGeneral
BrandQRP Labs
ModelQMX
CategoryTransceiver
LanguageEnglish

Related product manuals