2.9 Assemble and install transformer T501
Transformer T501 is wound on the BN43-202 binocular ferrite former, using the thick 0.6mm
(AWG #22) wire. This wire is also used for L502 and T507 so do not use all of it on the
transformer.
It is a good idea to de-burr the toroid because sharp edges can damage the insulating enamel on
the wire – however be careful since the ferrite is brittle and can easily be broken. So GENTLE
scraping of the edges with something sharp like a knife is possible.
The transformer has two windings, both 3 turns (3:2 if building for 12V supply). The three-turn
primary winding has a center-tap. In the nomenclature of binocular cored transformers, “1 turn”
means the wire passes through both sets of holes, ending up back at the end where it started.
Assembly of this transformer is best done in steps as follows. Please read all the steps before
commencing the assembly:
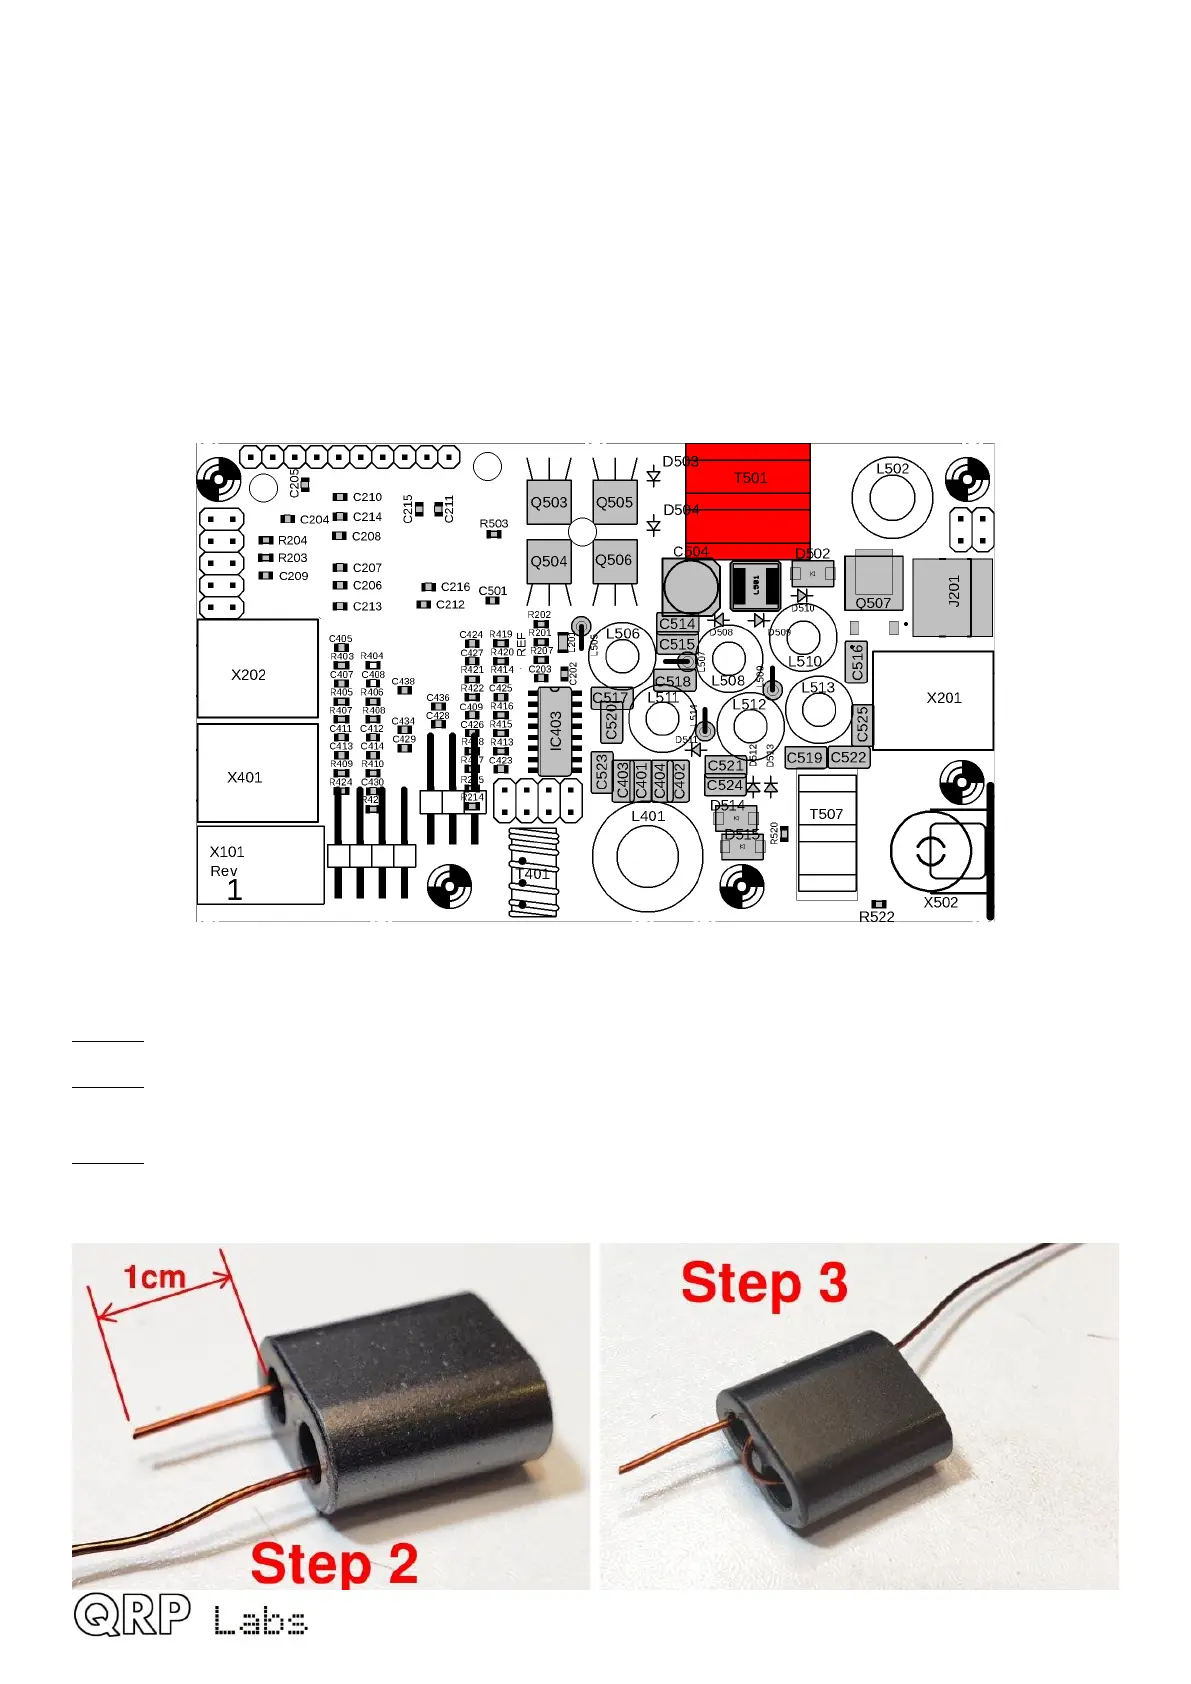
Step 1: Carefully unwrap the thick 0.6mm (AWG #22) wire, and straighten it ensuring no kinks.
Step 2: Pass the wire through both holes, starting at the top left, as shown. This is the first turn of
the 3-turn primary winding.
Step 3: Now pass the wire through the top hole of the binocular core, back from left to right. This is
the next half-turn of the primary winding, bringing the number of turns so far to 1.5; now we must
make the center tap.
QMX assembly Rev 1.00e 27

 Loading...