16Chapter 4 Installation of 2U enclosures
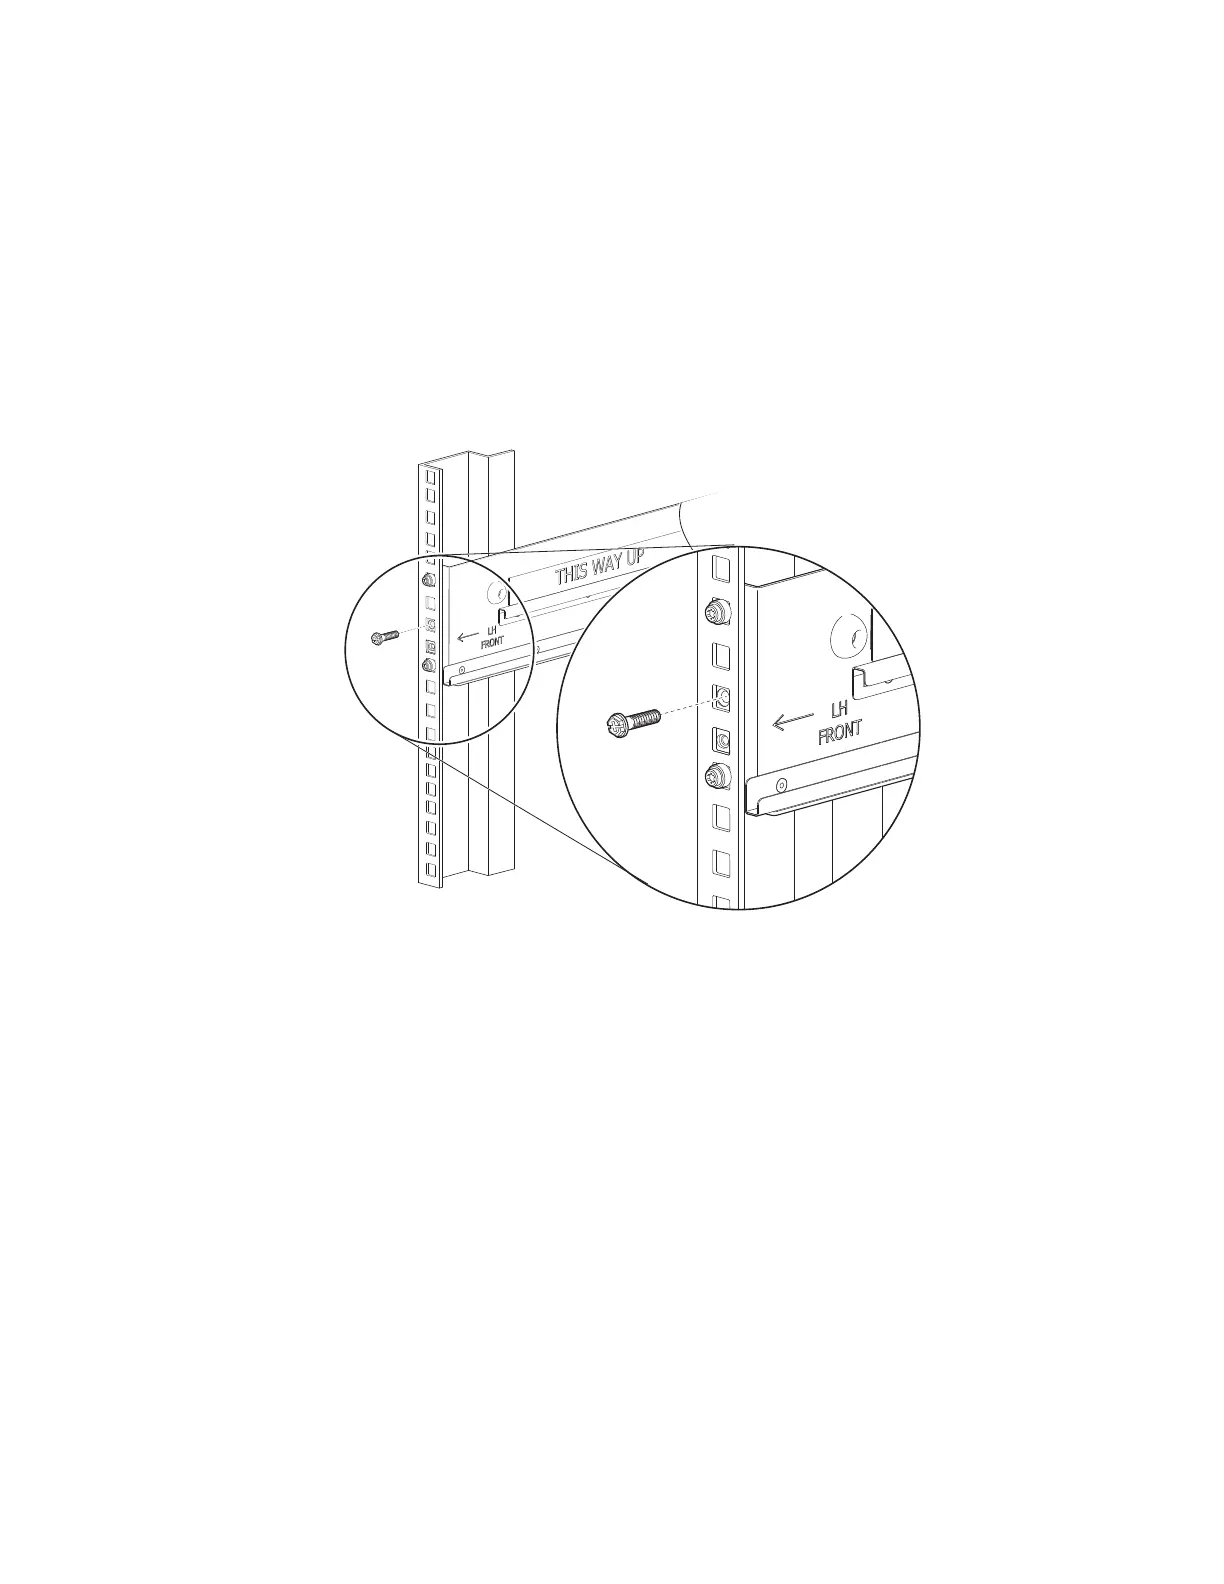
2. Orient the outer rail with the LH FRONT embossed on it to your left, the other with the RH FRONT
embossed on it to your right, and each emboss toward you, facing inward.
3. Loosen, but do not remove, the 2 set screws on each outer rail with a Philips screwdriver.
4. Facing the left side of the rack cabinet, slide the left front mount bracket pins into holes in the front rack
post.
5. Bias the left rack mount bracket as far inward as possible, then verify the entirety of the lower rail tab is
visible just beyond the inner edge of the front rack mount bracket. This step is crucial to safety and proper
storage enclosure operation.
6. Hold the biased mount bracket in that position.
7. Insert a Phillips-head M5 x 15 screw into the center hole of the front mount bracket and barely tighten
against the front rack post using a Philips screwdriver or 8mm nut driver.
Figure 9 Attachment of front mount bracket to front rack cabinet posts
8. Extend the length of the rail until fully mating the rear mount bracket pins in the mirror location on the rear
rack post.
 Loading...