36Chapter 5 Installation of 5U enclosures
d. Simultaneously press inward and hold both drawer pull handles as you push the drawer closed until it
fully latches.
4. (Optional) Use a T20 Torx driver to lock each drawer pull handle by fully turning both locks clockwise on
each drawer, and then confirm the locks properly latched by attempting to open the drawer.
Populate the 5U enclosure
After successfully mounting the 5U chassis into the rack cabinet, populate the storage enclosure.
CAUTION If you partially populate the storage enclosure with drives in their carriers (DDICs), you must
comply with several additional requirements.
l
You must install a minimum of 14 DDICs. Populate in rows, 14 DDICs at a time, from front to back of the
drawer, and alternate between drawers.
a. Fill the front row in Drawer 1, then front row in Drawer 2.
b. Fill the middle row in Drawer 1, then the middle row in Drawer 2.
c. Fill the back row in Drawer 1, then the back row in Drawer 2.
The total number of populated drawer rows cannot differ by more than 1 row.
l
Populate rows with DDICs that have the same form factor and same rotational speed.
l
Do not mix drive types within the same drawer.
To populate the 5U enclosure:
1. Complete all actions to open the upper drawer. See "Access a drawer" on the previous page.
2. Complete the following actions to fully populate the upper drawer:
a. Select a DDIC and orient it, so the LED is towards the drawer front and the release latch arrow towards
the rear.
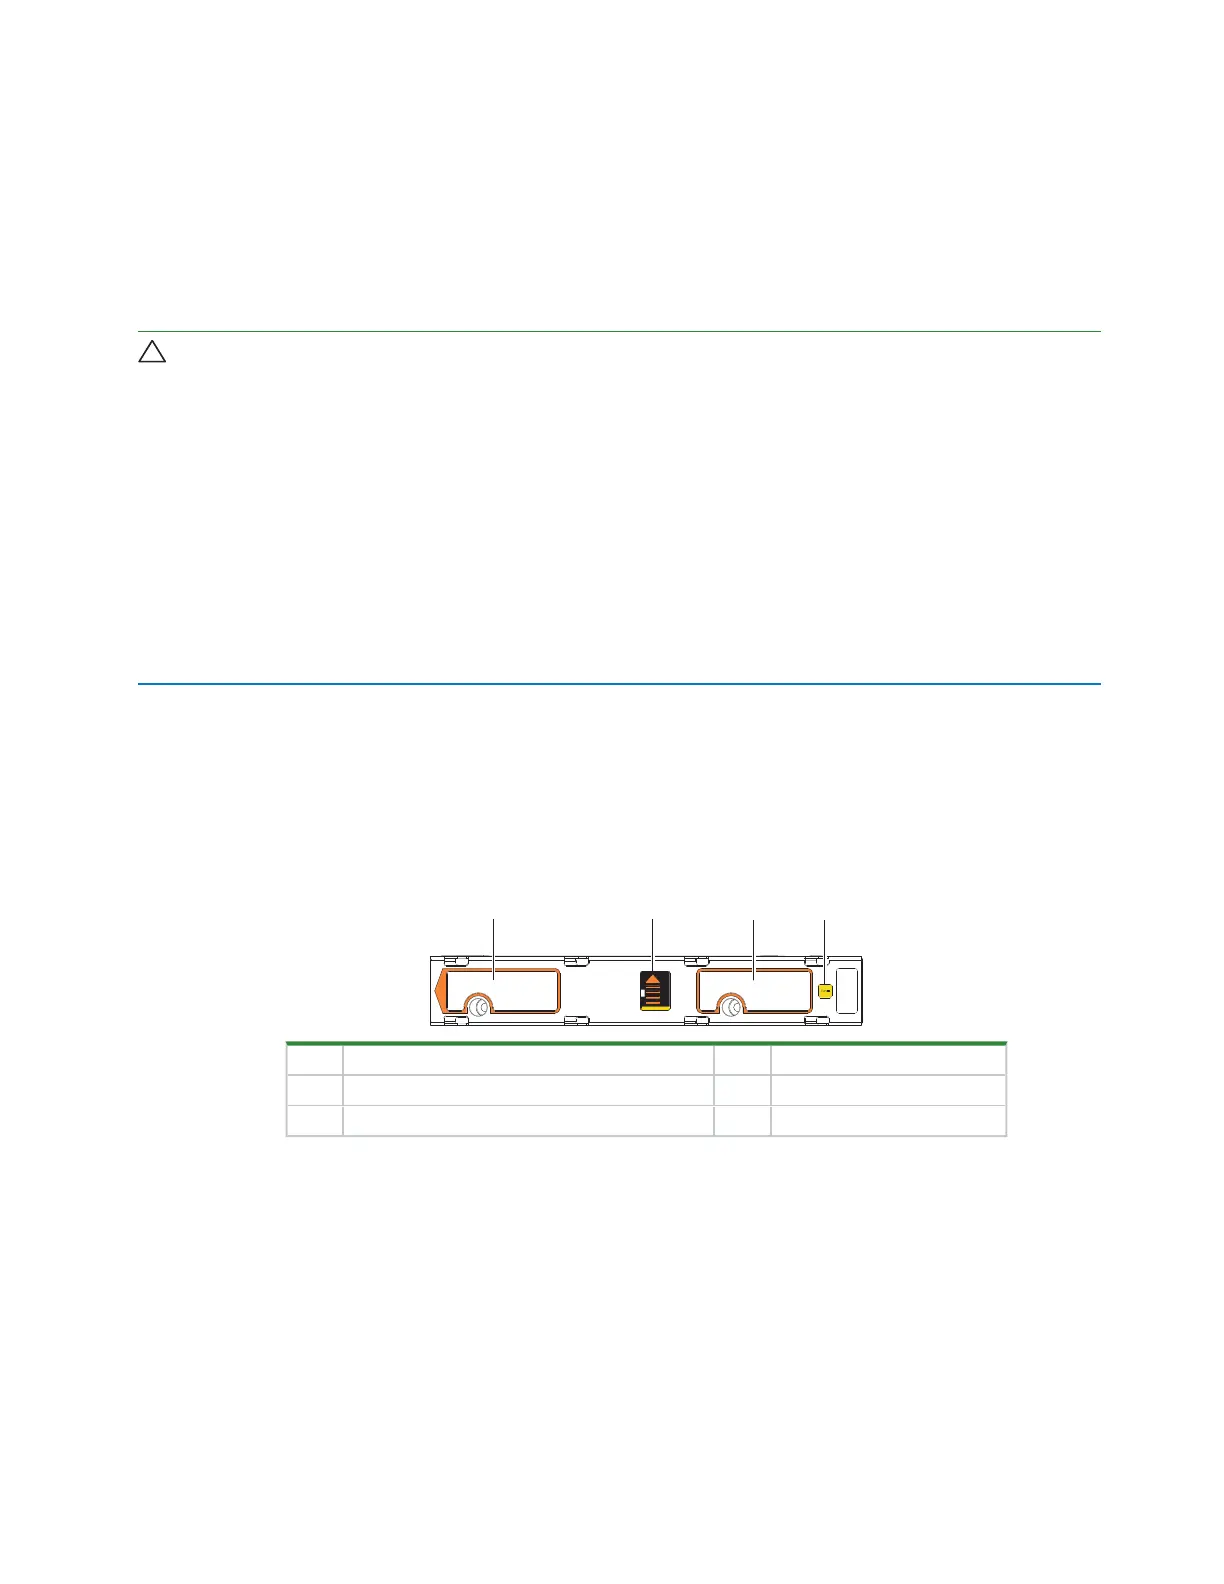
Item Description Item Description
1 Upper portion of carrier latch 3 Lower portion of carrier latch
2 Release latch, release latch arrow, open state 4 Fault condition LED
Figure 28 Carrier latch features
b. Align the carrier with the first empty drawer slot to the front far left, then lower it fully into the slot.
c. Push the DDIC down until the top is flush with the top of the slot.
d. While holding it against the bottom of the slot, slide the top latch toward the rear of the drawer until it
locks into place and the DDICrelease latch locks.
 Loading...