ESP-SMT Smart Modular Control System
65
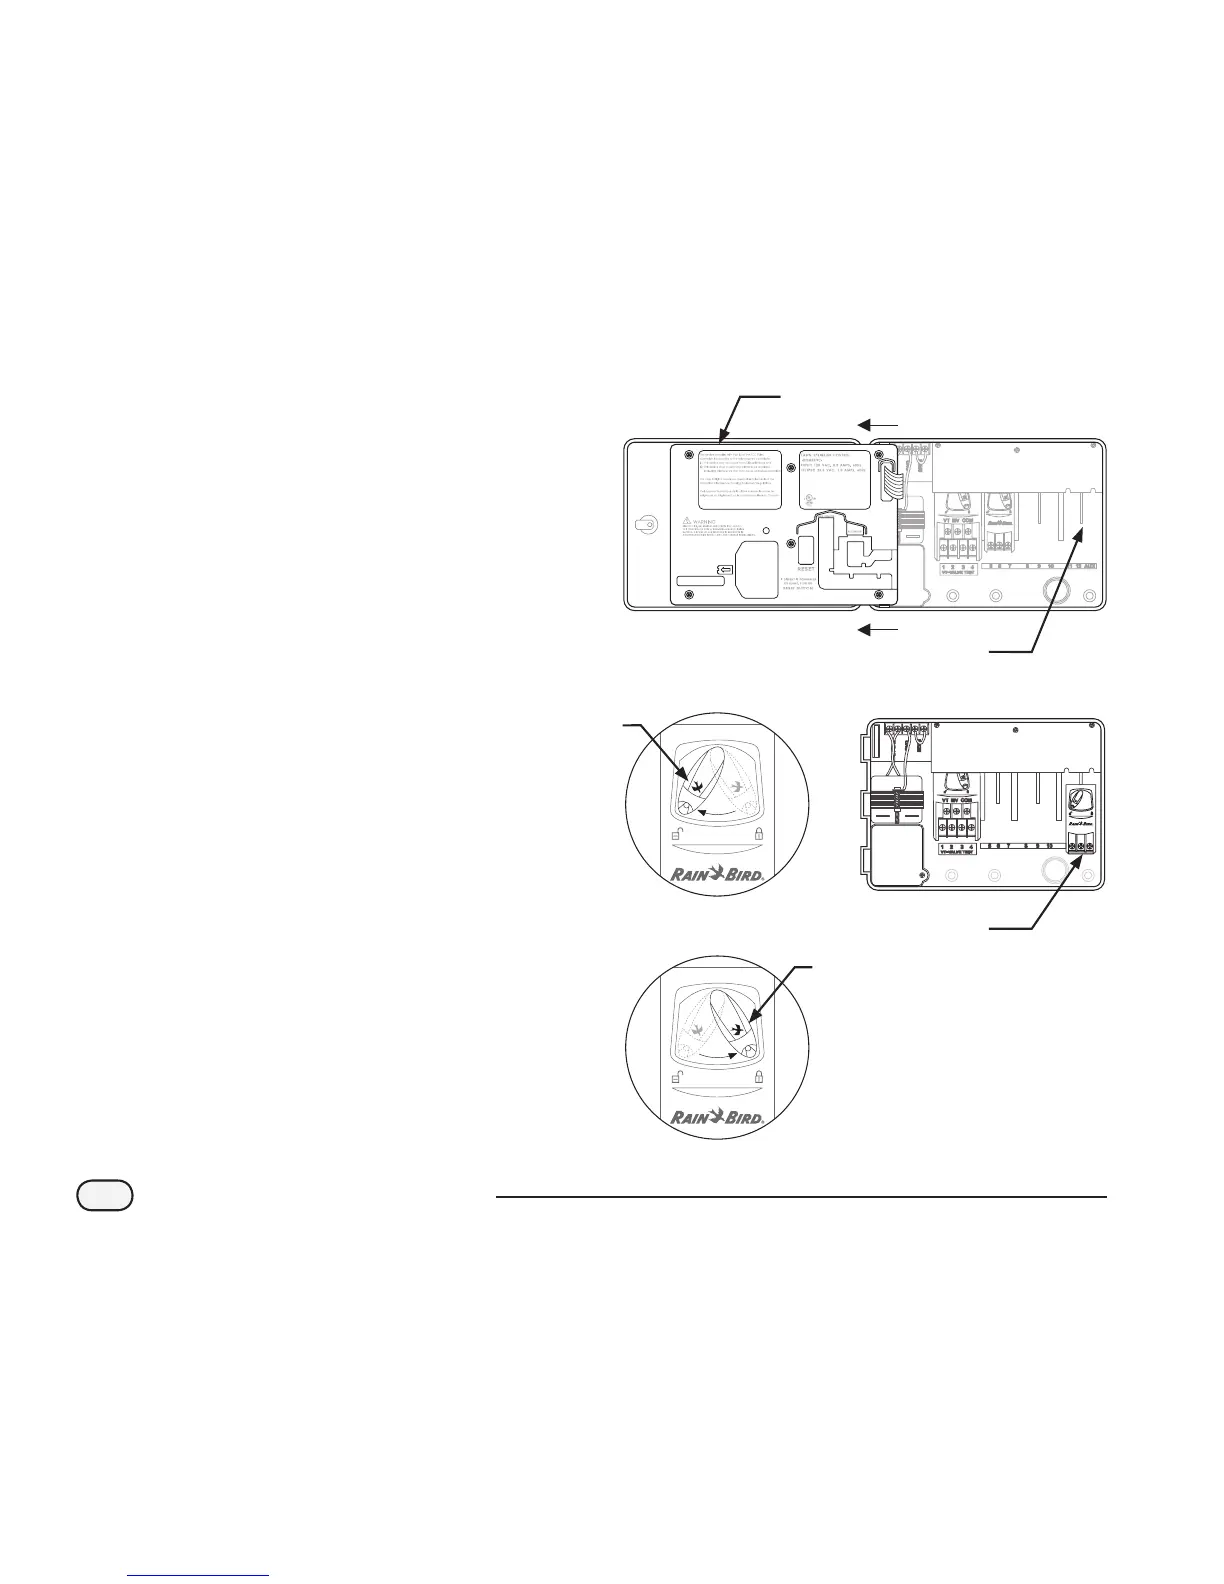
Installing Station Expansion Modules
Optional modules for the ESP-SMT Smart Modular
controller provide terminals for up to nine additional
valves (zones) for a total of 13 separate zones.
You can install optional 3 station expansion modules
in any open position in the cabinet. The valve numbers
associated with each terminal (e.g., 5, 6, and 7) are molded
into the cabinet.
A
Open the cabinet door and then open the front panel
by grasping the crescent shaped nger hold on the
top right side of the cabinet. Swing the face panel to
the left.
B
Locate an open module expansion slot in the cabinet.
C
Make sure the lever on the module is in the unlocked
position (pointing to the left). Place the module in the
slot between the plastic rails.
D
Push the module toward the top of the cabinet until it
snaps into place.
E
Slide the lever to the locked position (to the right).
F
To remove a module, slide the lever to the unlocked
position, then pull the module down and out of the
slot.
!
NOTE: You can install or remove any modules with or
without AC voltage connected. The modules are “hot-
swappable.”
A
C
E
D
 Loading...