Getting Started
16
1
Reference
For printer driver settings, see
the printer driver Help.
For details about setting custom
sizes, see p.16 “Setting custom
size paper”.
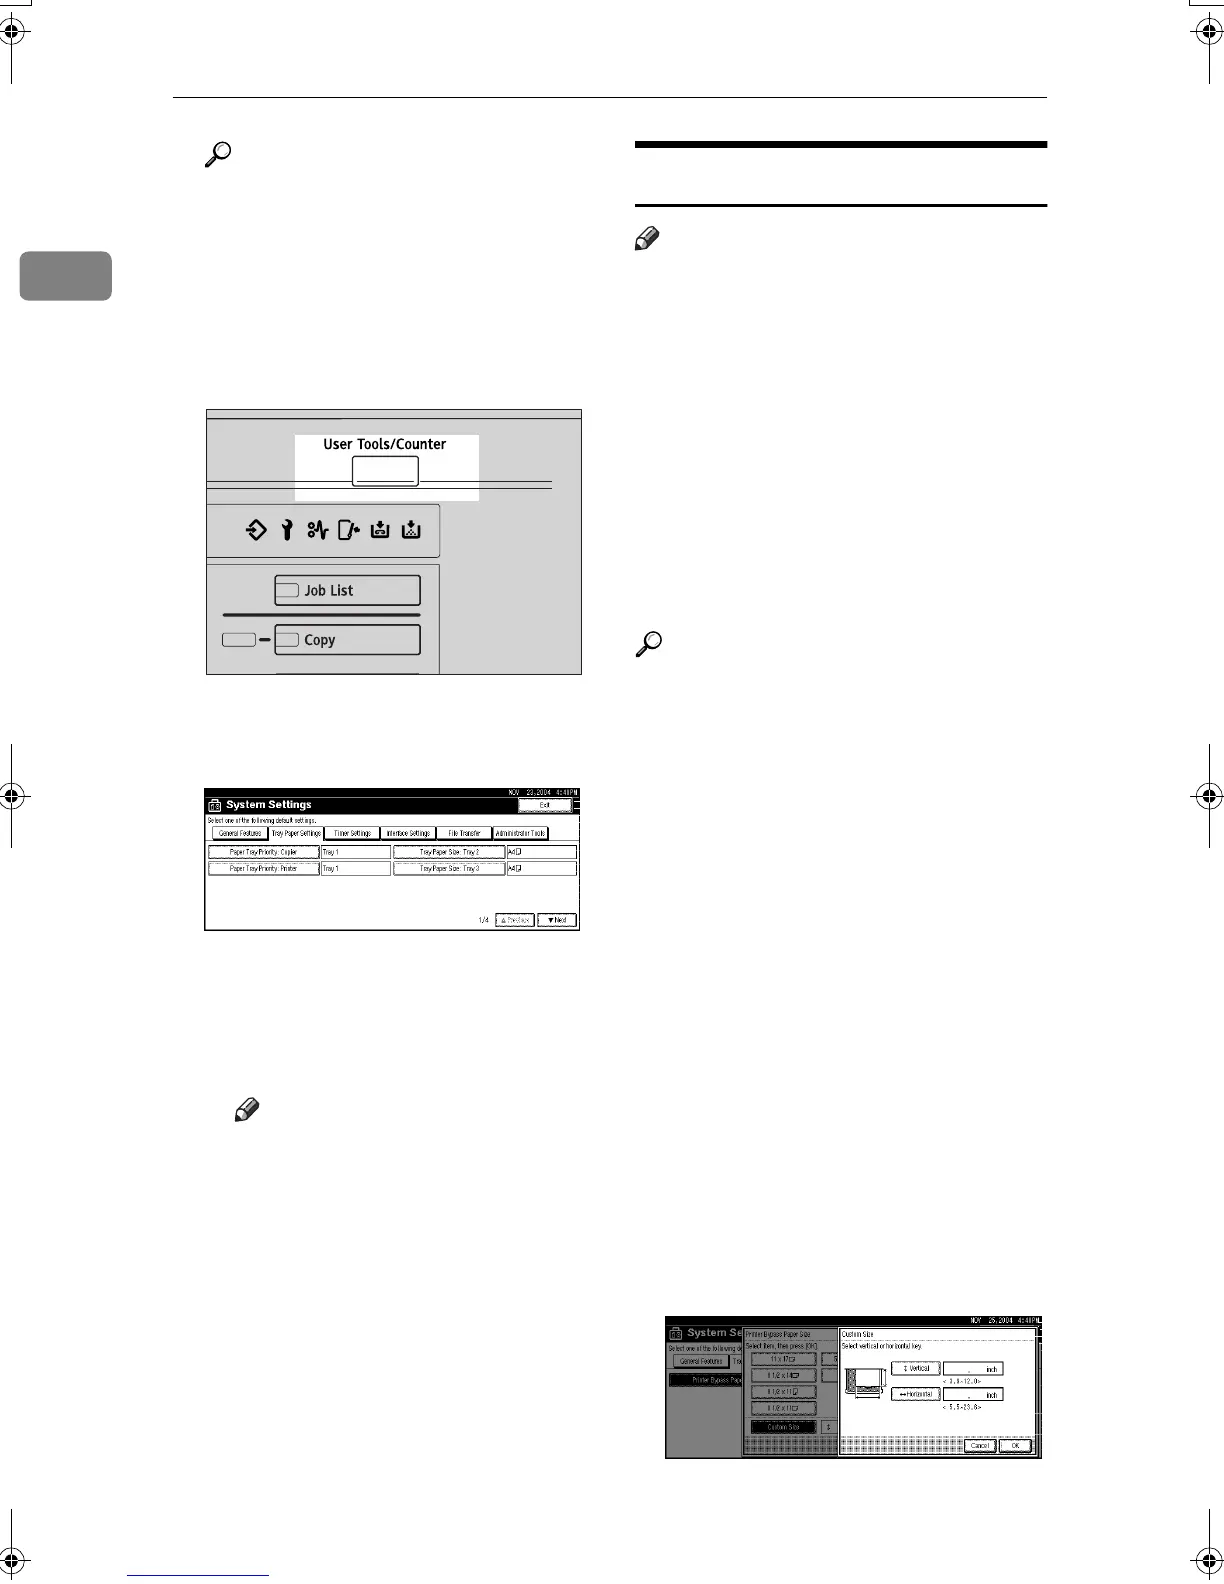
A Press the {
{{
{User Tools/Counter}
}}
} key
on the control panel.
B Press [System Settings].
C Press the [Tray Paper Settings] tab.
D Press [T
TT
TNext] to scroll through
the list.
E Press [Printer Bypass Paper Size].
F Select the paper size.
Note
❒ Press [U
UU
UPrevious] or [T
TT
TNext]
to scroll through the list.
❒ When printing onto thick pa-
per or OHP transparencies,
select paper type. For details,
see p.17 “Setting thick paper
or OHP transparencies”.
G Press [OK].
H Press the {
{{
{User Tools/Counter}
}}
}
key.
Setting custom size paper
Note
❒ Custom sizes can also be set using
the printer driver. The following
procedures are not necessary
when setting custom sizes using
the printer driver.
❒ Custom size settings set using the
printer driver have priority over
those set using the machine's dis-
play panel.
❒ When the printer driver is not
used, make settings using the dis-
play panel.
Reference
For printer driver settings, see the
printer driver Help.
A
AA
A
Press the {
{{
{User Tools/Counter}
}}
} key
on the control panel.
B
BB
B
Press [System Settings].
C
CC
C
Press the [Tray Paper Settings] tab.
D
DD
D
Press [T
TT
TNext] to scroll through the
list.
E
EE
E
Press [Printer Bypass Paper Size].
F
FF
F
Press [Custom Size].
If a custom size is already set, press
[Change Size] .
G
GG
G
Press [Vertical].
H
HH
H
Enter the vertical size of the paper
using the number keys, and then
press [#].
I
II
I
Press [←
←←
←> Horizontal].
AEW014S
MartiniC25-EN-Pref-F_FM_ZF.book Page 16 Tuesday, July 27, 2004 11:51 AM
 Loading...