Troubleshooting the Drive Using the OIM
7-7
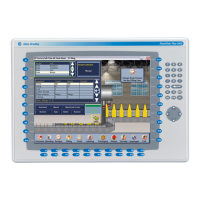
7.6 Replacing the OIM
If necessary, the entire
OIM
(M/N 317C160D) or the
OIM
circuit board (M/N 58772) can
be replaced using this procedure.
7.6.1 Preparing to Replace the OIM
Before replacing the
OIM
, disconnect power from the drive.
You will need the following equipment:
•
New
OIM
display assembly or
OIM
circuit board
•
#1 Phillips screwdriver
•
#2 Phillips screwdriver
•
M7 Hex wrench or socket wrench
7.6.2 Accessing the OIM and Disconnecting It from the Regulator Board
These steps are required for both
OIM
circuit board and complete
OIM
replacement.
Important:
Unless otherwise indicated, keep all hardware for the replacement
procedure.
Step 1. Loosen the screws that secure the front cover to the drive.
Step 2. Remove the front cover.
Step 3. Disconnect the communication cable from J9 on the Regulator board by
pressing down the locking clip and pulling the cable out.
Step 4. Remove the four screws holding the
OIM
assembly to the drive enclosure.
Step 5. Pull the
OIM
assembly away from the drive so you can access the ground
wire on the upper right corner of the
OIM
mounting plate. Slide the ground
wire off its connection.
Important:
Ground wires on older versions of the
OIM
are fastened by a nut. If you are
replacing an older version, keep the hardware so you can re-attach the
ground wire.
!
ATTENTION:
Only qualified electrical personnel familiar with the
construction and operation of this equipment and the hazards involved
should install, adjust, operate, or service this equipment. Read and
understand this section in its entirety before proceeding. Failure to
observe this precaution could result in severe bodily injury or loss of life.
ATTENTION:
Do not install or remove the
OIM
with power applied to the
drive. Disconnect and lockout incoming power before attempting
installation or removal. Failure to observe this precaution could result in
severe bodily injury or loss of life.

 Loading...
