Editing a Studio Set
45
Performance
Functions
Editing
Sequencer
(Creating Songs)
Sampler Pads DAW
Appendix
Overview Performing SettingsEditing
Saving a Studio Set
Edits you make to a studio set are temporary. They are lost if you
turn o the power or select another studio set. If you want to keep
the changes you make, save the studio set.
NOTE
When you save the studio set, the data that was previously in
the save-destination is overwritten.
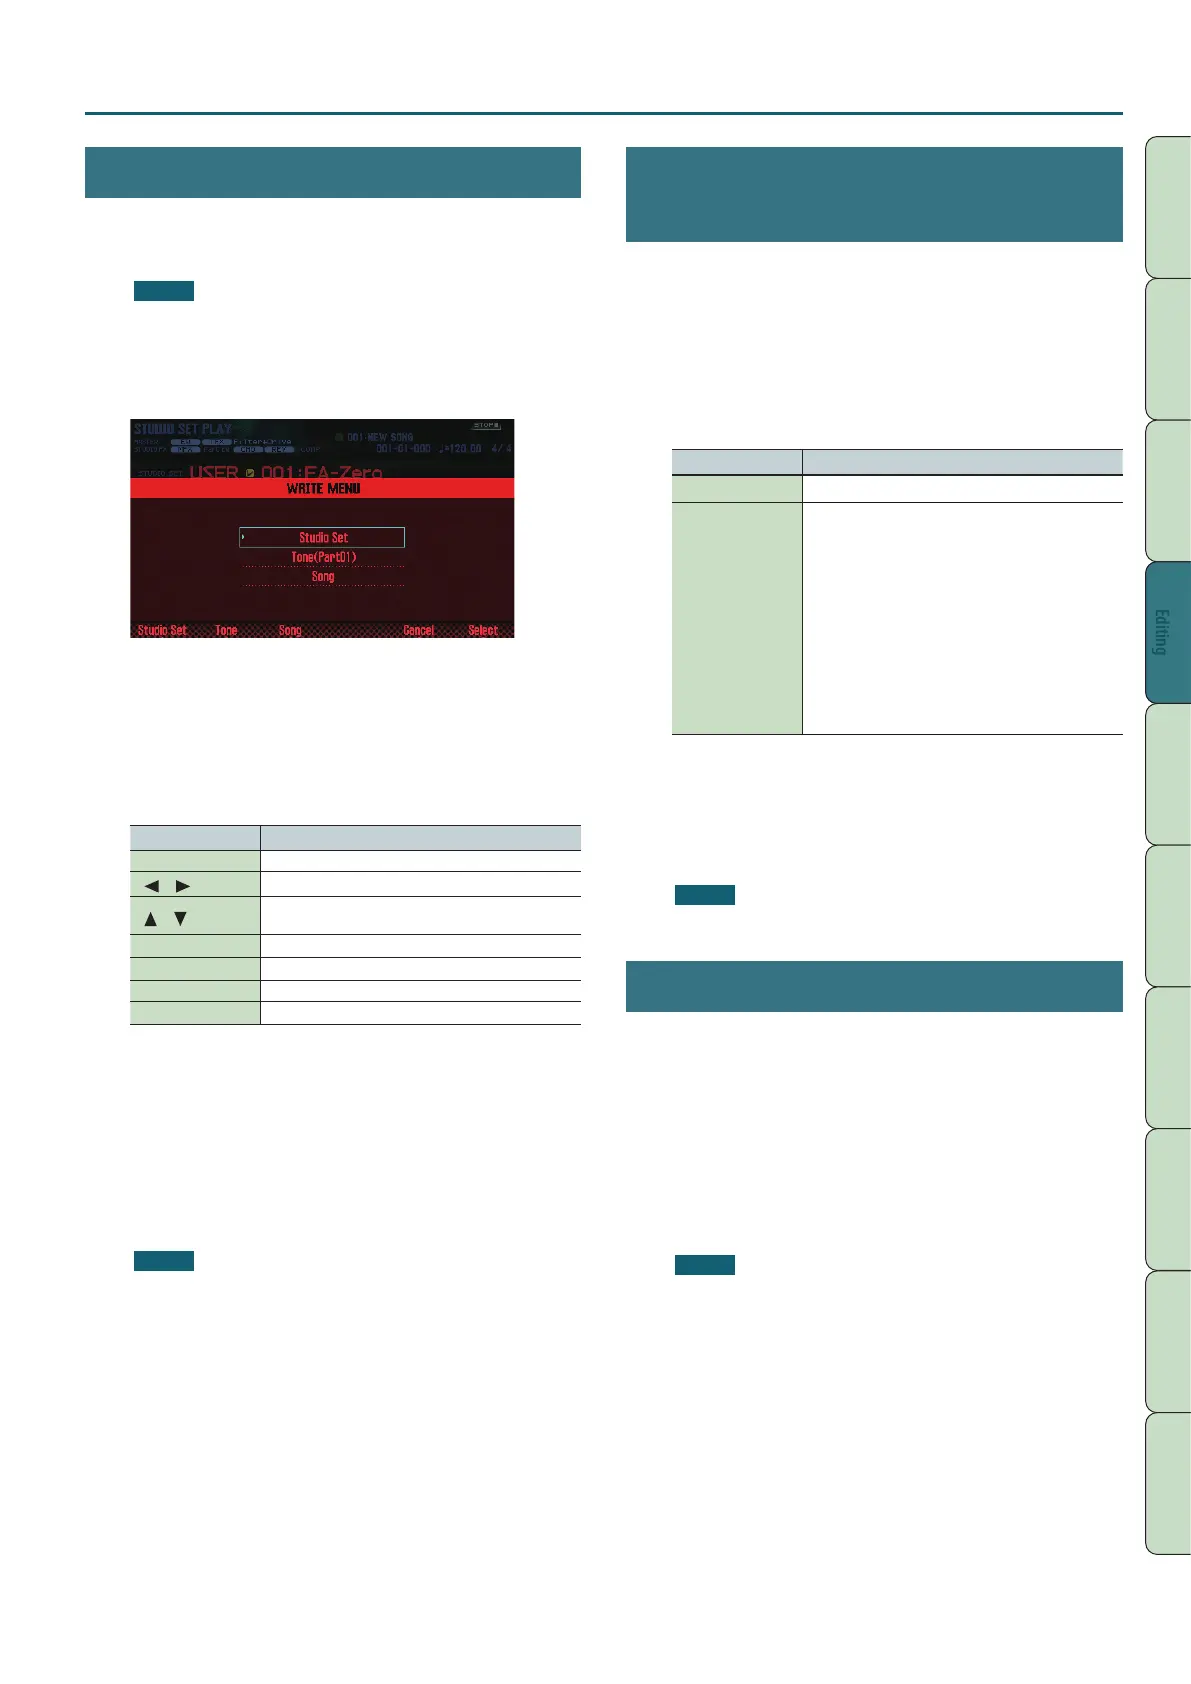
1. Press the [WRITE] button.
The WRITE MENU window appears.
2. Move the cursor to “Studio Set” and press the [ENTER]
button.
3. Use the dial or the [DEC] [INC] buttons to select the
save-destination.
4. Press the [2] (Rename) button and assign a name.
Controller Explanation
Dial or [DEC] [INC] Specify the character that you want to enter.
[
] [ ]
Move the cursor.
[
] [ ]
Switch between uppercase and lowercase
alphabetical characters.
[4] (Delete) Deletes the character at the cursor location.
[5] (Insert) Inserts a space (blank) at the cursor location.
[6] (Cancel) Cancels input and exits the naming screen.
[7] (OK) Conrms the name.
5. Press the [7] (OK) button.
6. Press the [7] (Write) button.
A conrmation message appears.
If you decide to cancel, press the [7] (Cancel) button.
7. Press the [6] (OK) button.
The studio set is saved.
NOTE
Never turn o the power while data is being saved.
Initializing a Studio Set (Studio Set
Init)
Here’s how to initialize the currently selected studio set.
1. Press the [MENU] button.
2. Move the cursor to “Studio Set Init” and press the
[ENTER] button.
3. Select the content that you want to initialize, and then
press the [7] (Select) button.
Parameter Explanation
Studio Set All settings of the studio set are initialized.
Sound Control
Each part’s vibrato and the following oset
parameters are initialized.
• Cuto Oset
• Resonance Oset
• Attack Oset
• Decay Oset
• Release Oset
• Vibrato Rate
• Vibrato Depth
• Vibrato Delay
A conrmation message appears.
If you decide to cancel, press the [7] (Cancel) button.
4. Press the [6] (OK) button.
The studio set is initialized.
NOTE
Never turn o the power while initialization is in progress.
Initializing a Part (Part Init)
Here’s how to initialize the part settings of the current part.
1. In the PART VIEW screen (p. 26), press the [5] (Part Init)
button.
A conrmation message appears.
If you decide to cancel, press the [7] (Cancel) button.
2. Press the [6] (OK) button.
The part is initialized.
* The Voice Reserve setting is not initialized.
NOTE
Never turn o the power while initialization is in progress.
 Loading...