www.schaerer.com Installation and commissioning
Option 1: External cooling units
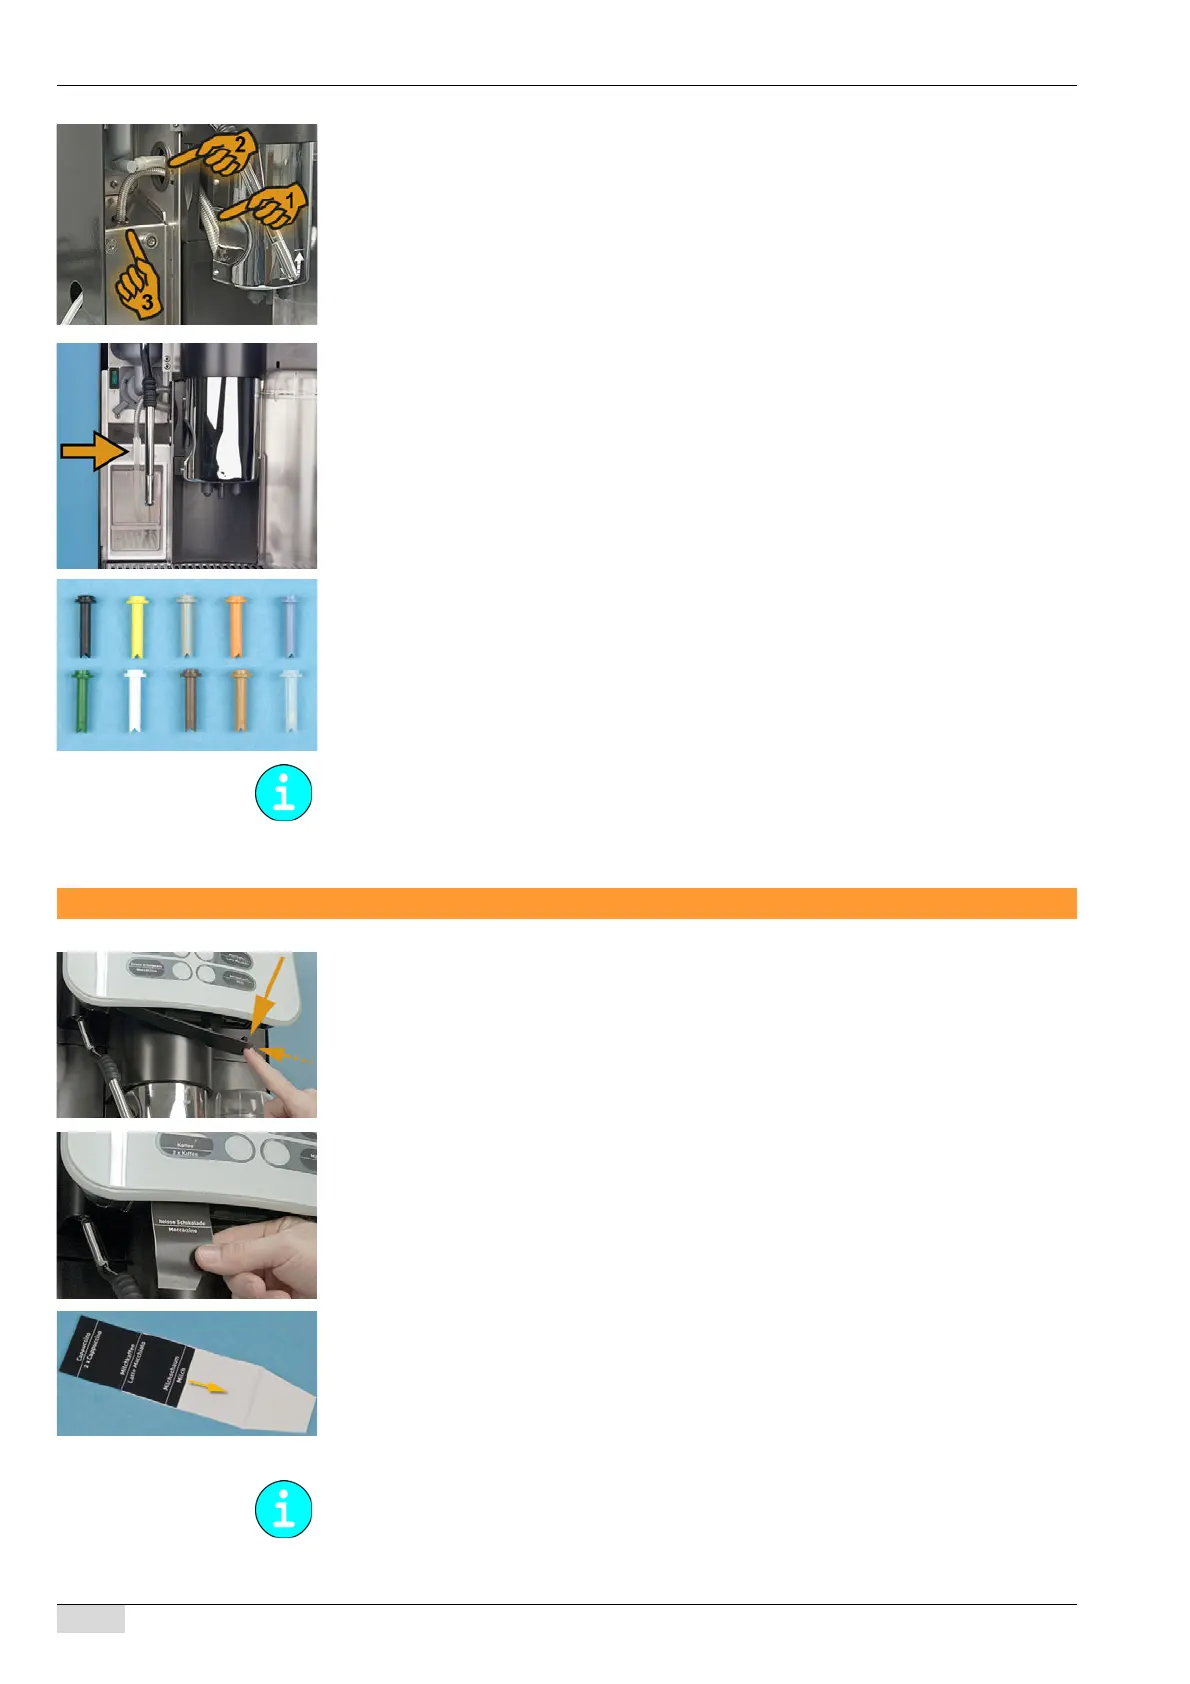
► Pass the milk hose through the bottom openings (see figure). Make sure that the milk hose
does not become kinked when the beverage outlet is adjusted.
► Select the desired milk nozzle (included in the scope of delivery) and insert it at the hose
end located outside the machine.
The milk connection is now ready for external milk cooling units.
Option 2: Internal cooling unit
► Select the desired milk nozzle (included in the scope of delivery) and insert it at the hose
end located outside the machine.
► Insert the milk hose into the guide (arrow) and position the end of the hose in the milk con-
tainer.
The milk connection is now ready for the internal milk cooling unit.
The milk nozzles (1 mm – 1.7 mm) contained in the scope of delivery influence the milk tem-
perature. If the milk foam is too cold, a smaller nozzle diameter is necessary. If the milk foam
is too hot, a larger nozzle diameter is necessary.
Button labelling
► Switch off the coffee machine to avoid accidentally dispensing a beverage.
► Remove the bottom cover of the user panel. Push the tongue on the right-hand side to the
left while pulling the cover downwards.
► Pull out the existing button label in a downward direction by the protruding tab.
► Download a new button labelling template at (www.schaerer.com-Member-MediaCentre).
► Define the desired beverage assignment using the template.
► Print the template (printer setting A4).
► Cut out the label sheet.
► Insert the button labels into the designated plastic sleeve (see illustration) and slide it back
into place behind the front pane.
K
Label templates can be downloaded free of charge from www.schaerer.com.
BA SCV_EN
V06 | 11.2015
24
 Loading...