LMV Series Technical Instructions
Document No. LV3-1000
SCC Inc. Page 17 Section 1
Section 1-3: Mounting
LMV3 Controller
The LMV3 must be mounted inside an enclosure that will protect it from dirt and moisture. The
unit should be mounted with four #8 screws (not provided) through the holes in the corners of
the LMV3. The panel, which the unit sits on, should be drilled and tapped to accommodate
these screws.
During the mounting process, consideration should be given to the various plugs and wires that
must be attached to the LMV3. Electrical connections are made via plugs that are located in
the face of the unit with wires coming out to the top, bottom, and left side of the unit. A space
of at least one inch is recommended above, below, and to the left of the LMV3. The
recommended total space to leave for the LMV3 is 11” x 7.5” x 3” because the overall
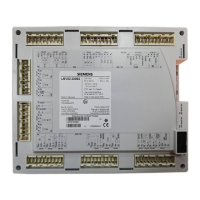
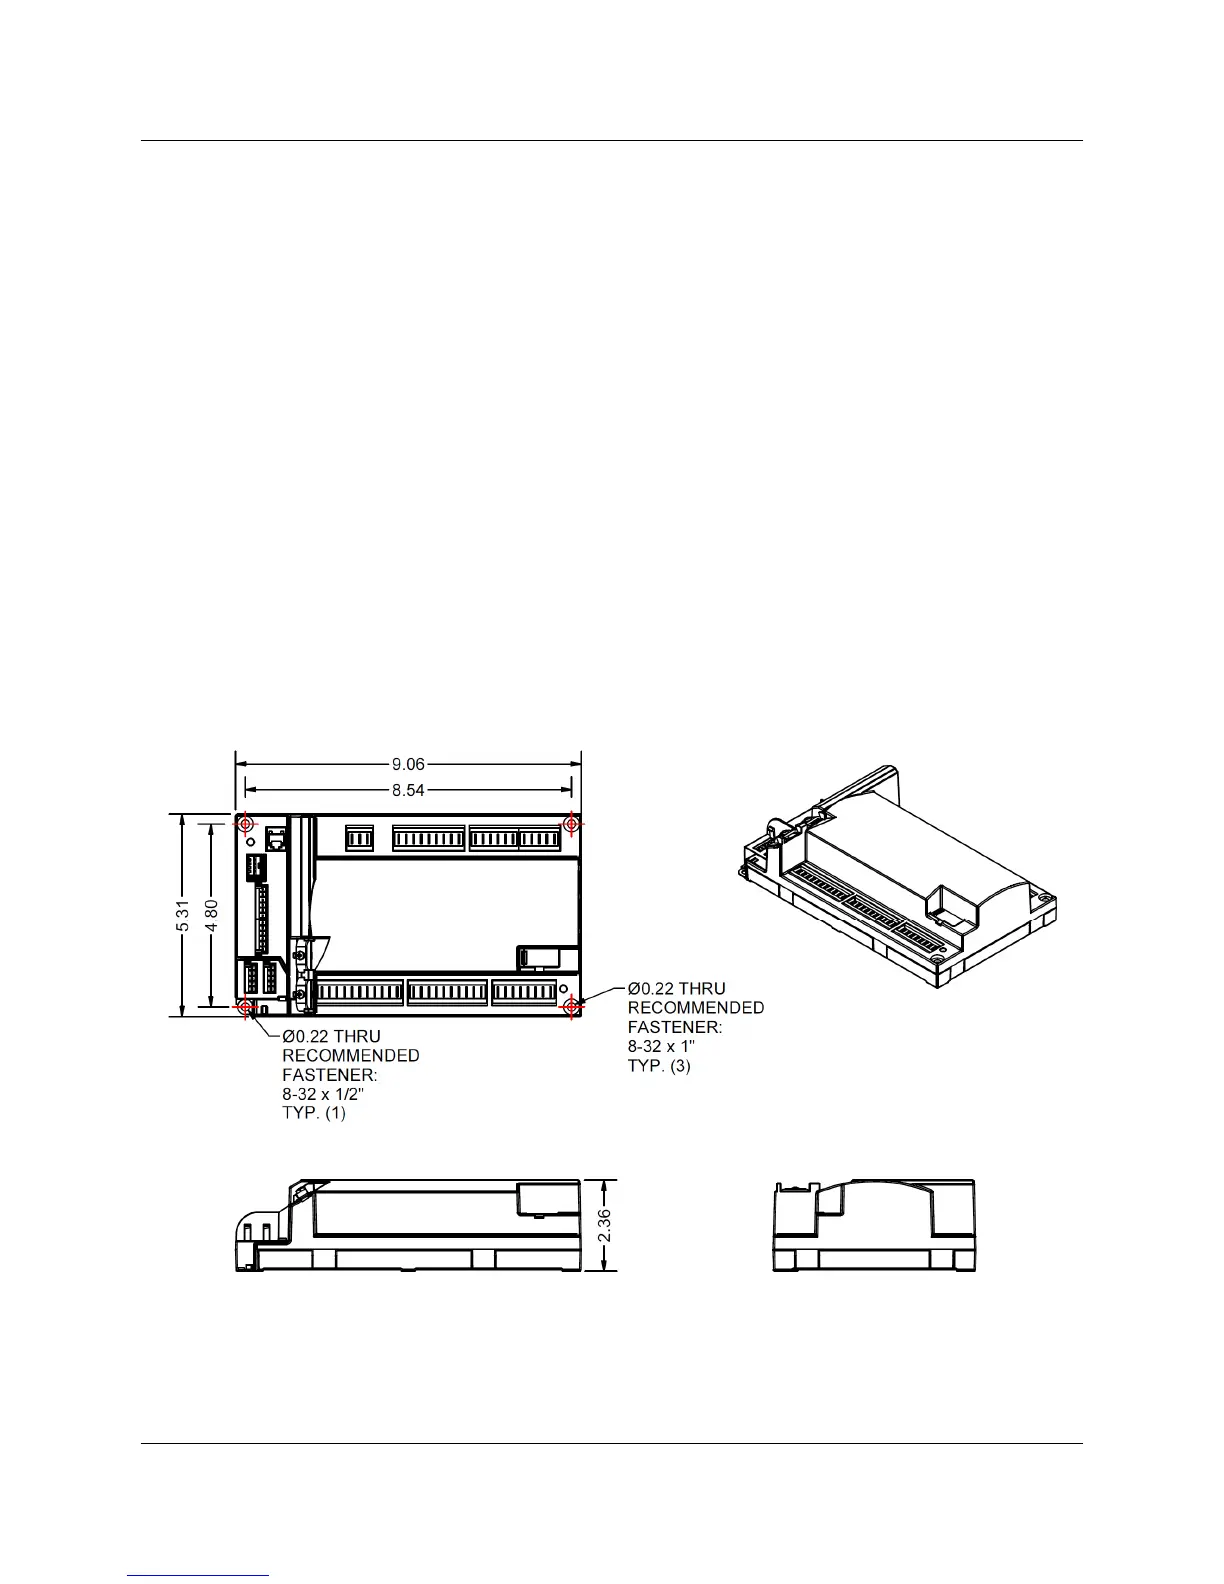
dimensions of the LMV3 are 9.06” x 5.31” x 2.36”.
Figure 1-2: LMV3 Dimensions (inches)
 Loading...