3-13
S7-200 Programmable Controller, CPU 210
C79000-G7076-C235-01
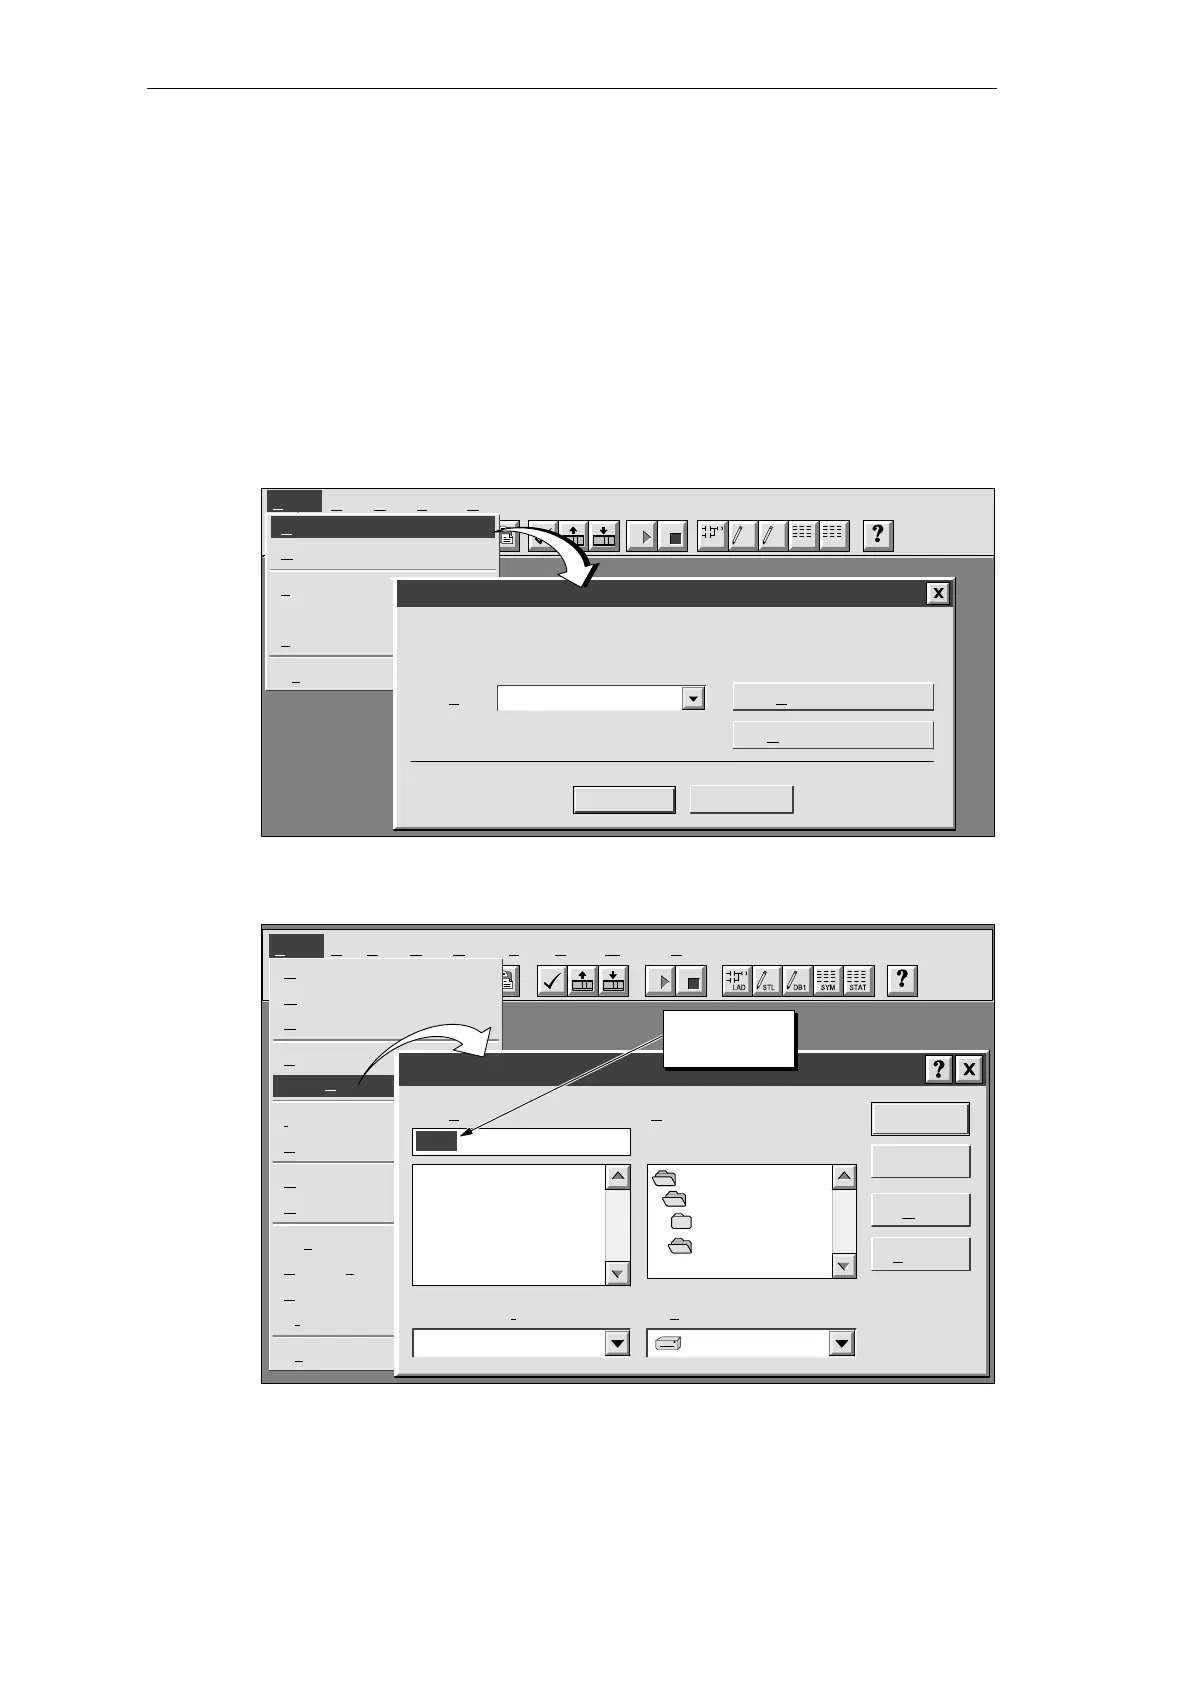
3.4 Creating a Project with STEP 7-Micro/WIN
To create a new project, select the menu command Project
"
New..., as shown in
Figure 3-12. The CPU Type dialog box is displayed. Select “PDS 210” from the drop-down
list box.
You can name your project at any time; for this example, refer to Figure 3-13 and follow
these steps to name the project:
1. Select the menu command Project
"
Save As...
2. In the File Name field, type the following: house.prj
3. Click on the “OK” button.
✂
Project View CPU Setup Help
Project
LAD STL SYM STATDB1
New... Ctrl+N
O
pen... Ctrl+O
1
c:\microwin\project1.prj
2 c:\microwin\project2.prj
3
c:\microwin\project3.prj
Ex
it
CPU Type
Cancel
OK
Select or read the CPU type from your PLC if you would like the software to
limit the available options to only those supported by a specific CPU.
Read CPU Type
Communications...
PDS 210CPU Type:
Figure 3-12 Creating a New Project and Selecting the CPU Type
✂
Project Edit View CPU Debug Tools Setup Window HelpProject
New... Ctrl+N
O
pen... Ctrl+O
C
lose
S
ave All Ctrl+S
Save A
s...
I
mport
E
xport
U
pload... Ctrl+U
D
ownload... Ctrl+D
Pag
e Setup...
P
rint Preview...
P
rint... Ctrl+P
Pr
int Setup...
Ex
it
Save As Project
Cancel
OK
File n
ame:
Help
Network...
Project
Save file as type:
c:
Drives:
sample.prj c:\
microwin
F
olders:
c:\microwin
backup
samples
*.prj
Enter project
name here.
Figure 3-13 Naming the Sample Project
Getting Started with a Sample Program

 Loading...