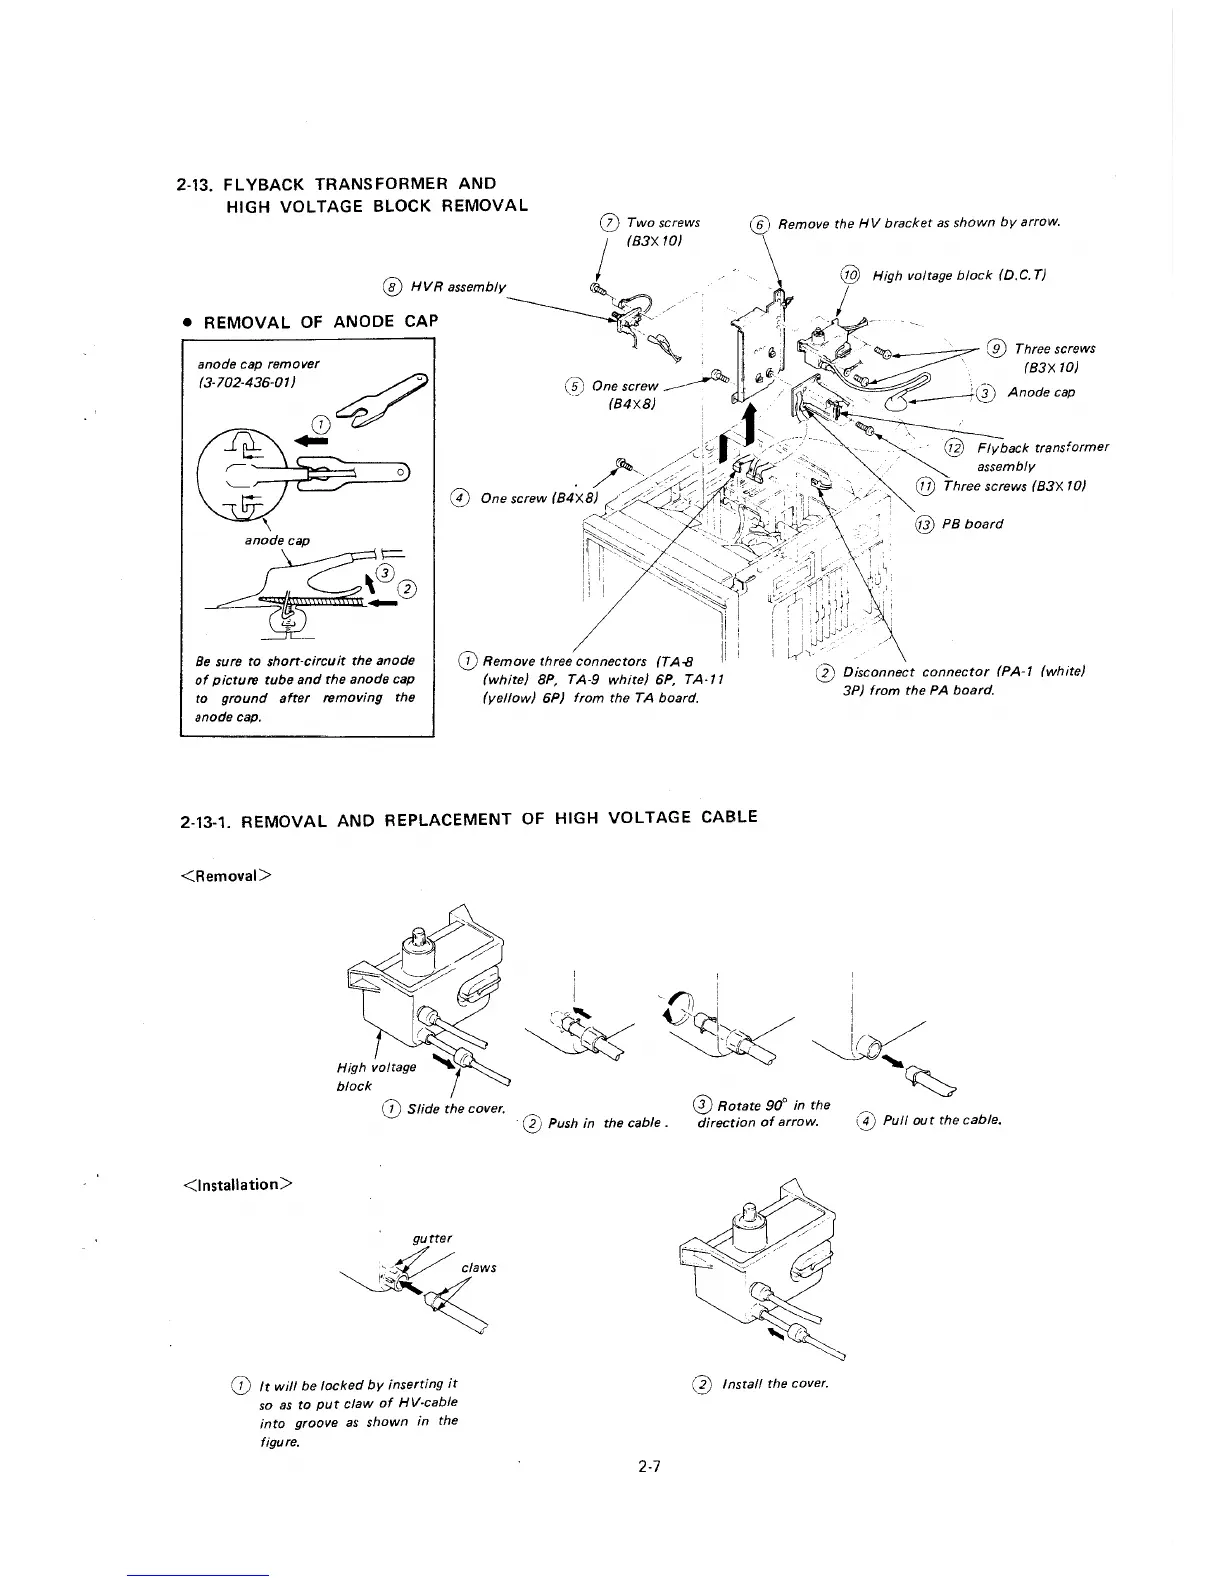
2-13. FLYBACK TRANSFORMER AND
HIGH VOLTAGE BLOCK REMOVAL
anode cap remover
(3-702-436-01)
~
0~
...
0
Be sure to short-circuit the anode
of picture tube and the anode cap
to ground after removing the
anode cap.
(J) Remove three connectors (TA-8
(white) BP, TA-9 white) 6P, TA-11
(yellow) 6P) from the TA board.
@ Remove the HV bracket as shown by arrow.
0 Disconnect connector (PA-1 (white)
3P) from the PA board.
2-13-1. REMOVAL AND REPLACEMENT OF HIGH VOLTAGE CABLE
<Removal>
<Installation>
gutter
~~;;
(j) It will be locked by inserting it
so as to put claw of HV-cable
into groove as shown in the
figure.
'Oct:t~~I
~,'? .· I, r ,ri
' v.'
0 Rotate 90° in the
~
0 Push in the cable. direction of arrow. (I) Pull out the cable.
(j) Install the cover.
2-7
 Loading...