5-60
MAINTENANCE
ADJUSTING THE GAP BETWEEN THE
BUCKET AND ARM (IF EQUIPPED)
• Before performing maintenance or
repairs under the machine, lower all
working equipment to the ground or in
the lowermost position.
• To prevent unexpected movement,
securely block the working equipment
when adjusting the gap.
WHEN REQUIRED
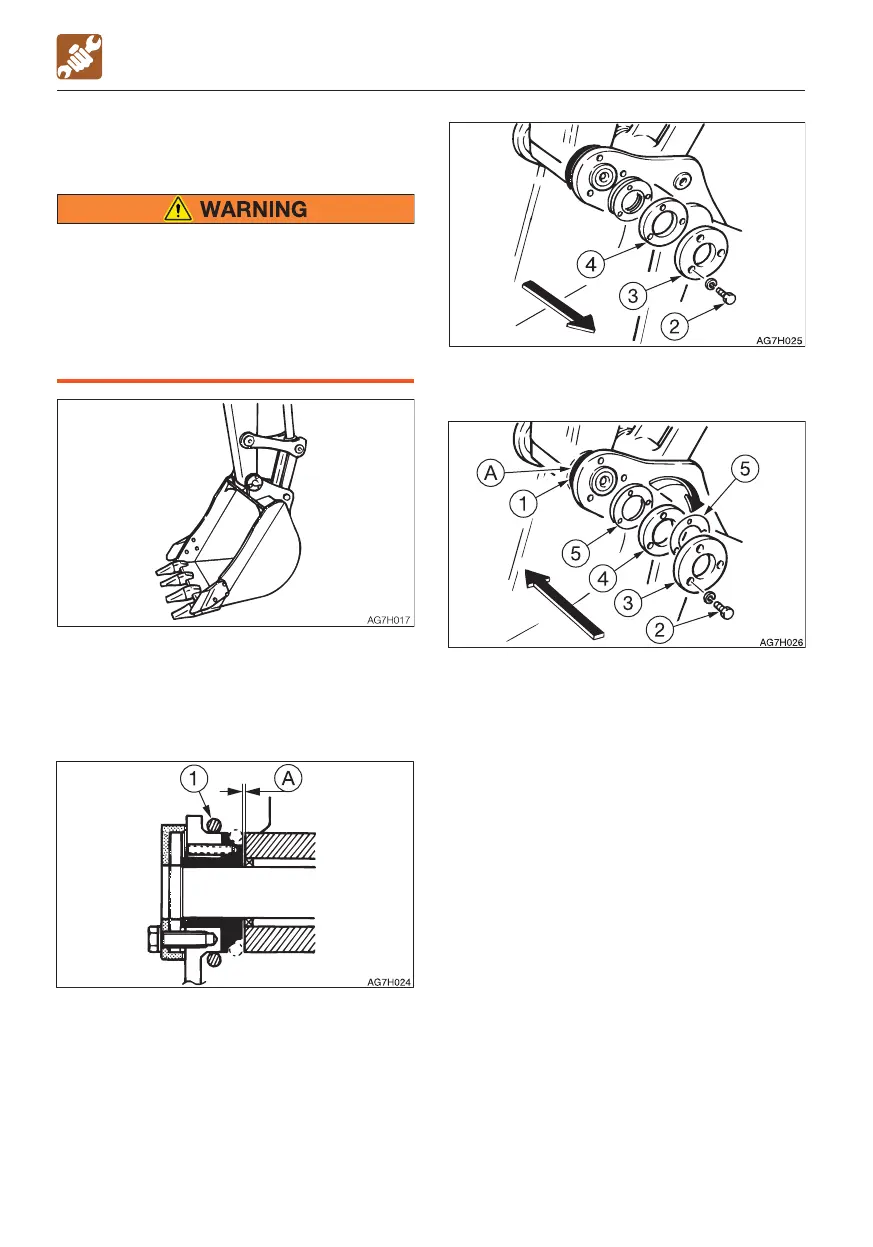
1. Lower the bucket to the ground as shown
on the figure above in a stable position.
2. Check that the bucket dose not move,
and then set the safety lock lever to the
locked position and stop the engine.
3. Move the O-ring (1) to bring the gap (A)
into view and measure the width of the
gap (A).
The gap (A) should be 0.5 mm (0.02 in.).
Swing the upperstructure slightly to the left
and lightly press the arm point to the left
side of the bucket (the side without an
adjuster).
4. Remove the three bolts (2), the end plate
(3) and flange (4).
5. Pull out the adjustment shim(s) (5)
corresponding to the gap (A) from
between the flange (4) and the bucket
body.
Adjustment shim thickness : 0.5 mm (0.02
in.)
Be careful that the gap is no less than 0.5
mm (0.02 in.) after adjustment.
Note:
Example (for a gap of 2 mm or 0.08 in.):
2 mm - 0.5 mm (standard value)= 1.5 mm
(0.06 in.)
In the above example, three shims (5) should
be removed.
6. Insert the adjustment shim(s) (5) removed
in step 5 above between the end plate (3)
and the flange (4), and then fasten it in
place with the three bolts (2).
· Tightening torque for bolts (2): 83 N·m
(61.5 ft-lb.)
7. Return the O-ring (1) to the original
position.

 Loading...