Application Exa
mple
Application Example
Timing a Studio
Your instrument supports multiple methods and techniques for timing a studio, all of which require an external reference
to your instrument. Timing a studio involves adjusting the references going to different sources so that their output feeds
have the same timing when they arrive at a common point, such as a production sw itcher. For digital systems, timing
typically only needs to be close, but not exact, because most switchers have some t olerance for timing errors. For analog
composite systems, the timing may need to be matched within a small part of a subcarrier cycle to prevent hue shifts
when switching between sources.
Following are procedures for timing a studio using various methods.
Using the Traditional Method
Your instrument makes the traditional method of comparing Horizontal and Vertical timing easier by providing flexible
tiles and a Freeze function. To time a s tudio using the traditional method, you store an input as a baseline and compare
signals tha
t you time against the baseline.
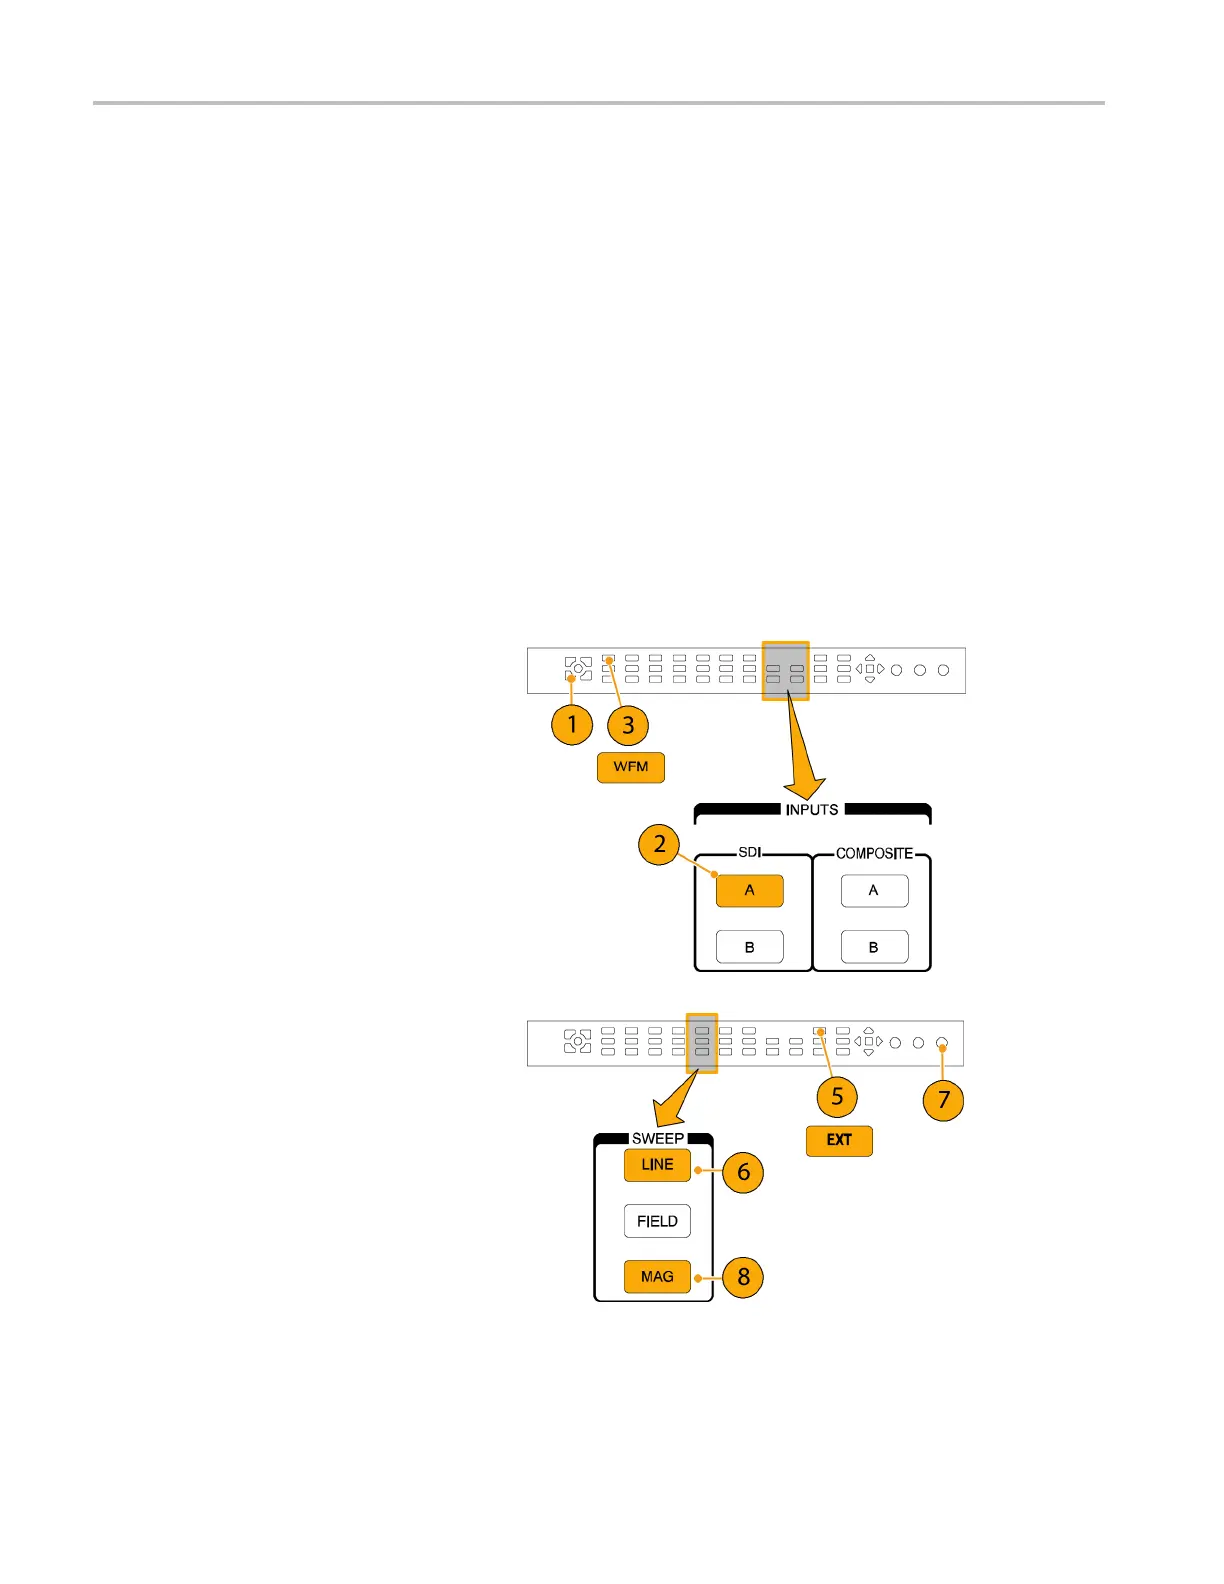
1. Selectatileinwhichtotimetheactive
input. Select WFM.
2. Apply the first input signal to the
appropria
te input, terminate it properly,
and select it. (See page 9, Line
Term ina t io n .)
3. Push and hold the WFM button. From
the Displa
yModesubmenu, select a
display m ode that is appropriate to the
signal that you input.
4. Apply the house reference signal to the
external
reference input, terminating it
properly.
5. Press the
EXT button to select External
Reference mode. (Connected to the
house reference.)
6. Pu t the selected tile in line mode.
7. Use the HORIZ ONTAL knob to center
the sync
edge or the SAV pulse. (If
using the SAV pulse, turn off Stripping
EAV/SAV/ANC in the SDI Input setting of
the Confi
guration Menu.)
8. Press th
e MAG button to increase the
timing resolution.
118 Waveform Rasterizers Quick Start User Manual
 Loading...


