9-S41
L3130 · L3430 · L3830 · L4630 · L5030, WSM
ELECTRICAL SYSTEM
(2) Disassembling and Assembling
(A) Starter
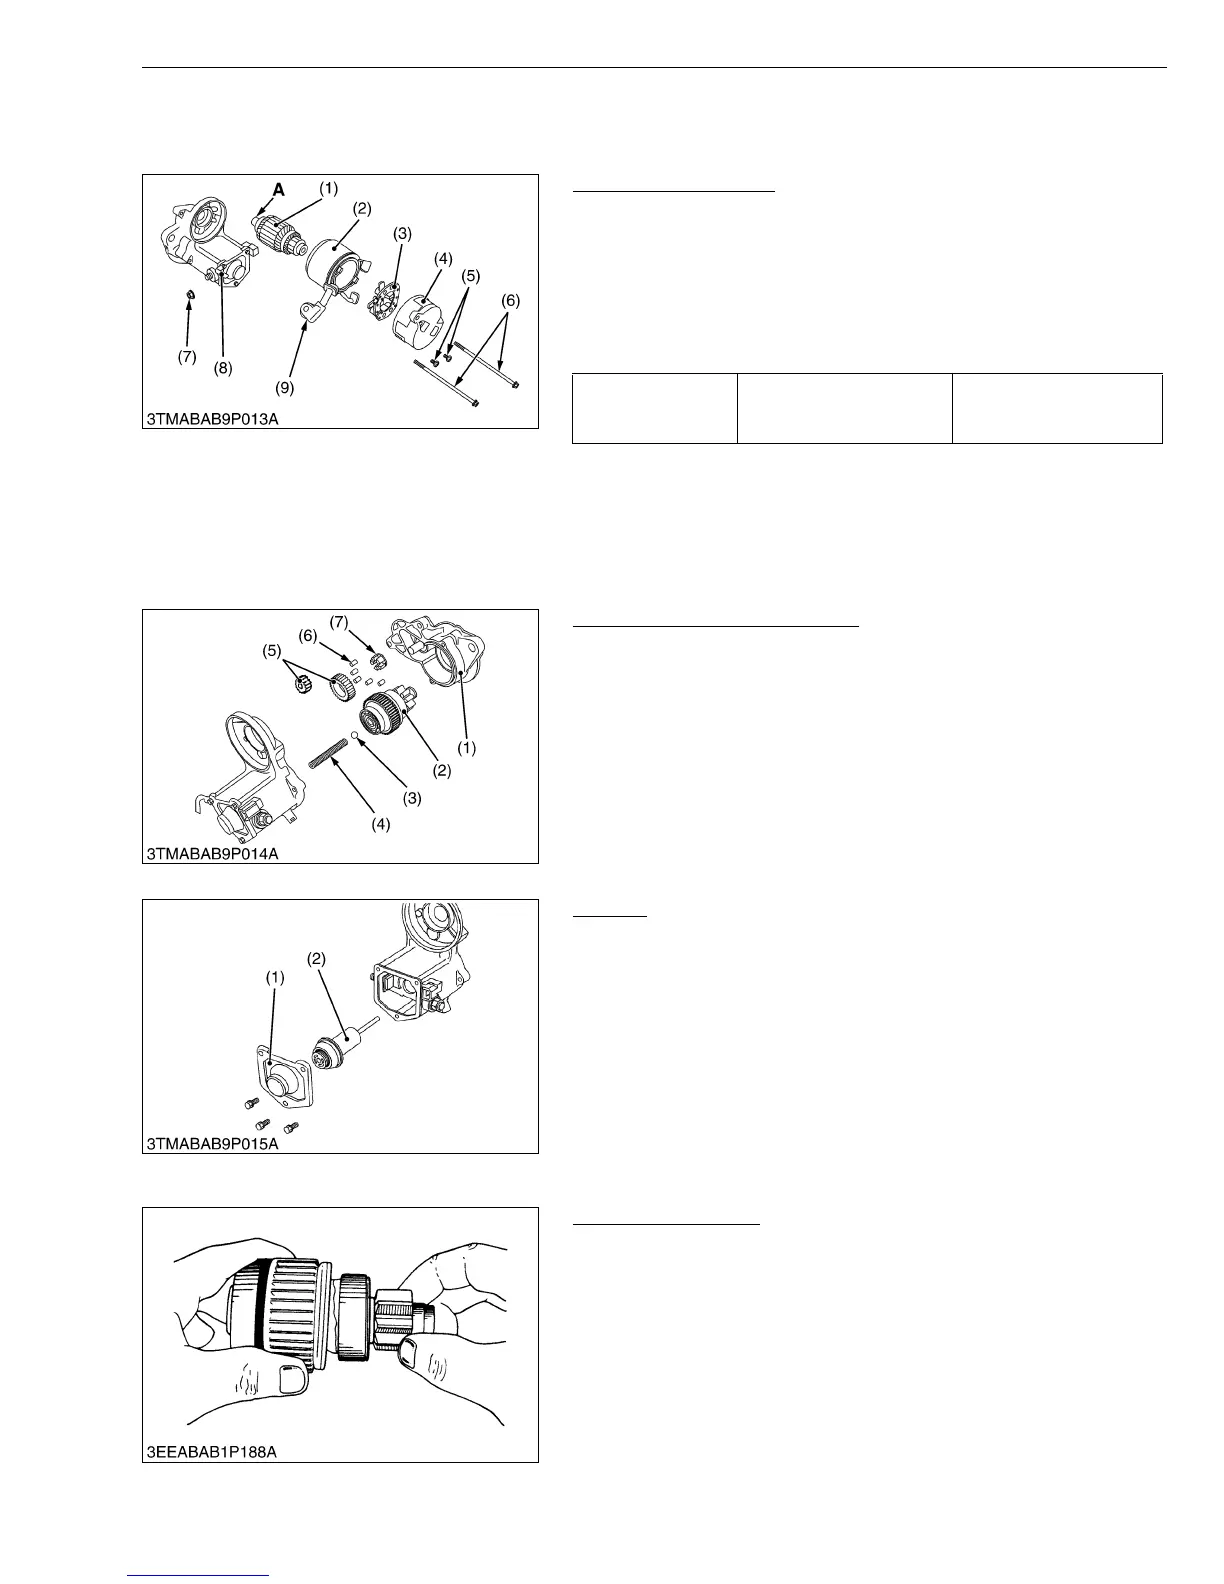
Disassembling Motor
1. Disconnect the connecting lead (9) from the magnet switch (8).
2. Remove the screws (6), and then separate the end frame (4),
yoke (2) and armature (1).
3. Remove the two screws (5), and then take out the brush holder
(3) from the end frame (4).
(When reassembling)
• Apply grease to the spline teeth A of the armature (1).
W10162880
Disassembling Magnet Switch
1. Remove the drive end frame (1) mounting screws.
2. Take out the overrunning clutch (2), ball (3), spring (4), gears (5),
rollers (6) and retainer (7).
(When reassembling)
• Apply grease to the gear teeth of the gears (5) and overrunning
clutch (2), and ball (3).
W10167280
Plunger
1. Remove the end cover (1).
2. Take out the plunger (2).
W10168830
(3) Servicing
Overrunning Clutch
1. Inspect the pinion for wear or damage.
2. If there is any defect, replace the overrunning clutch assembly.
3. Check that the pinion turns freely and smoothly in the
overrunning direction and does not slip in the cranking direction.
4. If the pinion slips or does not rotate in the both directions, replace
the overrunning clutch assembly.
W10169900
Tightening torque Nut (7)
5.9 to 11.8 N·m
0.6 to 1.2 kgf·m
4.3 to 8.7 ft-lbs
(1) Armature
(2) Yoke
(3) Brush Holder
(4) End Frame
(5) Screw
(6) Screw
(7) Nut
(8) Magnet Switch
(9) Connecting Lead
A : Spline Teeth
(1) Drive End Frame
(2) Overrunning Clutch
(3) Ball
(4) Spring
(5) Gear
(6) Roller
(7) Retainer
(1) End Cover (2) Plunger
 Loading...