5/2011
4-124
Phaser 4600/4620 Printer Service Manual
REP 11.10, REP 11.11
Revision - Xerox Internal Use Only
Repairs
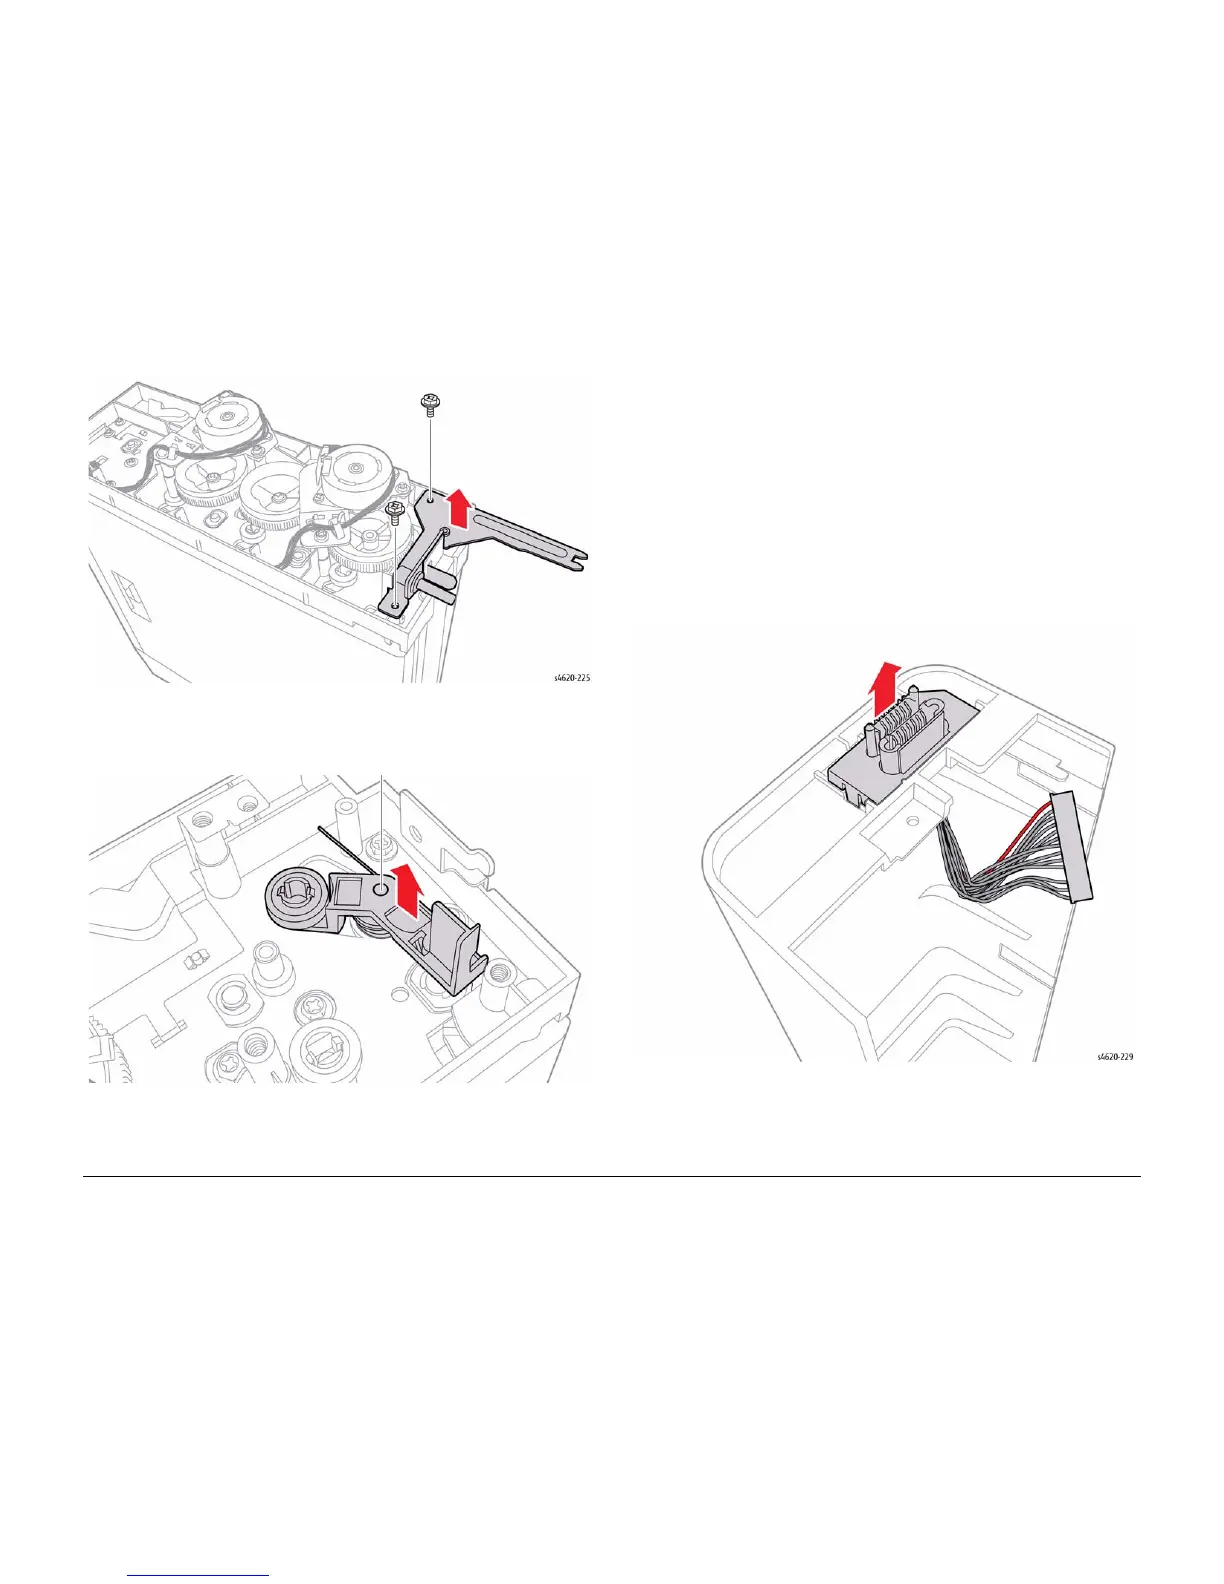
Figure 2 Remove the exit gate bracket
NOTE: Hold the cam follower spring while removing the cam follower from the Mailbox.
7. Remove 1 (plastic) screw that secures the cam follower to the Mailbox, Figure 3.
Figure 3 Remove the cam follower
REP 11.11 Mailbox Option Harness
Parts List on PL 11.15 Item 4
Removal
WARNING
Switch off the electricity to the machine. Disconnect the power cord from the customer
supply while performing tasks that do not need electricity. Electricity can cause death or
injury. Moving parts can cause injury.
1. Remove the Mailbox Output Trays, REP 11.1.
2. Separate the Mailbox from the printer, GP 14.
3. Remove the right cover, REP 11.3.
4. Disconnect P/J1 from the Control Board.
5. Release 2 hooks that secure the connector cover to the right cover and remove the con-
nector, Figure 1.
Figure 1 Remove the option connector
Replacement
Check connector orientation before Mailbox installation.
 Loading...


