SSeettttiinngg tthhee FFiillee FFoorrmmaatt
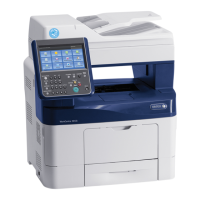
1. At the printer control panel, press Clear All, then press Services Home.
2. Touch Scan To, then touch and hold the Right Arrow button until Scan To...Features appears.
3. Touch File.
4. Using the menu, select a file type, then type the file name using the keypad.
5. Touch OK.
LLiigghhtteenniinngg oorr DDaarrkkeenniinngg tthhee IImmaaggee
1. At the printer control panel, press Clear All, then press Services Home.
2. Touch Scan To, then touch and hold the Right Arrow button until Scan To...Features appears.
3. Scroll down, then touch Lighten/Darken.
4. Using the slider control, make the desired adjustment.
5. Touch OK.
AAuuttoommaattiiccaallllyy SSuupppprreessssiinngg BBaacckkggrroouunndd VVaarriiaattiioonn
When scanning original documents that are printed on thin paper, text or images printed on one side
of the paper can be seen on the other side. Use the Auto Suppression setting to reduce the sensitivity
of the printer to variations in light background colors.
1. At the printer control panel, press Clear All, then press Services Home.
2. Touch Scan To, then touch and hold the Right Arrow button until Scan To...Features appears.
3. Touch Background Suppression.
4. Choose Enable or Disable.
5. Touch OK.
SSppeecciiffyyiinngg tthhee OOrriiggiinnaall SSiizzee
1. At the printer control panel, press Clear All, then press Services Home.
2. Touch Scan To, then touch and hold the Right Arrow button until Scan To...Features appears.
3. Touch Original Size.
4. Select an option.
5. Touch OK.
EErraassiinngg EEddggeess
1. At the printer control panel, press Clear All, then press Services Home.
2. Touch Scan To, then touch and hold the Right Arrow button until Scan To...Features appears.
3. Touch Scan To Edge.
Xerox
®
WorkCentre
®
3335/3345 Multifunction Printer
User Guide
115
Scanning

 Loading...