b. If you know the gateway address and subnet mask, click the top button and enter the
addresses into the Gateway and Subnet Mask fields.
c. If you know the address of another printer on the same subnet, click the middle button and
enter the address in the IP Address field.
d. Click Search.
e. From the list of discovered printers, select your printer, then click Next.
Note: When the printer appears in the Discovered Printers window, it displays the IP
address. Record the IP address for future use.
10. Select the desired driver.
11. Click Install.
12. If the installer prompts you for the IP address, enter the IP address of the printer.
13. If the installer prompts you to restart your computer, click Restart to complete the installation of
the drivers.
14. To complete the installation, click Finish.
IInnssttaalllliinngg PPrriinntt DDrriivveerrss ffoorr MMaacciinnttoosshh OOSS XX VVeerrssiioonn
1100..99 aanndd LLaatteerr
Use this procedure to install the Xerox print driver to access all features of your printer.
To install the print driver software:
1. Insert the Software and Documentation disc into the appropriate drive on your computer.
2. To view the .dmg file for your printer, on your desktop, click the disc icon.
3. Open the .dmg file, then navigate to the appropriate installer file for your operating system.
4. To begin installation, open the Installer package file.
5. To acknowledge the warning and introductory messages, click Continue. Click Continue again.
6. To accept the license agreement, click Continue, then click Agree.
7. To accept the current installation location, click Install, or select another location for the
installation files, then click Install.
8. Enter your password, then click Install Software.
9. Select your printer in the list of discovered printers, then click Continue. If your printer does not
appear in the list of discovered printers:
a. Click the Network Printer icon.
b. Type the IP address of your printer, then click Continue.
c. Select your printer in the list of discovered printers, then click Continue.
10. To accept the print queue message, click Continue.
11. To accept the installation success message, click Close.
12. To verify that the print driver recognizes the installed options:
a. From the Apple menu, click System Preferences→Printers and Scanners.
46
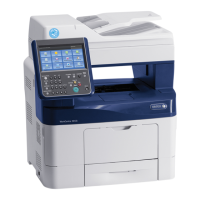
Xerox
®
WorkCentre
®
3335/3345 Multifunction Printer
User Guide
Installation and Setup

 Loading...