YL9160 PDA Detector
5) towards you. Be careful not to lose the two thumbscrews. Be careful not to get fingerprints on the
lamp.
4-1-2. How to install a new D
2
lamp
1) Insert the new lamp assembly onto the lamp housing on the right front panel.
2) Use the thumbscrews to attach the lamp assembly to the detector.
3) Connect the lamp lead to the lower of the two terminals in the lamp compartment.
CAUTION ; NEVER loosen the screw holding the lamp to the mount, and never attempt to rotate or
move the lamp up or down in the mount. The lamp Is provided as a pre-aligned assembly.
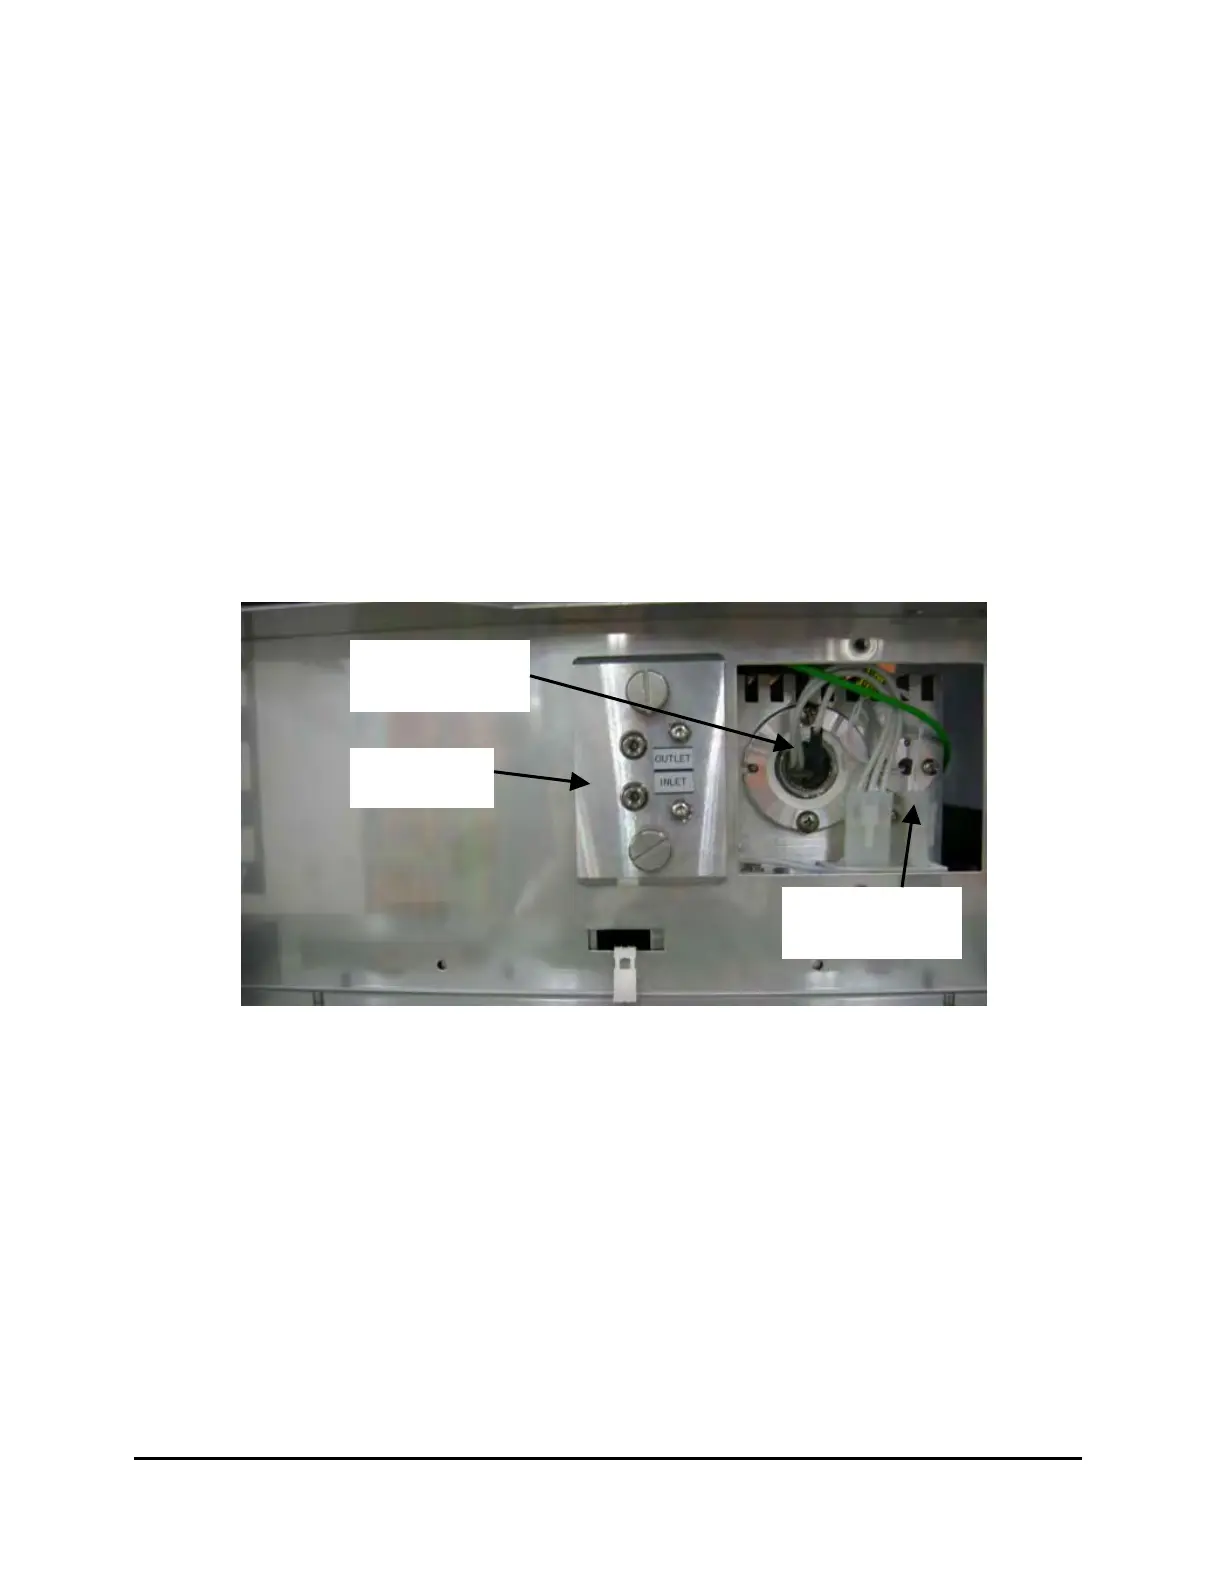
D2 lamp
assembly
Flow cell
assembl
Tungsten lamp
assembly
[Fig. 5] Front of YL9160 PDA Detector
4-2. Tungsten lamp (W)
The replacement time of the tungsten lamp is approximately 1,500 hours. To check the W lamp
intensity:
1) Power on the unit if it is not already on. Wait approximately 10 minutes.
2) Set the wavelength to 720nm by YL-Clarity software.
3) Select the Reference Light Intensity.
4) If the displayed value is less than a half of the original intensity, the lamp should be replaced to
new one. Generally, you have to consider the lamp exchange when the light intensity of reference
energy is less than 5 nA.
14
 Loading...