Home
Allen-Bradley
Controller
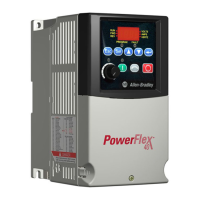
PowerFlex 40
Allen-Bradley PowerFlex 40 User Manual
4
of 1
of 1 rating
218 pages
Give review
Manual
Specs
To Next Page
To Next Page
Loading...
CompactLogix System
Catalog Numbers
1769-L31, 1769-L32C, 1769-
L32E, 1769-L35CR,
1769-L35E CompactLogix Co
ntrollers, POINT I/O M
odules, PowerFlex 70
Drives, PowerFl
ex 40 Drives, PanelVi
ew Plus T
erminals
Quick Start
2
Table of Contents
Default Chapter
4
Publication IASIMP-QS001C-EN-P - October
4
Table of Contents
7
About this Publication
11
Required Software
12
Parts List
13
Additional Resources
15
Conventions
15
Chapter 1 Before You Begin
17
What You Need
17
Follow These Steps
18
Connect the Battery to the Controller
19
Record the Ethernet Address (MAC)
19
Set the Controlnet Node Address
20
Assemble the System
21
Make Network Connections
22
Wire Power
25
Additional Resources
26
Chapter 2 Before You Begin
27
What You Need
27
Terminology
29
Make Network Connections
29
Install Rslogix Programming Software
31
Configure a Serial Driver
36
Set the IP Address for the Computer
38
Configure the Ethernet/Ip Driver in Rslinx Software
40
Load Firmware
42
Install Additional Software
44
Additional Resources
45
Chapter 3 Before You Begin
47
What You Need
47
Follow These Steps
48
Mount and Connect the Network Adapter
49
Mount the POINT I/O Modules
51
Mount and Wire the POINT I/O Power Supply
52
Wire the Adapter and I/O Modules to the Power Supply
53
Additional Resources
53
Chapter 4 Before You Begin
55
What You Need
55
Follow These Steps
56
Mount the Powerflex 70 Drive
57
Wire Power
57
Configure the Communication Adapter
58
Connect Communication Adapter to the Powerflex 70 Drive
59
Additional Resources
61
Chapter 5 Before You Begin
63
What You Need
63
Follow These Steps
64
Mount the Powerflex 40 Drive
65
Wire Power
65
Configure the Communication Adapter
66
Connect the Communication Adapter to the Powerflex 40 Drive
67
Additional Resources
69
Chapter 6 Before You Begin
71
What You Need
71
Follow These Steps
72
Install the Controlnet Interface Module
73
Mount the Panelview Plus Terminal
73
Wire the Panelview Plus Terminal to the Power Supply
74
Make Network Connections
75
Assign an IP Address
77
Additional Resources
80
Chapter 7 Before You Begin
81
What You Need
81
Follow These Steps
82
Terminology
82
Assign IP Addresses to Devices
83
Browse the Ethernet/Ip Network in Rslinx
85
Additional Resources
85
Chapter 8 Before You Begin
87
What You Need
87
Follow These Steps
87
Configure the Controlnet Driver in Rslinx
88
Additional Resources
90
Chapter 9 Before You Begin
91
What You Need
91
Publication IASIMP-QS001C-EN-P - October
91
Follow These Steps
92
Apply Power to the Devicenet Network
93
Set the 1769-SDN Module's Node Address
94
Create a Devicenet Configuration File
96
Additional Resources
98
Chapter 10 Before You Begin
99
What You Need
99
Follow These Steps
100
Create a Project
101
Configure the Controller
103
Add Local I/O Modules
105
Add Ladder Logic to Test the Local 1769 Compact I/O Modules
106
Set the Communication Path and Download to the Controller
109
Add the 1769-SDN to the Project
111
Additional Resources
112
Chapter 11 Before You Begin
113
What You Need
113
Follow These Steps
114
Add Distributed I/O Modules
115
Edit the Devicenet Adapter Parameters
118
Configure the Devicenet Subnet
120
Create a Devicenet Scanlist
124
Add Ladder Logic
127
Create Devicenet Tags and Add Ladder Logic
129
Download the Project
134
Set the POINT I/O Chassis Size
135
Schedule the Controlnet Network
137
Test the Distributed I/O Light
141
Additional Resources
142
Chapter 12 Before You Begin
143
What You Need
143
Follow These Steps
144
Add the Drive to Your Rslogix 5000 Project and Connect
144
To the Drive
145
Edit the Drive Parameters
149
Create a Devicenet Scanlist
150
Create Devicenet Tags
154
Download the Project
156
Schedule the Controlnet Network
157
Test the Powerflex 70 Tags
161
Test the Powerflex 70 Tags
163
Additional Resources
165
Chapter 13 Before You Begin
167
What You Need
167
Follow These Steps
168
Add the Drive to Your Rslogix 5000 Project
169
Create a Devicenet Scanlist
171
Create Devicenet Tags
174
Download the Project
176
Schedule the Controlnet Network
177
Edit Powerflex 40 Parameter Values
181
Reference for Editing Parameters
181
Test the Powerflex 40 Tags
183
Test the Powerflex 40 Tags
185
Additional Resources
187
Chapter 14 Before You Begin
189
What You Need
189
Follow These Steps
190
Create a New Application
191
Create an Rslinx Enterprise Configuration in Factorytalkview ME
192
Create Device Shortcuts to the Controller
194
Create the Ob16_Light Indicator
200
Create a Push Button
203
Test the Indicator and Push Button
205
Add a Goto Configuration Mode Button
207
Assign Keys
208
Assign an Initial Screen
208
Transfer to Panelview Plus Firmware
210
Test the Application on the Panelview Plus Application
211
Additional Resources
213
Ethernet/Ip
215
Devicenet Network
215
1769-SDN Module Information
215
Rsnetworx Devicenet Configuration File Information
215
Controlnet Network
216
Other manuals for Allen-Bradley PowerFlex 40
Original Instructions
38 pages
Installation Instructions
4 pages
4
Based on 1 rating
Ask a question
Give review
Questions and Answers:
Need help?
Do you have a question about the Allen-Bradley PowerFlex 40 and is the answer not in the manual?
Ask a question
Allen-Bradley PowerFlex 40 Specifications
General
Brand
Allen-Bradley
Model
PowerFlex 40
Category
Controller
Language
English
Related product manuals
Allen-Bradley PowerFlex 4
108 pages
Allen-Bradley PowerFlex 4M
118 pages
Allen-Bradley PowerFlex 400
218 pages
Allen-Bradley PowerFlex 70
132 pages
Allen-Bradley PowerFlex 525
244 pages
Allen-Bradley PowerFlex 527
354 pages
Allen-Bradley PowerFlex 523
244 pages
Allen-Bradley PowerFlex 755
354 pages
Allen-Bradley powerflex 700
198 pages
Allen-Bradley PowerFlex 755TM
192 pages
Allen-Bradley PowerFlex 755TR
192 pages
PowerFlex 750 Series
50 pages