CB-100-226
5.7 Schematic wiring diagrams
Connect the VARIPACK frequency inverter in accord-
ance with the schematic wiring diagrams. Mount the
control switches S1 to S3 in the switch cabinet.
Individual connection of the compressor motor accord-
ing to the selected motor version and design. For de-
tails concerning the motor connection, see inside the
terminal box of the compressor.
The schematic wiring diagrams include optional oil
monitoring. Without such monitoring, the Delta-PII and
OLC-K1, respectively and the components S3 and H2
can be omitted. The auxiliary relay K11 and the pres-
sure switches F5 and F6 should in this case be in-
stalled in path 15 at the connection 14 of the SE-B1.
In contrast to the safety levels obtained by the
VARIPACK frequency inverters (PLe, SIL3), the system
integration shown in the schematic wiring diagrams cor-
responds to a max. safety level of (PLd, SIL2). The ac-
tual safety levels valid for the entire system can exclus-
ively be calculated by the system manufacturer! The
obtainable safety level shown in the schematic wiring
diagrams is usually satisfactory for refrigeration sys-
tems. For comparison: a simple contactor circuit that is
usually used, without using two contactors with mutual
monitoring connected in series, corresponds to a max.
reachable safety level of PLc/SIL2. The required safety
level must be defined by the system manufacturer on
the basis of a risk assessment. For further information,
see chapter Safe Torque Off (STO), page 24.
5.7.1 Schematic wiring diagrams semi-hermetic
reciprocating compressors
Abbr. Component
B1 Control unit (cooling demand) or command for
compressor start (release signal from the sys-
tem controller) or controller On/Off
F1 Main fuse
F2 Compressor fuse
F3 Control circuit fuse
F12 Oil heater fuse
F17 Control transformer fuse
H1 Signal lamp "overtemperature" (motor and
discharge gas)
H2 Signal lamp "Oil supply fault"
H6 Signal lamp "Ready-to-operate"
K10 Auxiliary relay "Compressor is running"
K11 Auxiliary relay "Compressor release"
M1 Compressor
M2 Fan
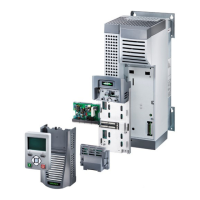
N1 VARIPACK frequency inverter (FI)
Q1 Main switch
R1..6 PTC sensor in motor winding
R7 Discharge gas temperature sensor (option)
R8 Oil heater (option)
S1 Control switch (on/off)
S2 Reset "overtemperature" (motor and dis-
charge gas)
S3 Reset "Oil supply fault"
T1 Control transformer (example for 230V)
Y2 Solenoid valve “liquid line”
Tab.5: Legend schematic wiring diagrams VARIPACK with semi-her-
metic reciprocating compressors
SE-B1: Protection device.
Delta PII or OLC-K1: Oil monitoring (option).
 Loading...