CB-100-2 39
7.2.2 Control panel setup and operation
For this, please refer to the BITZER leaflet 378 204 05
delivered with the control panel.
7.3 Interfaces for communication via ModbusRTU
and ModbusTCP/IP
For communication with superior system controllers or
the building control system, the following interfaces are
additionally available:
• ModbusRTU via RS485.
• Modbus TCP/IP via network cable on RJ45.
For the explanation and set-up of these interfaces, in-
cluding the register or address definition, see
BEST SOFTWARE 2.9 or newer.
8 Commissioning of the VARIPACK frequency
inverter
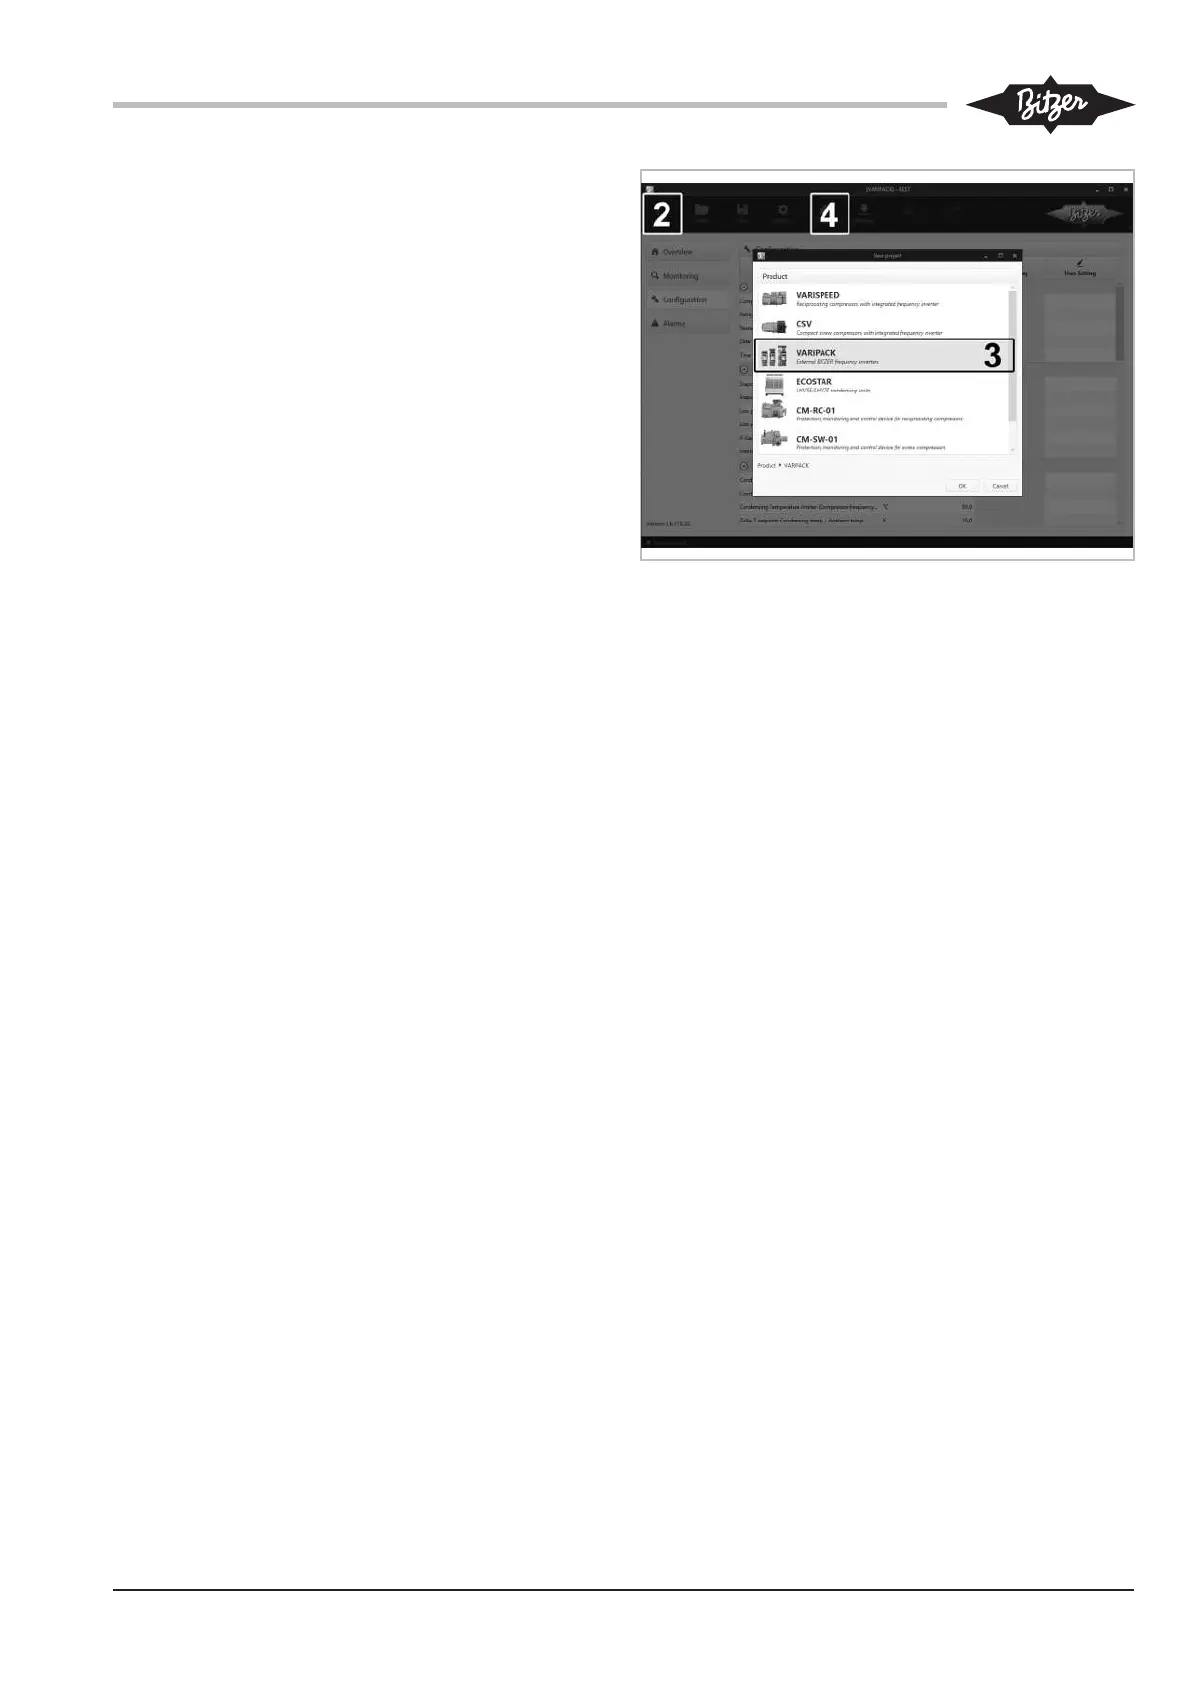
First:
Establish communication with the BEST SOFTWARE ,
see figure 28, page 39:
• Start the BEST SOFTWARE (1).
• Click the NEW button (2).
• Select the VARIPACK frequency inverter (3).
• Click the CONNECT button (4).
• The following selection appears: BEST CONVERTER or
ETHERNET.
– Selection BEST CONVERTER:
Click the CONNECT button. This concludes the con-
nection of the VARIPACK frequency inverter to
the mobile terminal device.
– Selection ETHERNET:
A list of all available devices appears.
Select a device.
Click the CONNECT button.
Enter Ethernet password (default "8670")
This concludes the connection of the VARIPACK
frequency inverter to the PC / mobile device.
Fig.28: Connecting the VARIPACK with the BEST software
Configuring the VARIPACK:
• Capacity control of the compressor depending on an
external setpoint signal:
– Click the CONFIGURATION button.
– Click the COMPRESSOR button and select the com-
pressor, including the motor code and motor wir-
ing.
– Click the TRANSMIT button and select and click
TRANSMIT USER SETTINGS TO THE DEVICE.
This completes the basic configuration.
• Capacity control of the compressor as a function of
the evaporation pressure using the extension mod-
ule for pressure control (option), see figure 29, page
40.
– Click the CONFIGURATION button.
– Click the COMPRESSOR button and select the com-
pressor, including the motor code and motor wir-
ing.
– Select the corresponding refrigerant.
– If necessary, adapt the temperature and pressure
settings.
– Click the TRANSMIT button and select and click
TRANSMIT USER SETTINGS TO THE DEVICE.
This completes the configuration.
 Loading...