14. Secure the waste tubing
to prevent spillage due to
pressure.
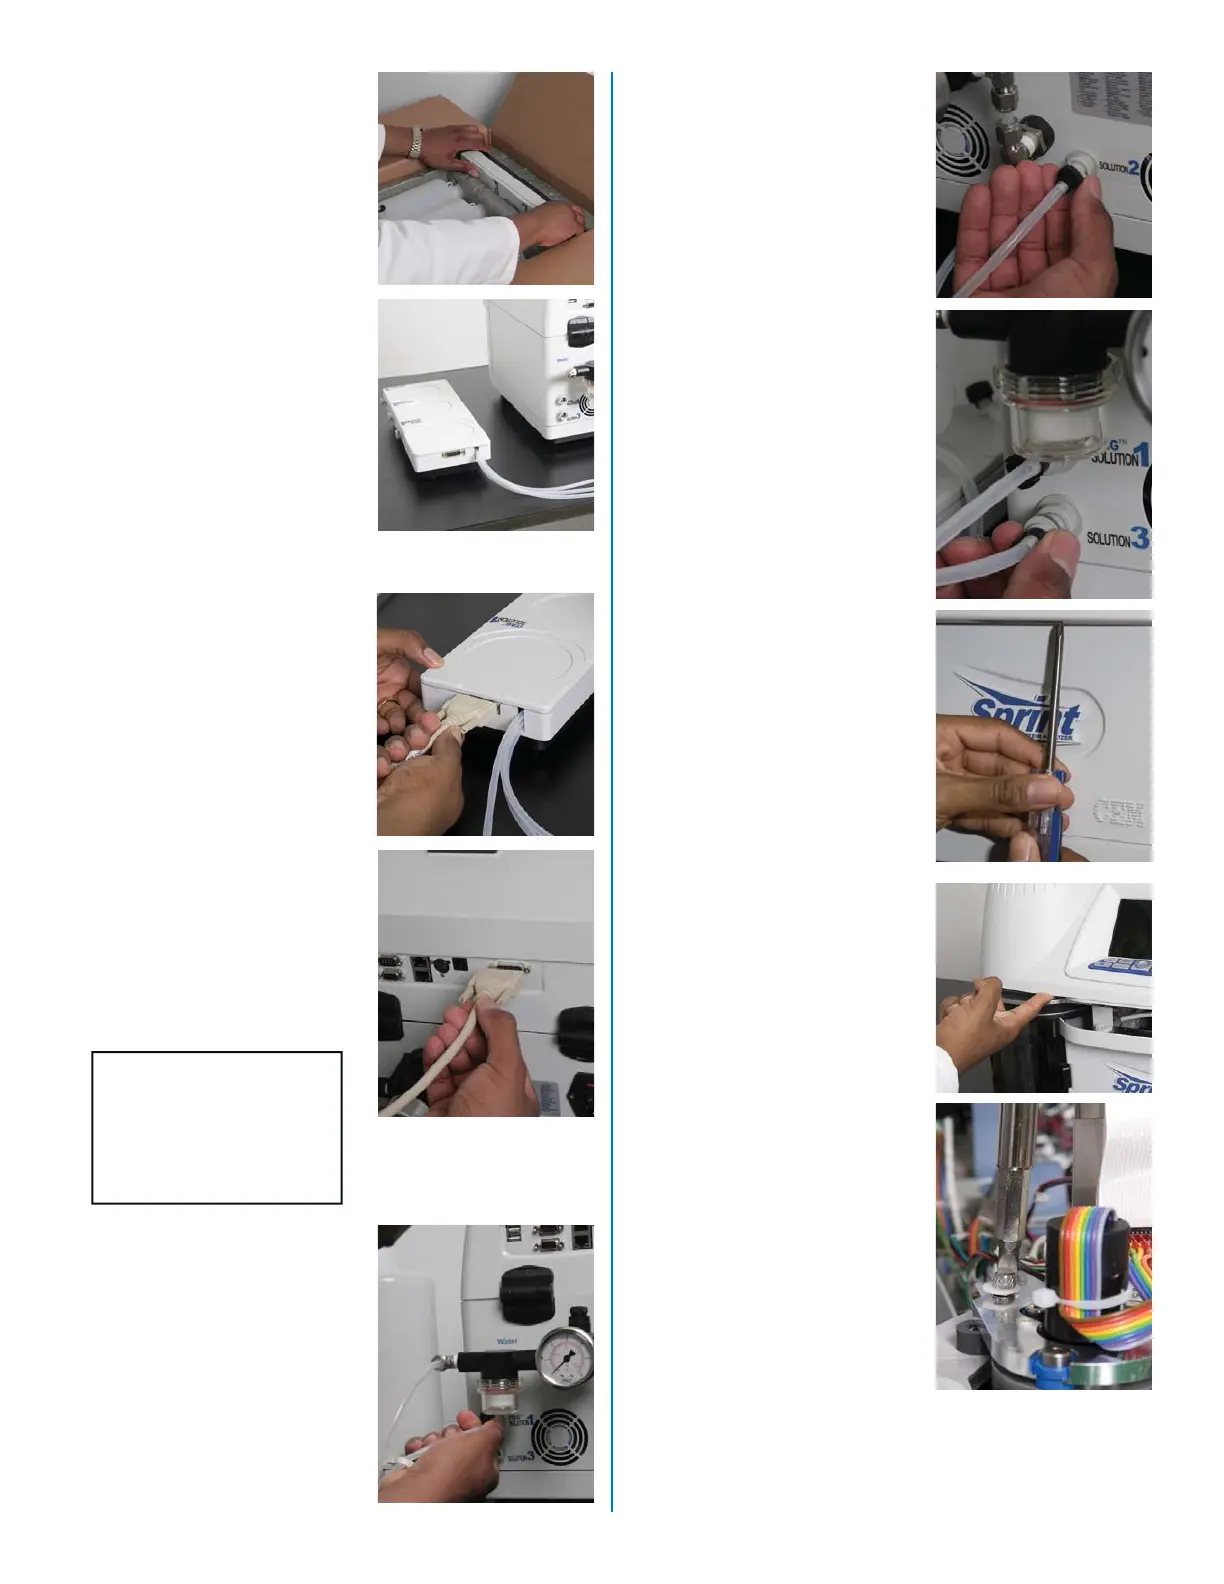
15. Carefully open the shipping
carton containing the bottle
stirrer assembly. Remove
the bottle stirrer from the
foam packaging.
16. Position the bottle stirrer on
the work bench on the right
side of the instrument (fac-
ing the front of the instru-
ment).
17. Ensure that the instrument
is not turned on. Connect
the cable supplied with the
instrument accessories to
the back of the bottle stirrer
by carefully aligning the pins
of the connectors. Once
the connector is properly
seated, tighten the screws
of the connector.
18. Connect the other end of
the cable to the 16-pin
connector on the back of
the instrument by aligning
the pins of the connec-
tors. Once the connector is
properly seated, tighten the
screws of the connector.
CAUTION
If the bottle stirrer cable
is connected with the
system on, damage to
the I/O board may occur.
19. Locate the three tubes
extending from the back of
the bottle stirrer. Connect
the tubing labeled “iTAG
1” to the connector on the
back of the Sprint instru-
ment labeled “iTAG Solution
1” by pushing the connector
on the tubing into the con-
nector of the instrument and
rotating it clockwise.
20. Connect the tubing labeled
“2” to the connector on the
back of the instrument la-
beled “Solution 2” by push-
ing the connector on the
tubing into the connector of
the instrument and rotating
it clockwise.
21. Connect the tubing labeled
“3” to the connector on the
back of the instrument la-
beled ”Solution 3” by push-
ing the connector on the
tubing into the connector of
the instrument and rotating
it clockwise.
23. Using an index fi nger
positioned as shown in the
illustration, carefully lift the
instrument cover.
3
22. Using a Phillips screwdriver,
remove the screw securing
the instrument cover. The
screw is located on the un-
derside of the cover to the
right of the barcode reader.
24. Either by hand or with a
fl at blade screwdriver as
required, rotate the spring
loaded screw securing the
Z axis counterclockwise
(loosen) until the tension of
the spring is released. Note:
Do not completely remove
the screw.
25. Carefully lower and close
the instrument top cover.
26. Remove the tape securing
the instrument turntable
door.
 Loading...