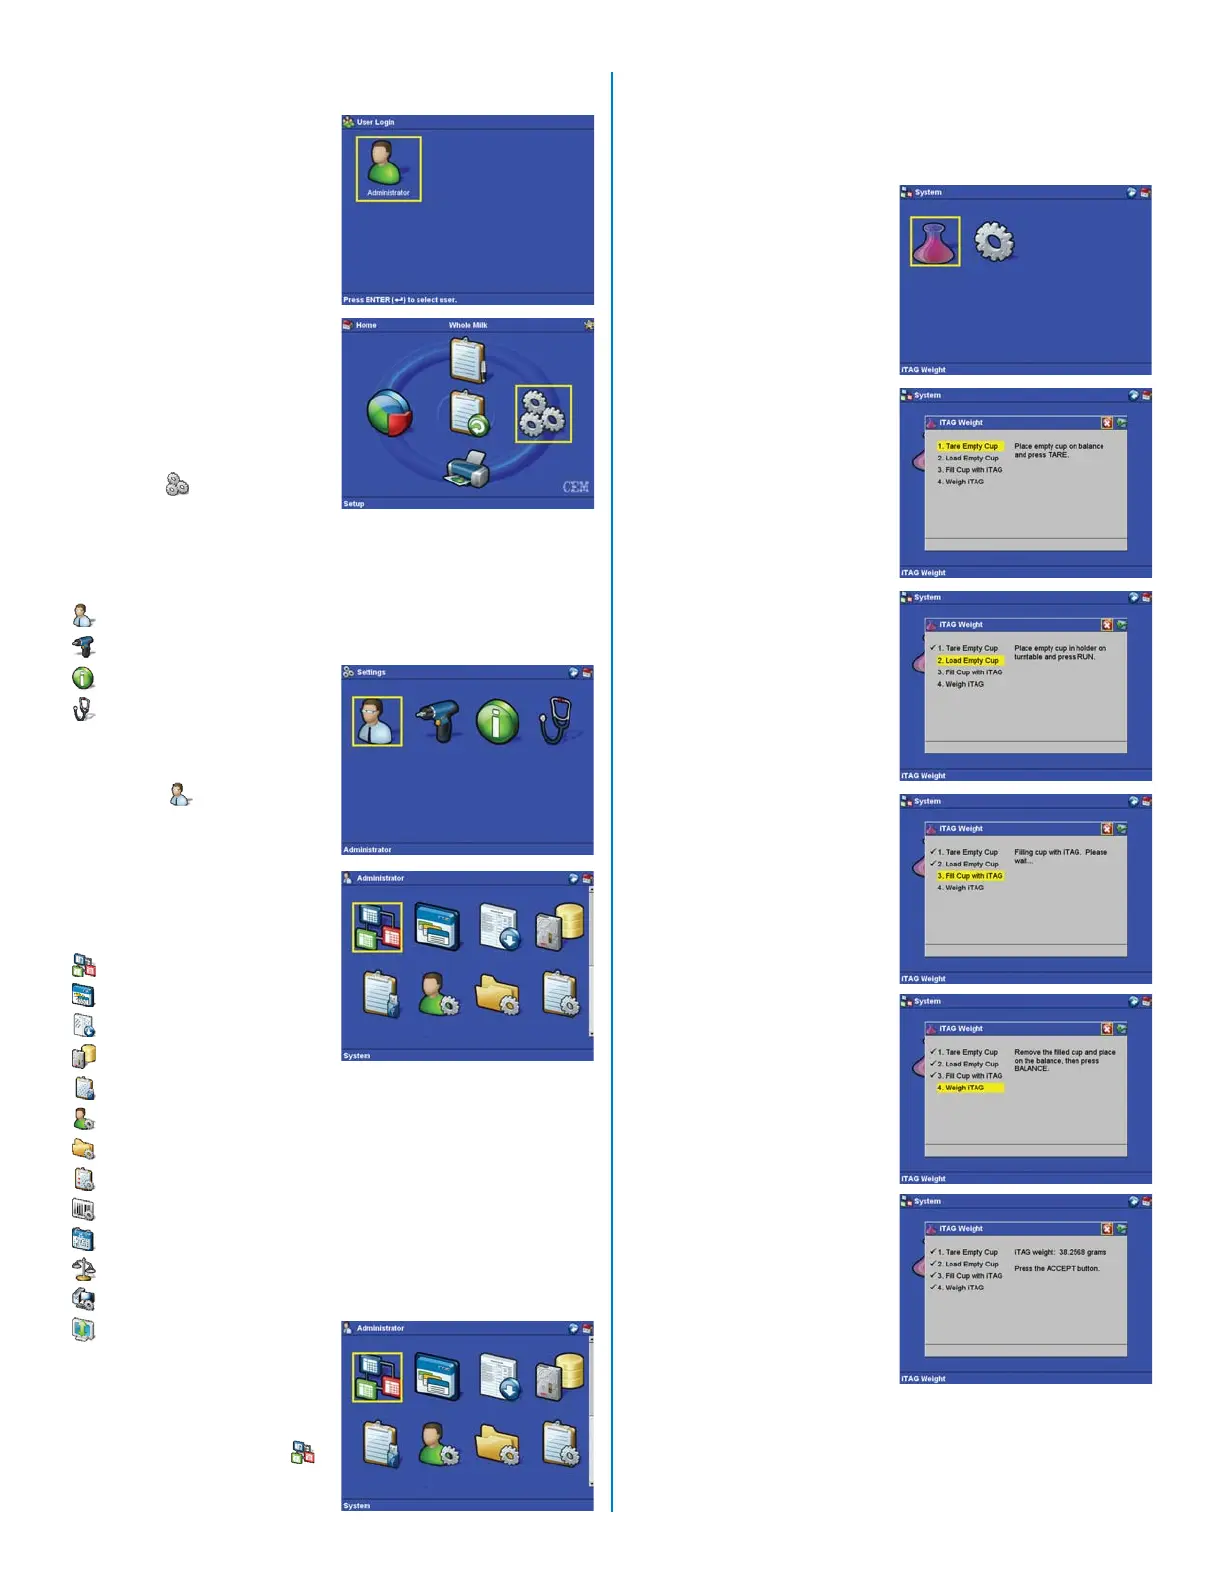
Instrument Setup
1. Press the “Enter”
key to enter the
system “Settings”
screen with admin-
istrative privileges
in order to confi gure
the instrument for
operation. Additional
“User Management”
procedures will be
outlined in the fol-
lowing procedures.
2. From the Main Screen,
using the arrow keys,
select “Setup” and
press the “Enter” key.
The “Settings” screen con-
sists of four (4) categories:
• Administrator
• Maintenance
• Information
• Diagnostics
Administrator
3. Select “Adminis-
trator” and press the
“Enter” key.
The “Administrator” screen
consists of the following
categories:
• System
• Preferences
• Data Output
• Backup/Restore
• Import/Export Data
• UserManagement
• Folder Management
• Method Management
• Sample ID Settings
• Date/Time
• Balance Settings
• Computer Settings
• Contrast
System
4. From the “Administrator”
screen, use the
arrow keys to select
“System.” Press the
“Enter” key.
iTAG® Weight
iTAG weight indicates the
repeatability of the amount
of iTAG solution dispensed
into the instrument. Three
iTAG weight tests should be
performed upon installation
and monthly thereafter.
5. From the “System”
screen, use the
arrow keys to select
“iTAG Weight.” Press
the “Enter” key.
6. Place a clean, empty
cup on the external
balance and press the
“Tare” key.
7. Remove the empty
cup from the balance
and place it in the cup
holder of the turntable.
8. Press the “Run”
key. The instrument
dispenses iTAG into
the cup. Remove the
cup with iTAG from the
turntable and place
it into the external
balance.
9. Press the “Balance” key
to weigh the iTAG.
10. The instrument will
display the iTAG weight.
Press the “Accept” key.
11. Repeat the above
test two (2) additional
times. The last two
iTAG weight results
should be within ±
.04. If the results are
within the acceptable
range, proceed with
normal operation. If the
results are not within
the acceptable range,
contact CEM Service.
NOTE
The iTAG solution
and cup used for
this iTAG weight
test can be reused.
Pour the iTAG so-
lution back into the
4-liter bottle.
10
 Loading...