33
4. Position the homogenizer with the top pointed down-
ward. Carefully remove the shaft from the stator, using
caution to prevent damage to the rotor.
CAUTION
Do not tap the bottom of the stator to remove the
lower bearing.
5. Using the cleaning brush inserted into the top of the
stator, remove (push) the lower bearing from the sta-
tor.
CAUTION
Do not permit the upper bearing to get wet.
6. Remove (slide) the upper bearing from the shaft.
7. Using the cleaning brush and mild soapy water, re-
move all sample and debris from the rotor, lower bear-
ing, the inside of the stator, and the end of the shaft.
8. Slide the upper bearing on the shaft with the largest
diameter positioned fl ush with the top of the shaft.
9. Install the shaft into the stator.
10. Install the lower bearing into the stator with the smaller
diameter inserted fi rst.
11. Install one of the service tools into the head of the sta-
tor to secure the shaft.
12. Install the rotor into the stator.
13. Using the second service tool, rotate the rotor clock-
wise until tension is observed (fi nger tight).
14. Remove both service tools.
15. Install the assembled homogenizer into the instrument
by positioning the homogenizer, pushing it upward,
and rotating it ¼ turn to the right to secure it in place in
the Sprint instrument. Gently pull downward on the ho-
mogenizer to ensure that the homogenizer is installed
securely.
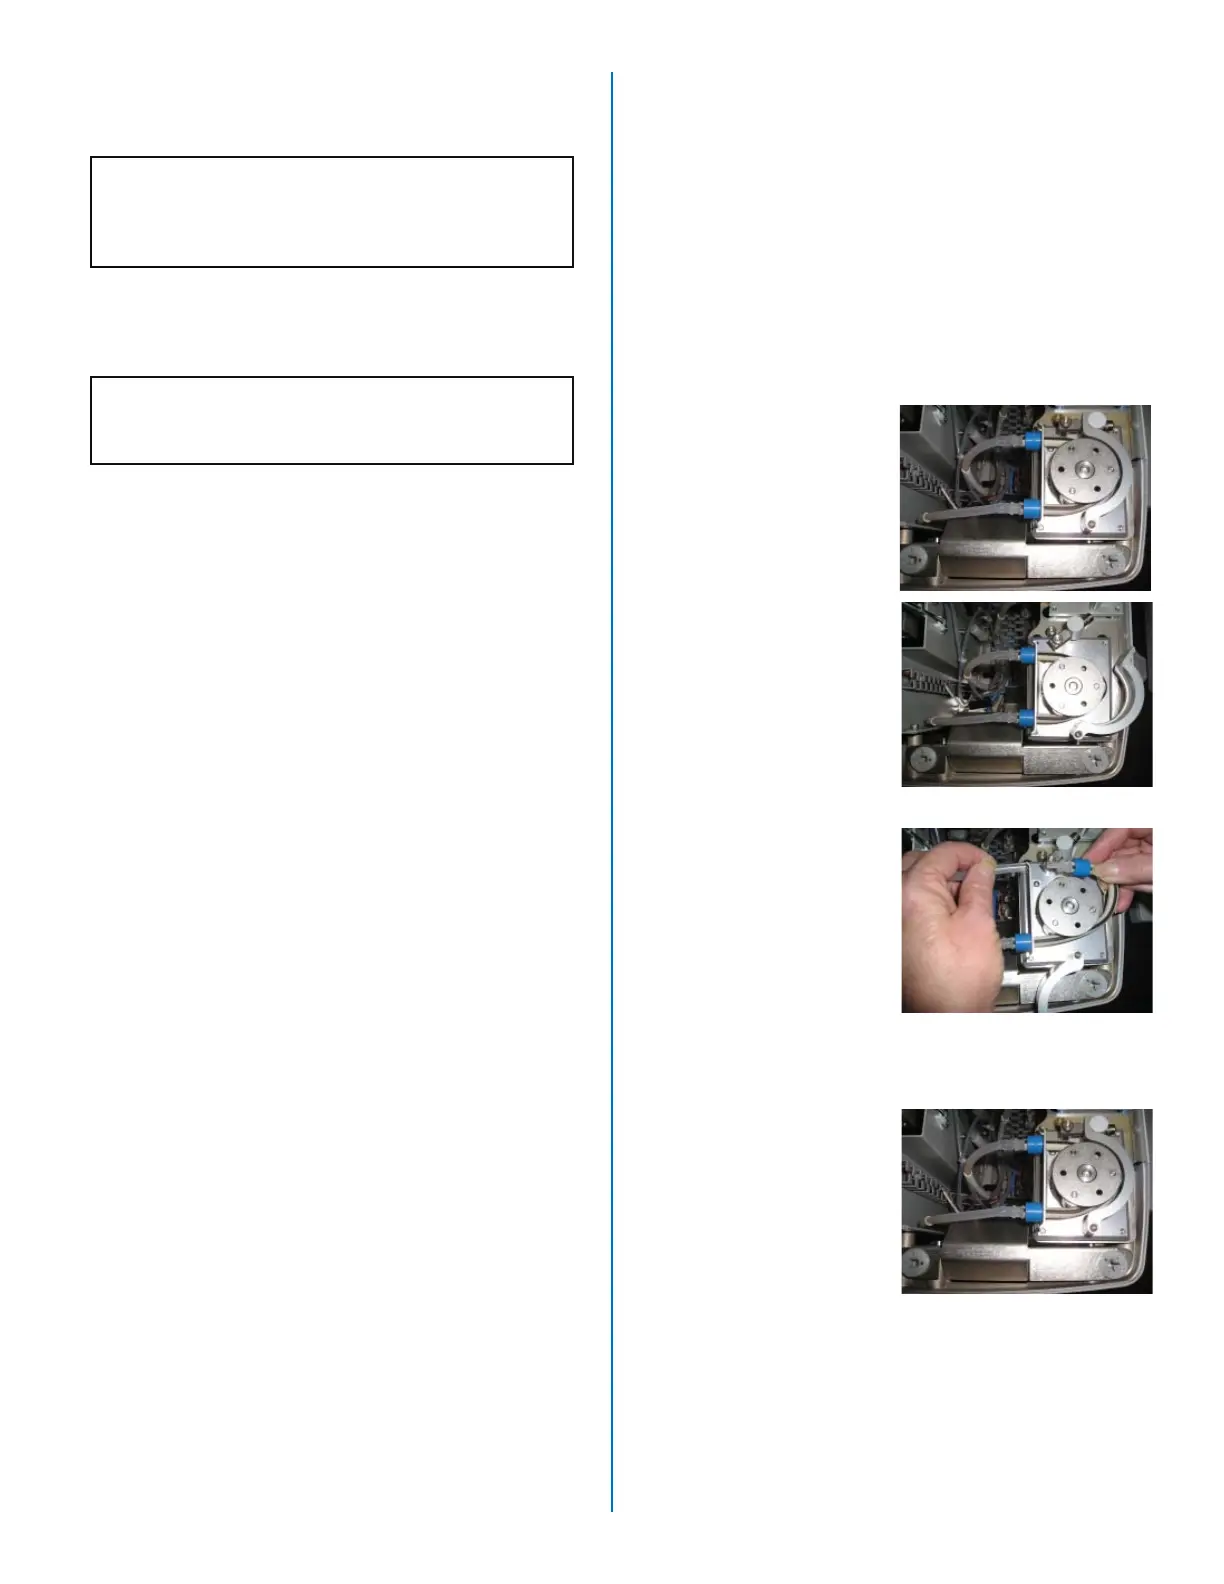
Replacement of Peristaltic
Pump Tubing (Waste and
Optics)
1. Turn the instrument off
and remove the power
cord from the instru-
ment.
2. Using a Phillilps screw-
driver, remove the
screw securing the
instrument cover. The
screw is located on the
underside of the cover
and to the right of the
barcode reader.
3. Lift the instrument cover
to permit access to the
peristaltic pump tubing.
4. Push the release latch
toward the center of the
instrument to release
the tubing collar.
5. Position the tubing
collar away from the
tubing.
6. Disconnect the two
sections of waste/optics
tubing from the connec-
tors on the peristaltic
pump tubing.
7. Place the new peristaltic
pump tubing around
the pump rotor with
the stripe on the tub-
ing facing upward as
illustrated.
8. Connect the two sec-
tions of waste/optics
tubing to the peristaltic
pump tubing.
9. Position the tubing col-
lar.
10. Push the release latch
toward the side of the
instrument to lock the
tubing collar into posi-
tion.
 Loading...