Data Output
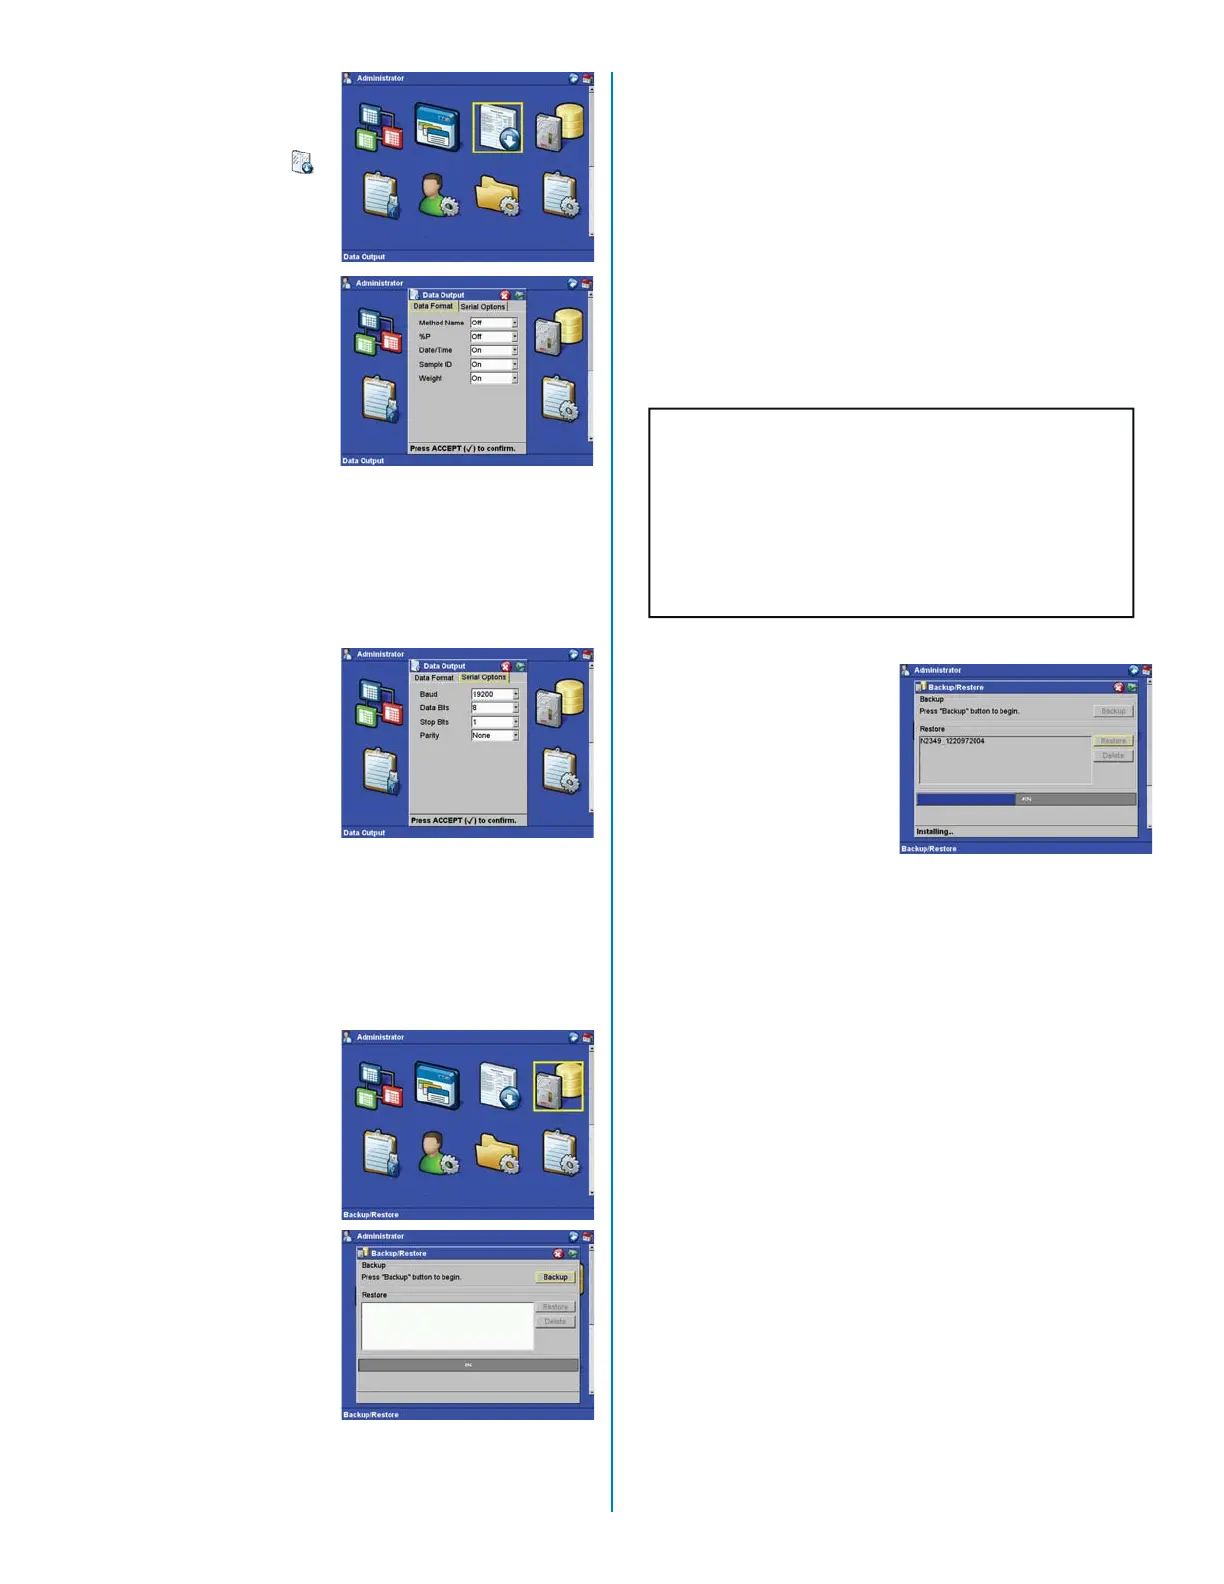
24. From the “Administrator”
screen, use the
arrow keys to select
“Data Output.”
Data Format
25. Press the “Enter” key
to access the “Data
Format” screen.
Note: “Data Format”
consists of information to
be output to a database
during data collection for the
system tests.
26. Use the arrow keys to
select and toggle on
and off the data output
options - “Method
Name,” “% Protein,”
“Date/Time,” “Sample
ID,” and “Weight.”
Serial Options
27. Use the arrow keys
to select the “Serial
Options” screen.
28. Use the arrow keys to
select and set the serial
options for the external
data output source -
“Baud,” “Data Bits,”
“Stop Bits,” and “Parity.”
29. Press the “Enter” key to
save the selected serial
option(s).
Backup/Restore
30. From the “Administrator”
screen, use the
arrow keys to select
“Backup/Restore.”
Backup
31. Use the arrow keys to
select “Backup.” Note:
“Backup” backs up the
methods stored in the
instrument software.
The information can
then be placed on a
personal computer.
32. Place a jump drive into
one of the USB ports of
the instrument. Press
the “Enter” key.
Note: If a jump drive is
not installed in one of the
USB ports, the software will
prompt the user that a jump
drive is required.
With the jump drive
installed, a screen appears
indicating the percentage
of the fi les backed up on
the jump drive. Once all
methods are backed up,
the software returns to the
“Setup” screen.
Restore
33. Use the arrow keys to
select “Restore.” Note:
“Restore” transfers
“backed up” methods
and information from
the jump drive to the
system fi les.
34. Press the “Enter” key.
Note: If a jump drive
is not installed in one
of the USB ports, the
software will prompt
the user to install a
jump drive containing
the information to
be restored to the
instrument. If a jump
drive is installed,
a screen appears
indicating the
percentage of the
information on the
jump drive that has
been restored to the
instrument memory.
CAUTION
Do not remove the jump drive from the USB port
during method restoration. Removal of the jump
drive prior to completion of method backup or res-
toration will corrupt the data on the jump drive
and/or the system fi les. Wait 15 - 20 seconds af-
ter completion of method restoration prior to re-
moval of the jump drive.
12
 Loading...