45. From the Main Screen,
using the arrows, select
“Setup” and press
the “Enter” key.
46. Using the arrows, select
“Maintenance” and
press the “Enter” key.
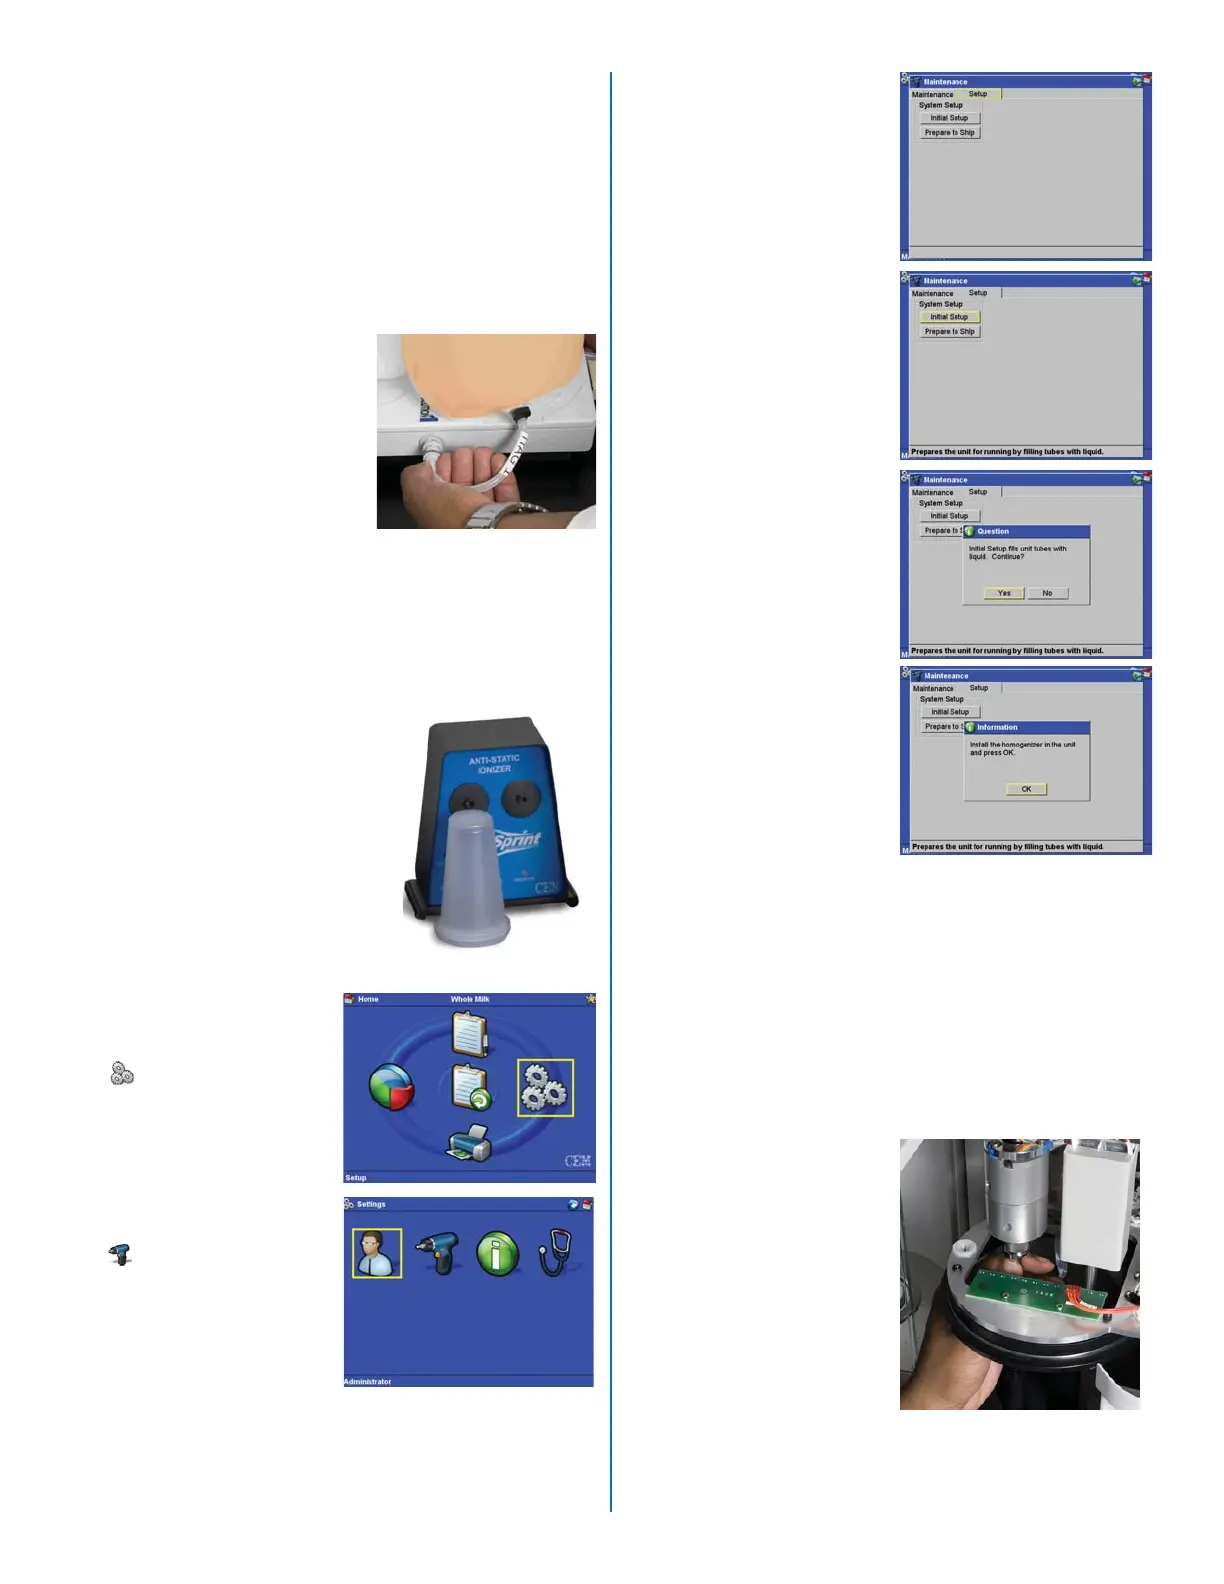
Fluid Tubing Preparation
47. From the Maintenance
Menu, highlight and
select “Setup” to fi ll the
internal tubing of the
instrument.
48. Press the “down” arrow
key to select “Initial
Setup.”
49. Press the “Enter” key.
41. Connect the tubing extend-
ing from the bottles to the
connectors on the side of
the bottle stirrer, matching
the labeling on the tubing
with the labeling on the
bottle stirrer and rotate it
clockwise.
44. In order to obtain more ac-
curate sample weights and
therefore more accurate
sample results, place six (6)
to eight (8) cups in front of the
anti-static ionizer to eliminate
static charge on the cups prior
to placing them in the balance.
42. Place the cup lids and the fi lters from the SPRINTPAK
into the small plastic containers furnished with the ac-
cessory kit. Place the containers on top of the instru-
ment or in a position where they are easily accessible.
43. Turn the anti-static ionizer on by pressing the red but-
ton on the back of the ionizer.
h. Completely loosen the lids on each of the
bottles so that the lid is sitting on the bottle,
but not tightened, to prevent a vacuum which
can stop fl ow.
40. Place each of the solution bottles on the bottle stirrer
in accordance with the labeling (iTAG® Solution 1 in
the back position, Solution 2 in the middle position,
and Solution 3 in the front position - facing the front of
the instrument.
50. Press the “Enter” key to
select “Yes” and verify
that the tubing is to be
fi lled with liquid.
Note: This process does not
require repeating once all
tubing is fi lled.
Once the tubing is fi lled with
the proper fl uids, a screen
will prompt the user to install
the homogenizer into the
instrument.
51. Remove the instrument power cord from either the
electrical outlet or the back of the instrument.
52. Remove the screw securing the instrument top cover
and carefully lift the cover.
53. Locate the homogenizer assembly supplied with the
instrument accessories.
Homogenizer Installation
54. Gripping the top of the
homogenizer with one
hand, install the ho-
mogenizer assembly
into the instrument by
positioning the homog-
enizer in the opening in
the Z axis as illustrated,
pushing it upward, and
rotating it ¼ turn to
the right to secure it in
place in the instrument.
6

 Loading...