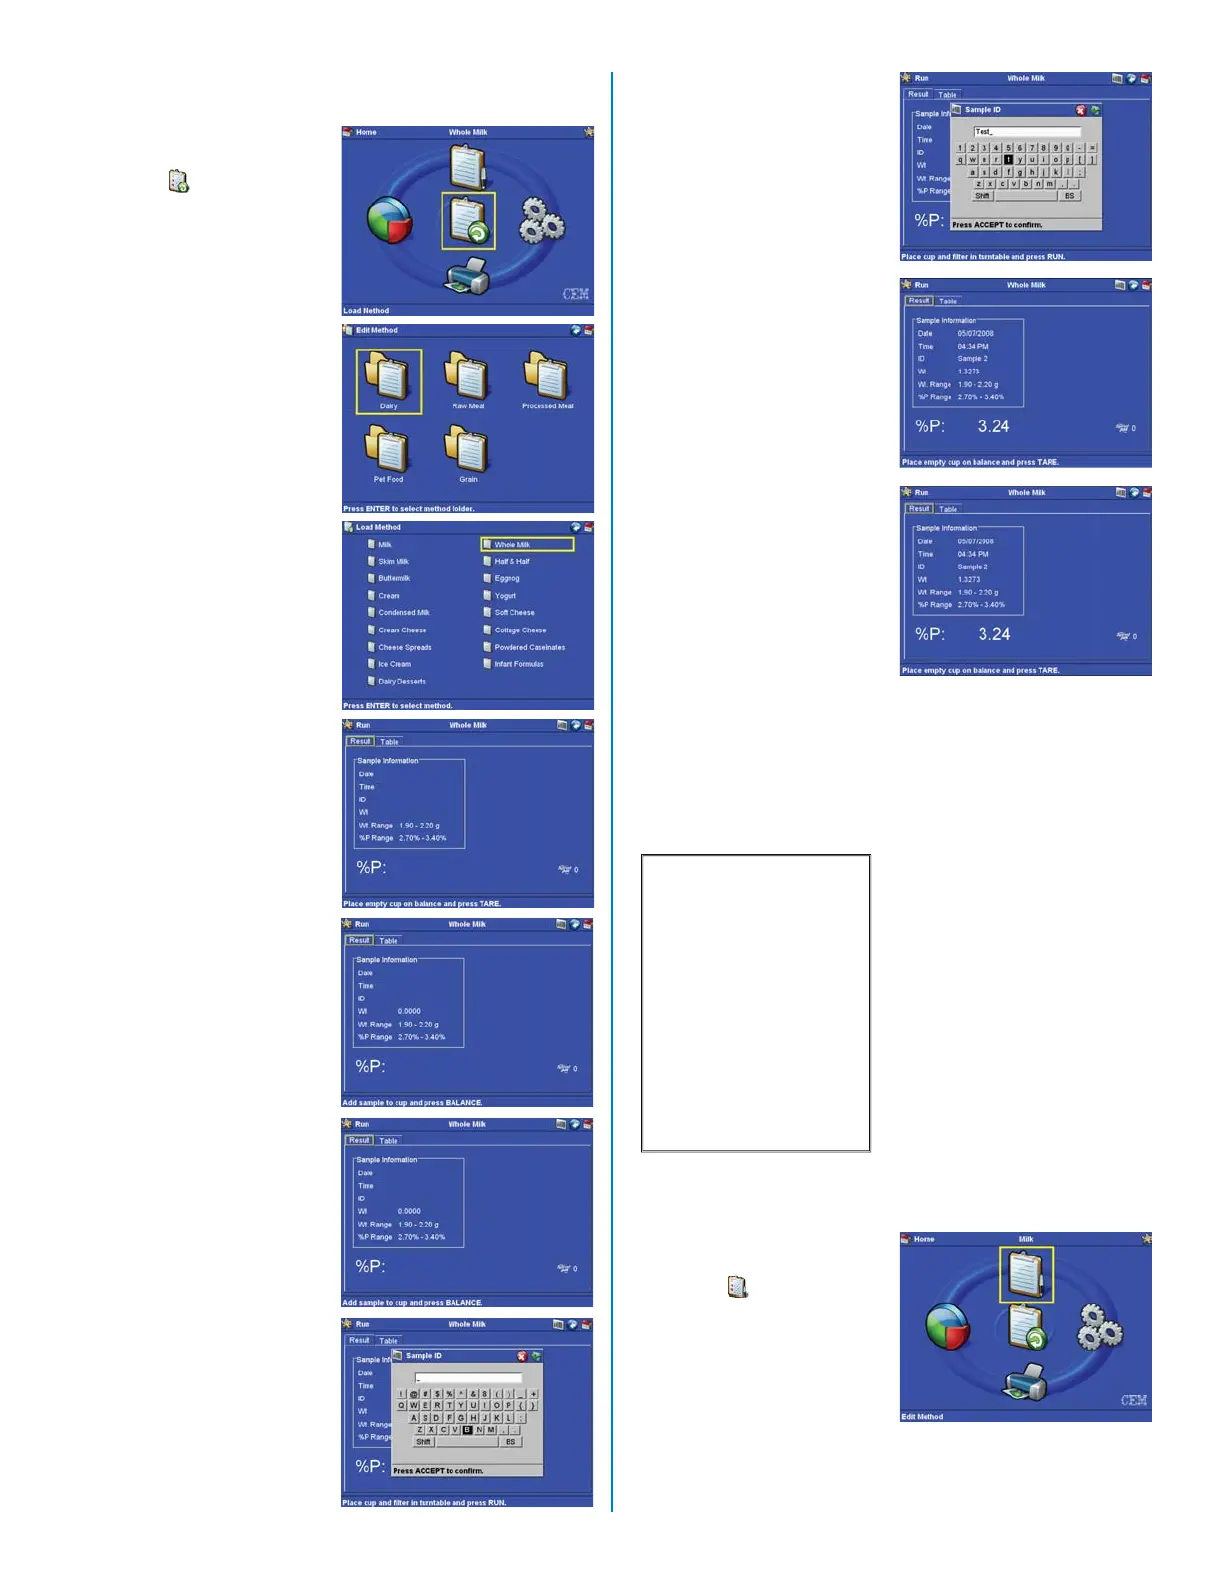
Instrument Operation
1. From the Main Screen,
using the arrow keys,
select “Load Method”
and press the “Enter”
key.
2. Using the arrow keys,
select the appropriate
method folder and press
the “Enter” key.
3. Using the arrows, select
the appropriate method
to load and press the
“Enter” key.
4. Using an empty cup
from the stack of cups
positioned in front of the
anti-static ionizer, wave
the open end of the cup
once or twice within
1/2 inch of the front of
the ionizer to eliminate
static. Place the cup on
the external balance.
5. Press the “TARE” key
on the Sprint keypad.
6. Place the sample into
the cup on the external
balance.
7. Press the “Balance” key.
8. Place the cup and
sample in the turntable.
Place a fi lter in the
turntable.
9. Press the “Run” key.
12. The instrument au-
tomatically closes
the instrument door,
dispenses the proper
amount of fl uids, and
homogenizes and ana-
lyzes the sample.
13. Open the instrument
door, and remove the
cup and fi lter. Place a lid
on the cup and discard
it.
14. To continue using the
same method, repeat
steps 4 through 13.
15. To continue operation
using a different method,
press the “Home” key,
and repeat the above
steps.
CAUTION
SPRINTPAK fi lters
and cups are de-
signed for one-time
use only. Reuse of
the fi lters and/or cups
can cause clogging
which can do exten-
sive damage to the in-
strument and void the
instrument warranty.
Load Method
Edit Method
1. From the Main Screen,
using the arrow keys,
select “Edit Method”
and press the “Enter”
key.
22
10. If an identifi cation
number is required for
the test, use the arrows
to select each letter or
number of the sample
identifi cation.
11. Once the sample
identifi cation is entered,
press the “Accept” key.
 Loading...