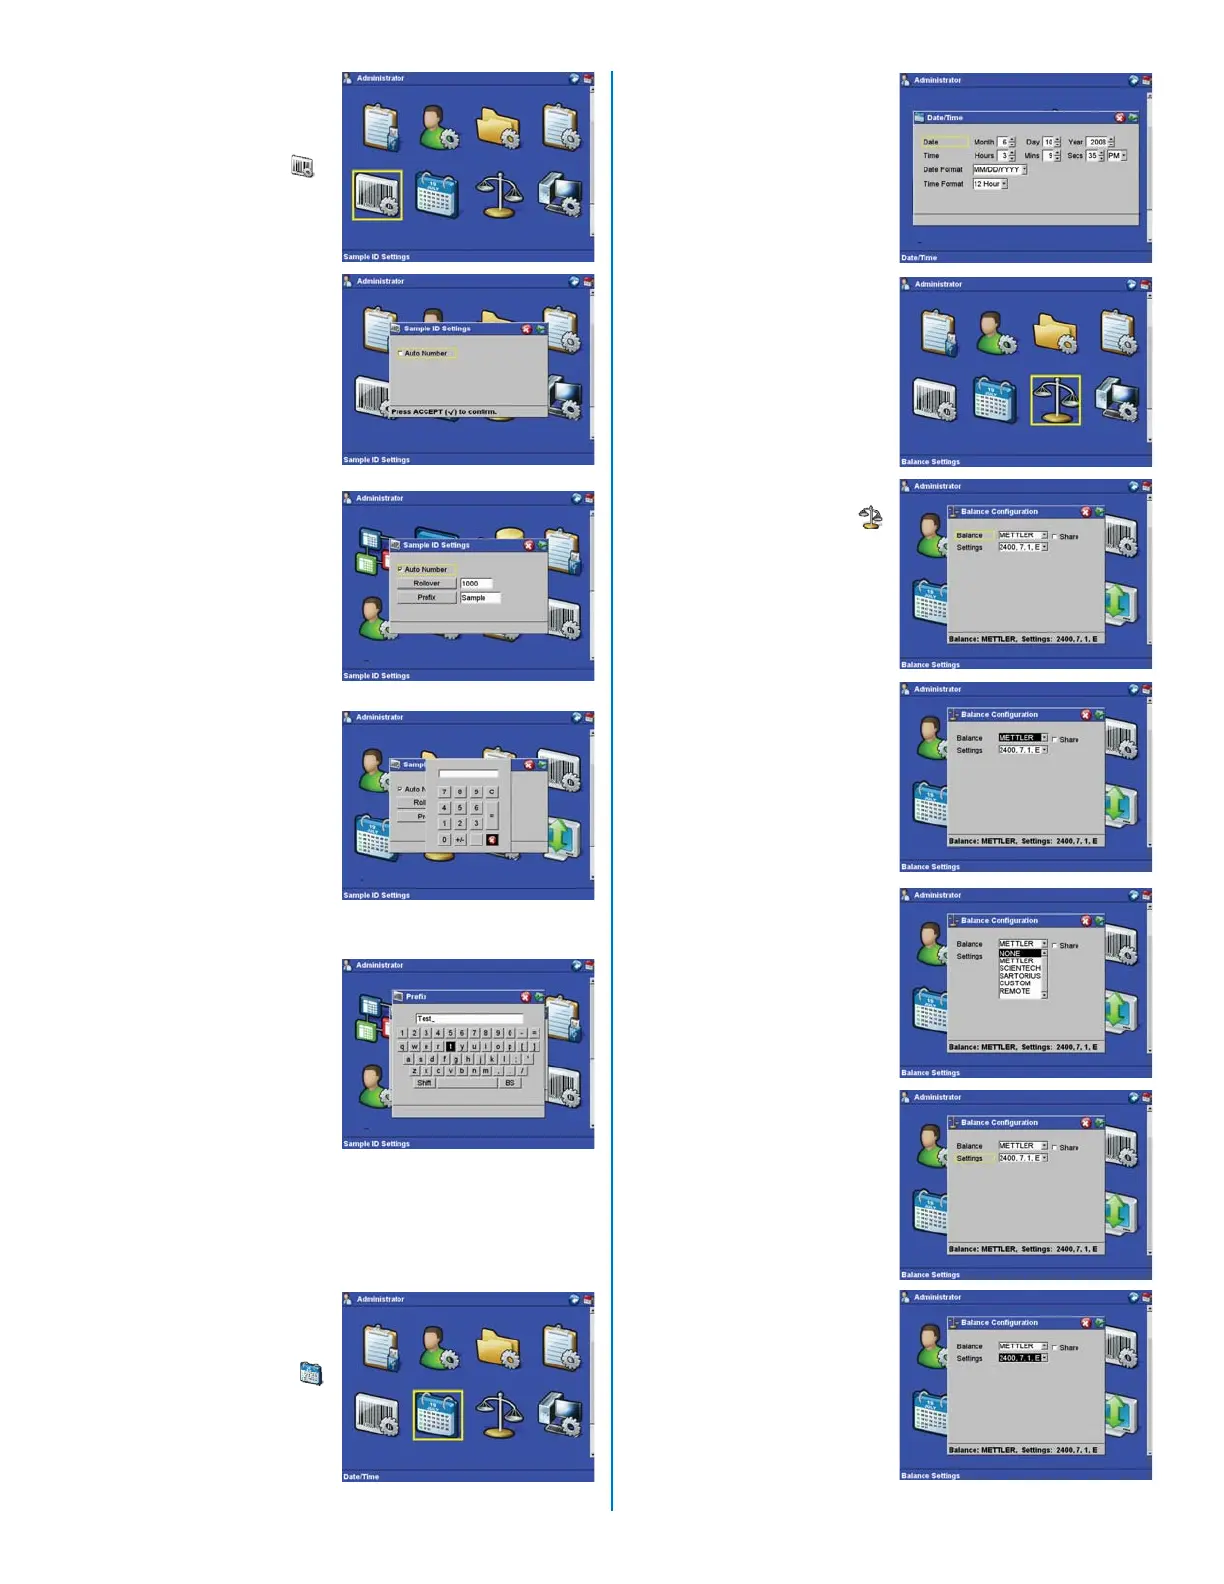
Sample ID Settings
98. From the “Administrator”
screen, use the
arrow keys to select
“Sample ID Settings.”
99. Use the “Enter” key
to toggle the “Auto
Number” on or off.
With the Auto Number
function turned off,
no sample ID will be
automatically used.
With the Auto Number
function turned on, the
following screen will
appear.
Note: A “rollover” sample ID
is consecutive numbering
for tests, beginning with
one (1) and ending with
the last number prior to the
rollover setting. A “prefi x”
is a defi ned alpha/numeric
designator prior to each test
number.
100. To set a rollover
number, use the
arrow keys to select
“Rollover.” Using the
arrow keys, select each
character of the ending
rollover number and
press the “Enter” key.
The rollover number
must not exceed 1000.
101. To set a prefi x for each
sample ID number
(Test 1), use the arrow
keys to select “Prefi x.”
Using the arrow keys,
select each alpha/
numeric character of
the prefi x and press the
“Enter” key. Press the
“Accept” key to store
the selected prefi x.
Date/Time
102. From the
“Administrator”
screen, press the
arrow keys to select
“Date/Time.”
17
103. The date and time are
factory set with the US
format (MM/DD/YYYY).
If necessary or desired,
use the arrow keys to
navigate and change
the date or time, or the
date/time (12 hour/24
hour) format to be
displayed. Once the
date is as desired,
press the “Accept” key.
Balance Settings
104. From the
“Administrator”
screen, use the
arrow keys to select
“Balance Settings.”
105. From the “Balance
Confi guration” screen,
press the “right” arrow
key to select (highlight)
the balance type.
106. Press the “down” arrow
key to display the
balance type choices.
107. Use the arrow keys to
select the appropriate
balance to be utilized
with the Sprint
instrument.
108. Press the “Enter” key.
109. Using the arrow keys,
select “Settings” to
select the proper
settings for the
selected balance.
Note: If using a balance
other than Mettler
which is optional with
the instrument, refer
to the manufacturer’s
instruction manual for
specifi c procedures
for setup and
confi guration.
 Loading...