CVT Drive and brake system
79
Belt installation notes:
• Install only correct OEM belts.
Incorrect belts may cause problems that effect
the performance and/or safety of the tractor.
• Apply a small amount of anti-seize compound to
the engine crankshaft before installing the crank-
shaft pulley.
• Apply a small amount of thread locking com-
pound such as Loctite 271
TM
(red) to the threads
of the crankshaft bolt.
• Tighten the crankshaft bolt to a torque of 36-50
ft-lbs (50-68 N-m).
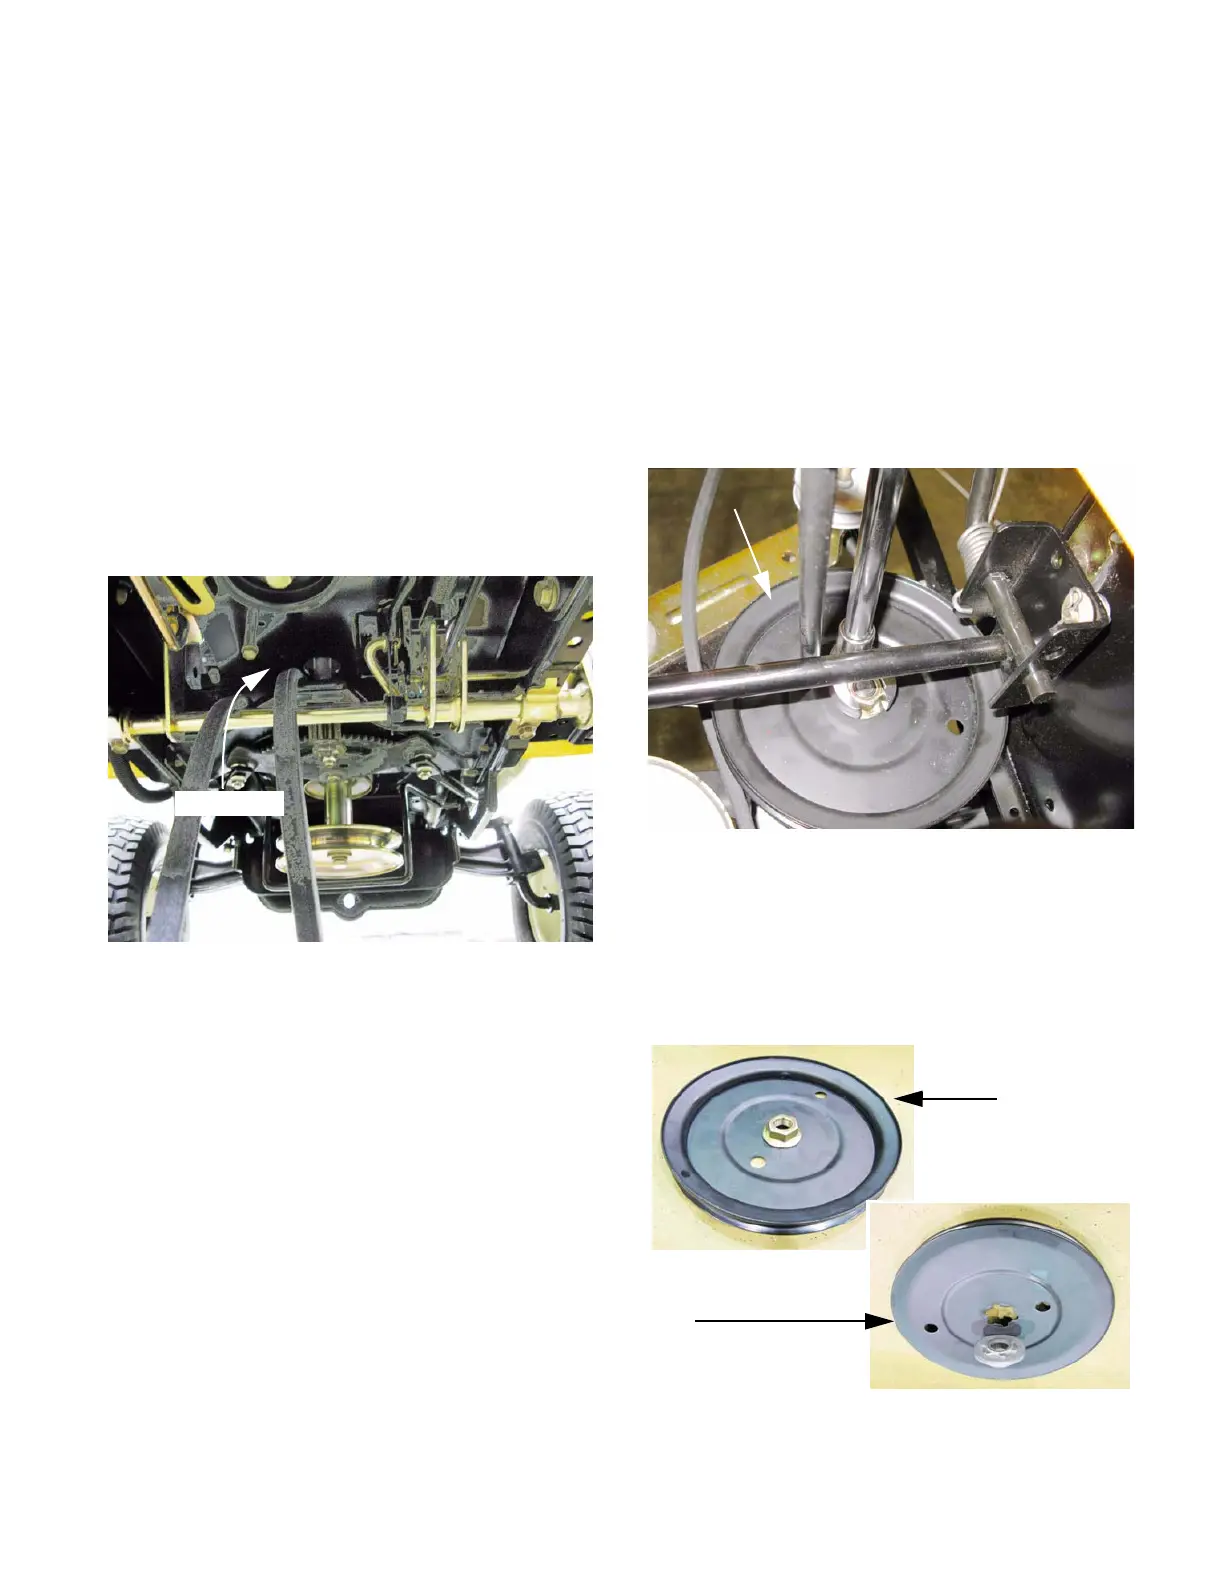
• The belt is routed to the left of the steering shaft,
and the fore-most keeper pin goes between the
runs of the belt. See Figure 6.73.
7. Thoroughly test the operation of the drive sys-
tem and all safety features before returning the
tractor to service.
Figure 6.73
Belt routing
Transaxle removal and replacement
CAUTION: The battery will be removed in this
procedure. Review the Operator’s Manual and
the Electrical chapter of this manual for impor-
tant safety information about handling batteries
before proceeding.
1. Remove the upper drive belt as described in the
drive belt replacement section of this chapter.
2. Remove the input pulley and input pulley adap-
tor from the transmission using a 7/8” wrench.
See Figure 6.74.
NOTE: A crow foot wrench with a long exten-
sion works well for this step. Use a tapered pin
to keep the pulley from rotating.
NOTE: The recessed side of the pulley faces up.
See Figure 6.75.
Figure 6.74
Input pulley
Figure 6.75
Top
Bottom
 Loading...