4-19
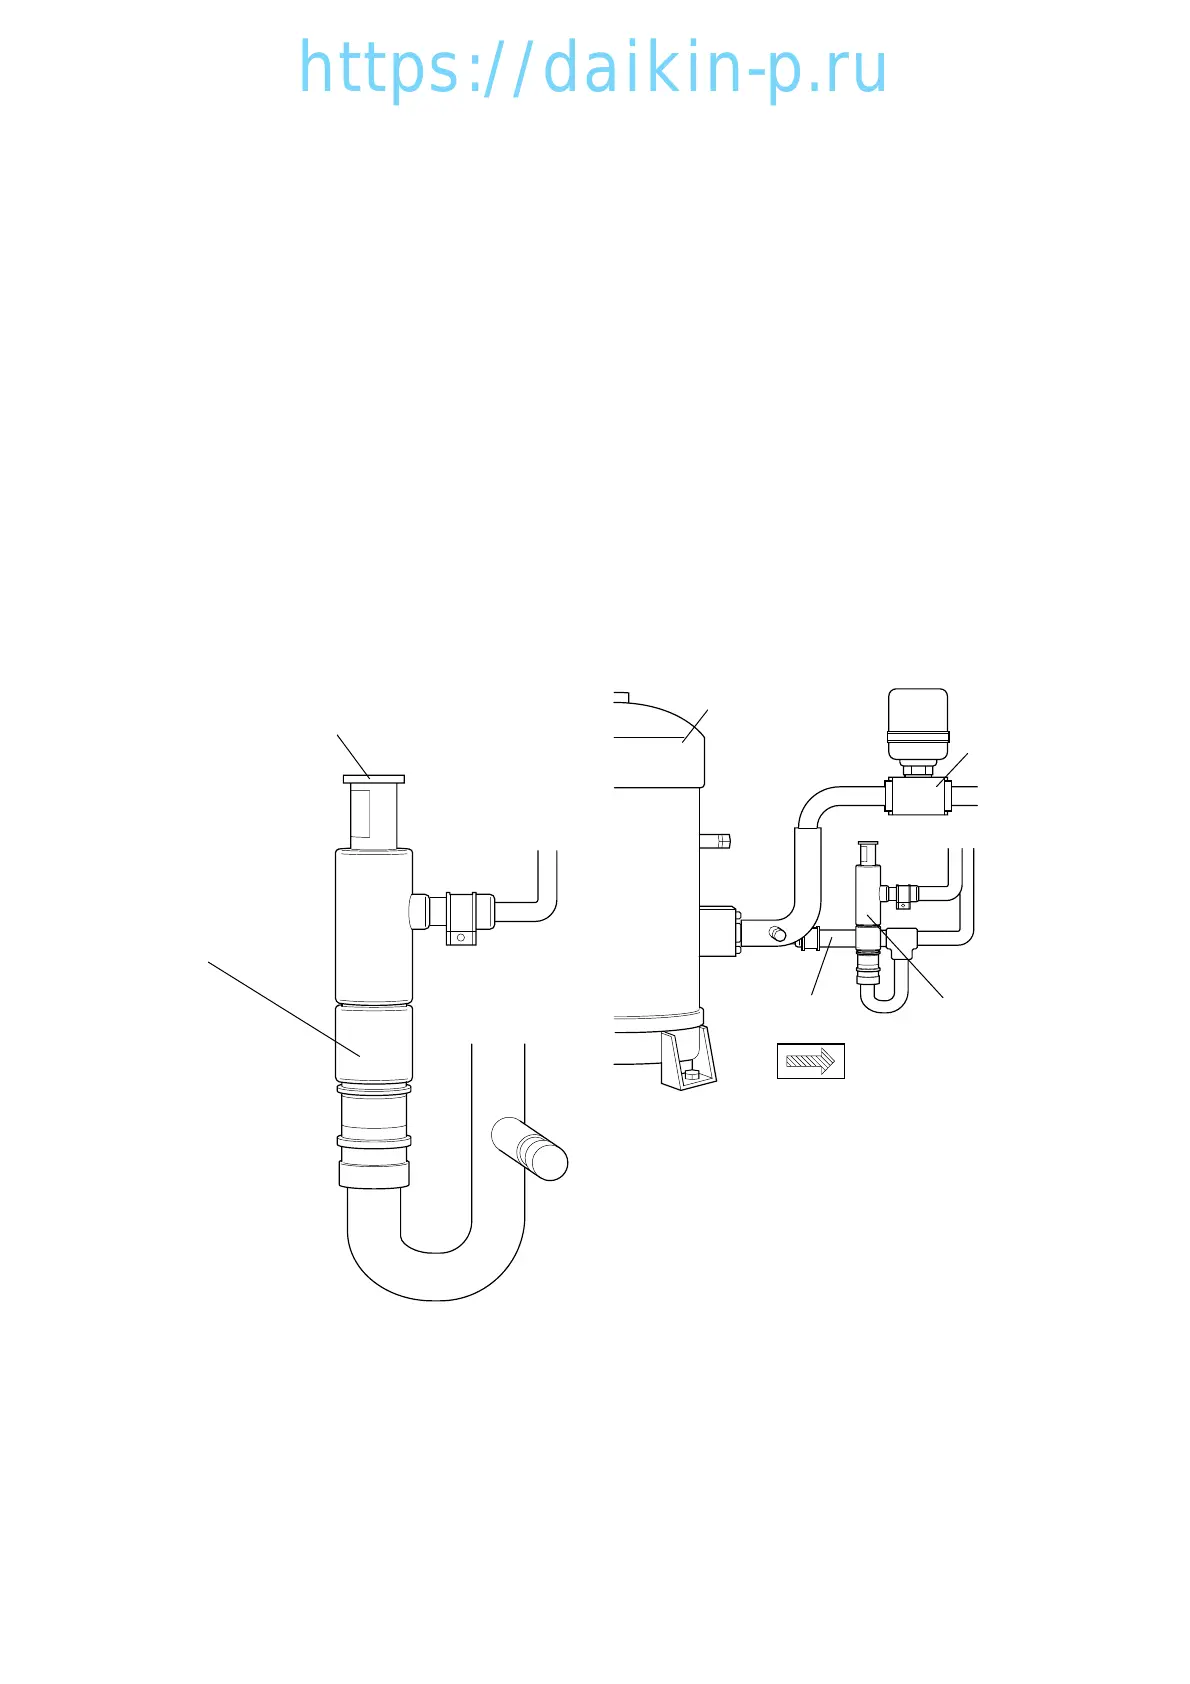
Discharge pressure
regulating valve body
Protection cap
4.2.8
Discharge pressure regulating valve
● Model KVR15
(1) Replacing the valve
q Remove the protection cap to conduct brazing
for the valve body.
Be sure not to turn the regulating screw inside
the valve, since the pressure has been
adjusted to 690 kPa (7.0 kg/cm
2
).
w When brazing, it is required to cool the valve
body in order to keep the temperature of
valve body below 140 ˚C by covering the body
with wet cloth or the like.
e After brazing work, set and tighten the
protection cap.
The tightening torque should be 8 to 10 N m.
Apply lock-tight, etc. on the screw section to
avoid loosening of the cap.
r After replacement, carry out refrigerant
leakage check, and make sure there are no
leaks.
4.2.9 Check valve
● Model LCV(B)5
(1) Replacement procedure
q Remove the pipe clamp which fixes the
check valve, then heat up the valve to
disconnect the brazed joint.
w Install the new check valve taking care to
install it in the correct direction, which is the
same direction as the arrow shown in the
label.
e Conduct brazing while cool the center part of
valve with a wet cloth to keep the
temperature of the valve body below 120 ˚C
(248˚ F)
r After replacing the valve, carry out refrigerant
leakage check, and make sure that there are
no leaks.
Check valve
Discharge
pressure
regulating valve
Compressor
Suction
modulation
valve
04LXE10E-A(9-24)07.2.1918:50ページ4-19
 Loading...