RAPID CONFIGURATION
20
P2X-SERIES™
.
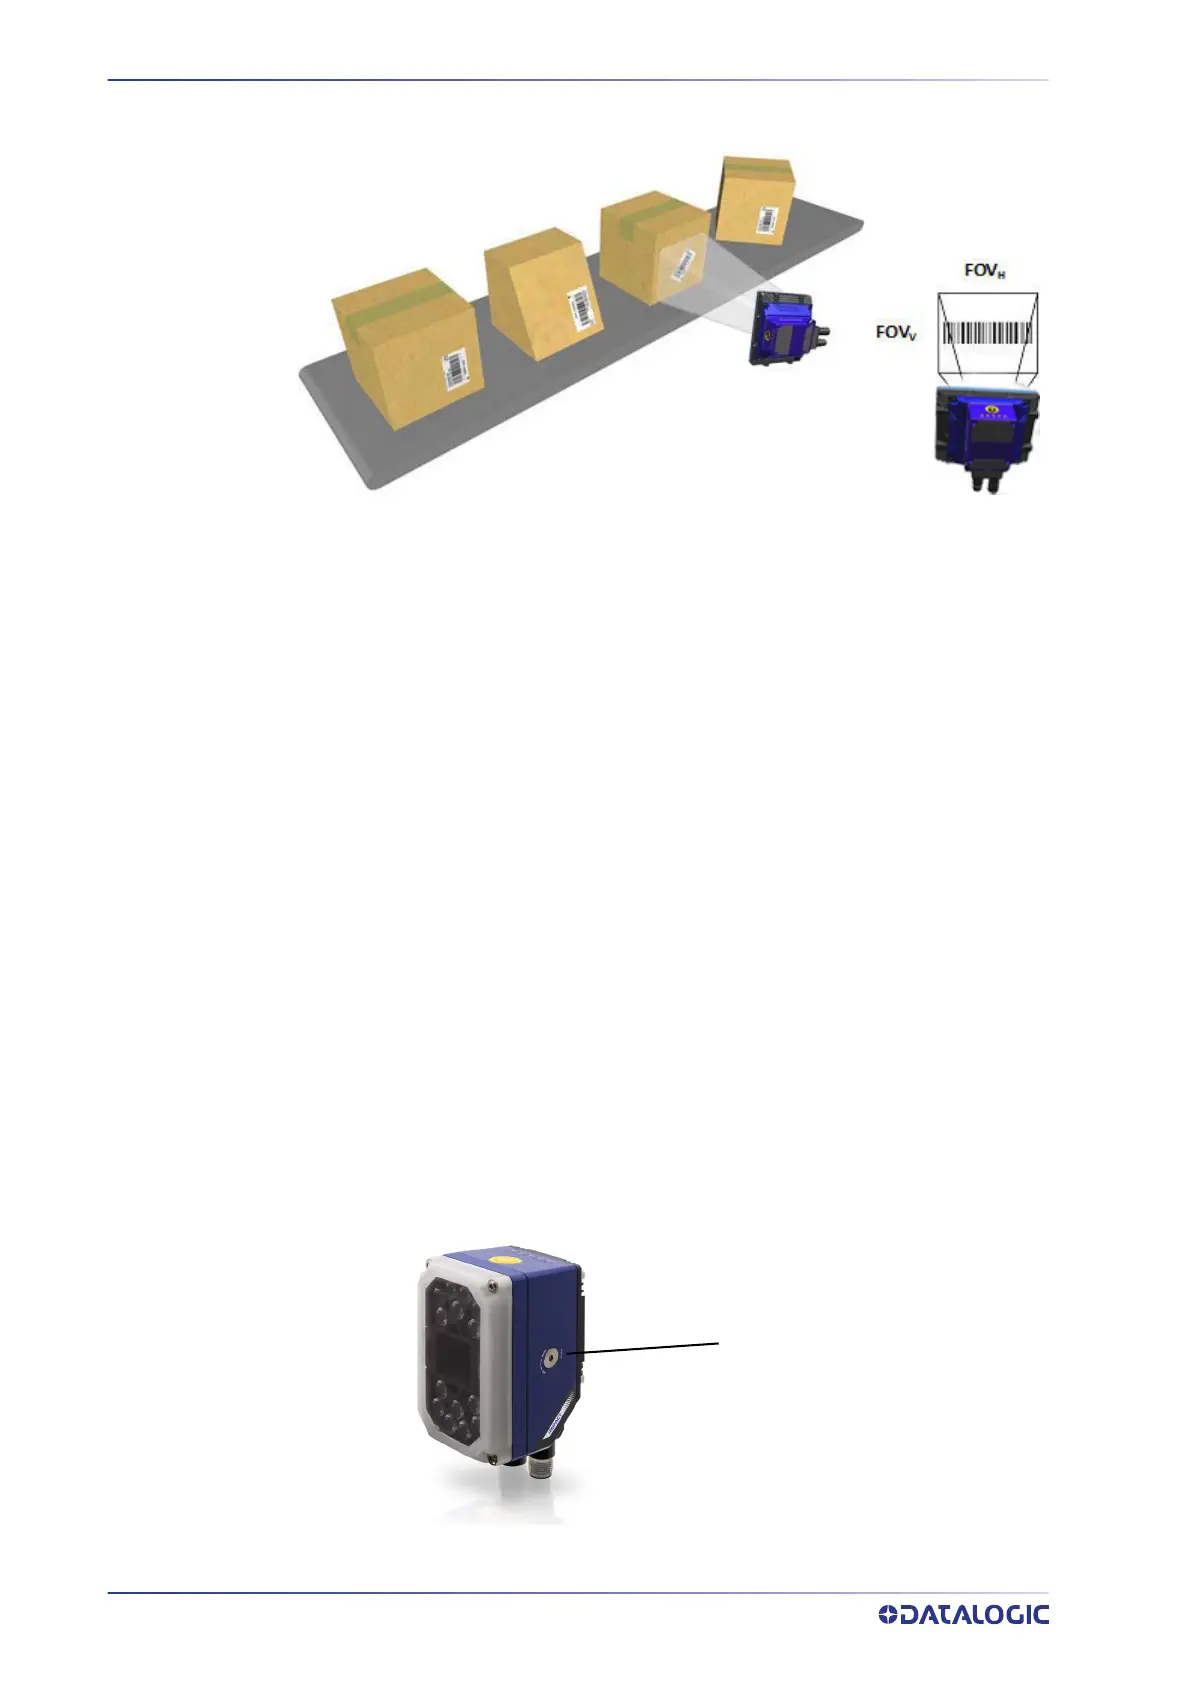
Figure 9 - Pitch, Tilt and Skew Angles
STEP 4 – FOCUS THE CAMERA
To adjust the P2x-Series™ lens, use VPM to continuously snap and display an image. Use
the camera Focus adjustment on the side of the camera to adjust the focus.
1. Install or change the lens, if necessary. (See “STEP 2 – Install the lens and illumina-
tor” on page 13.)
2. Power the camera on. The “POWER ON” LED (blue) on the rear of the camera indi-
cates that the camera is correctly powered.
3. Start Impact VPM and connect to the camera.
4. Direct the camera toward a correctly lighted calibration image or other clearly
defined object.
5. Select the Settings tab, then click the Camera system object.
6. In the Camera Setup tab, click the Live button.
7. Adjust the lens until the image is clearly in focus in the VPM image window. Turn
the Focus Adjustment clockwise to focus on near objects. Turn it counter-clock-
wise to focus on objects that are further away.
8. When focusing is complete, click the Snap button in the Camera Setup tab. You
can now calibrate the camera, if needed.
No Pitch, Tilt or Skew
Pitch
Minimize
Tilt
any angle
inside FOV
Skew
Assure at least 10°
 Loading...