c. Integrated storage controller card
d. Internal USB key (if applicable)
e. Internal USB key (if applicable)
f. USB 3.0 module (if applicable))
g. Processors and heat sink modules
h. Processors blanks (if installed)
CAUTION: To prevent damage to the processor socket when replacing a faulty system board, ensure that you
cover the processor socket with the processor dust cover.
i. Memory modules and memory module blanks
j. Network daughter card
Steps
1. Disconnect all cables from the system board.
CAUTION: Take care not to damage the system identification button while removing the system board from the
chassis.
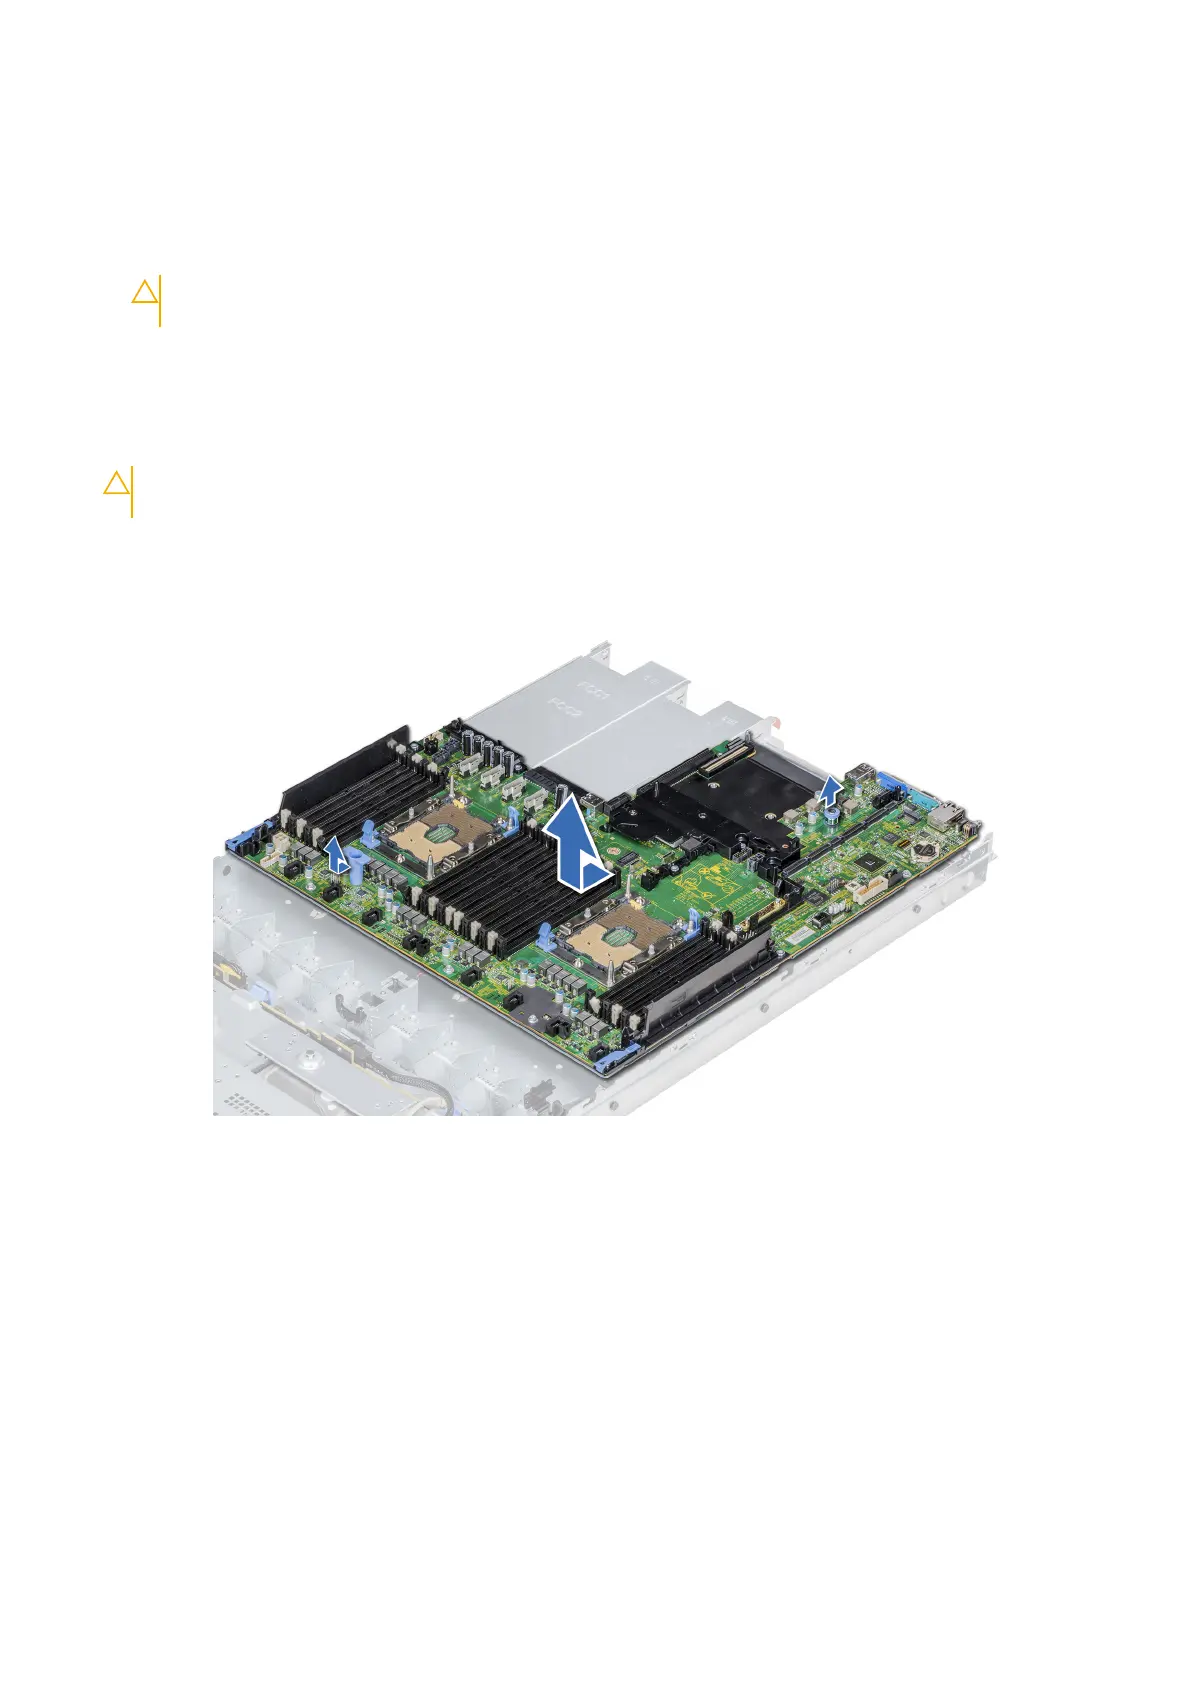
2. Holding the post, lift the blue release pin, and slide the system board toward the front of the system to disengage the connectors from
the slots on the chassis.
3. Incline the system board at an angle, and lift the system board out of the chassis.
Figure 110. Removing the system board
Next steps
Install the system board.
Installing the system board
Prerequisites
Follow the safety guidelines listed in Safety instructions on page 71.
Steps
1. Unpack the new system board assembly.
158
Installing and removing system components
 Loading...