215
© 2017 Eaton. All rights reserved
2018.12.12
Range Valve Removal and Installation | Service Procedures TRSM0940
Range Valve Installation
Important: Lubricate O-rings with Eaton Fuller silicone
71214 or equivalent.
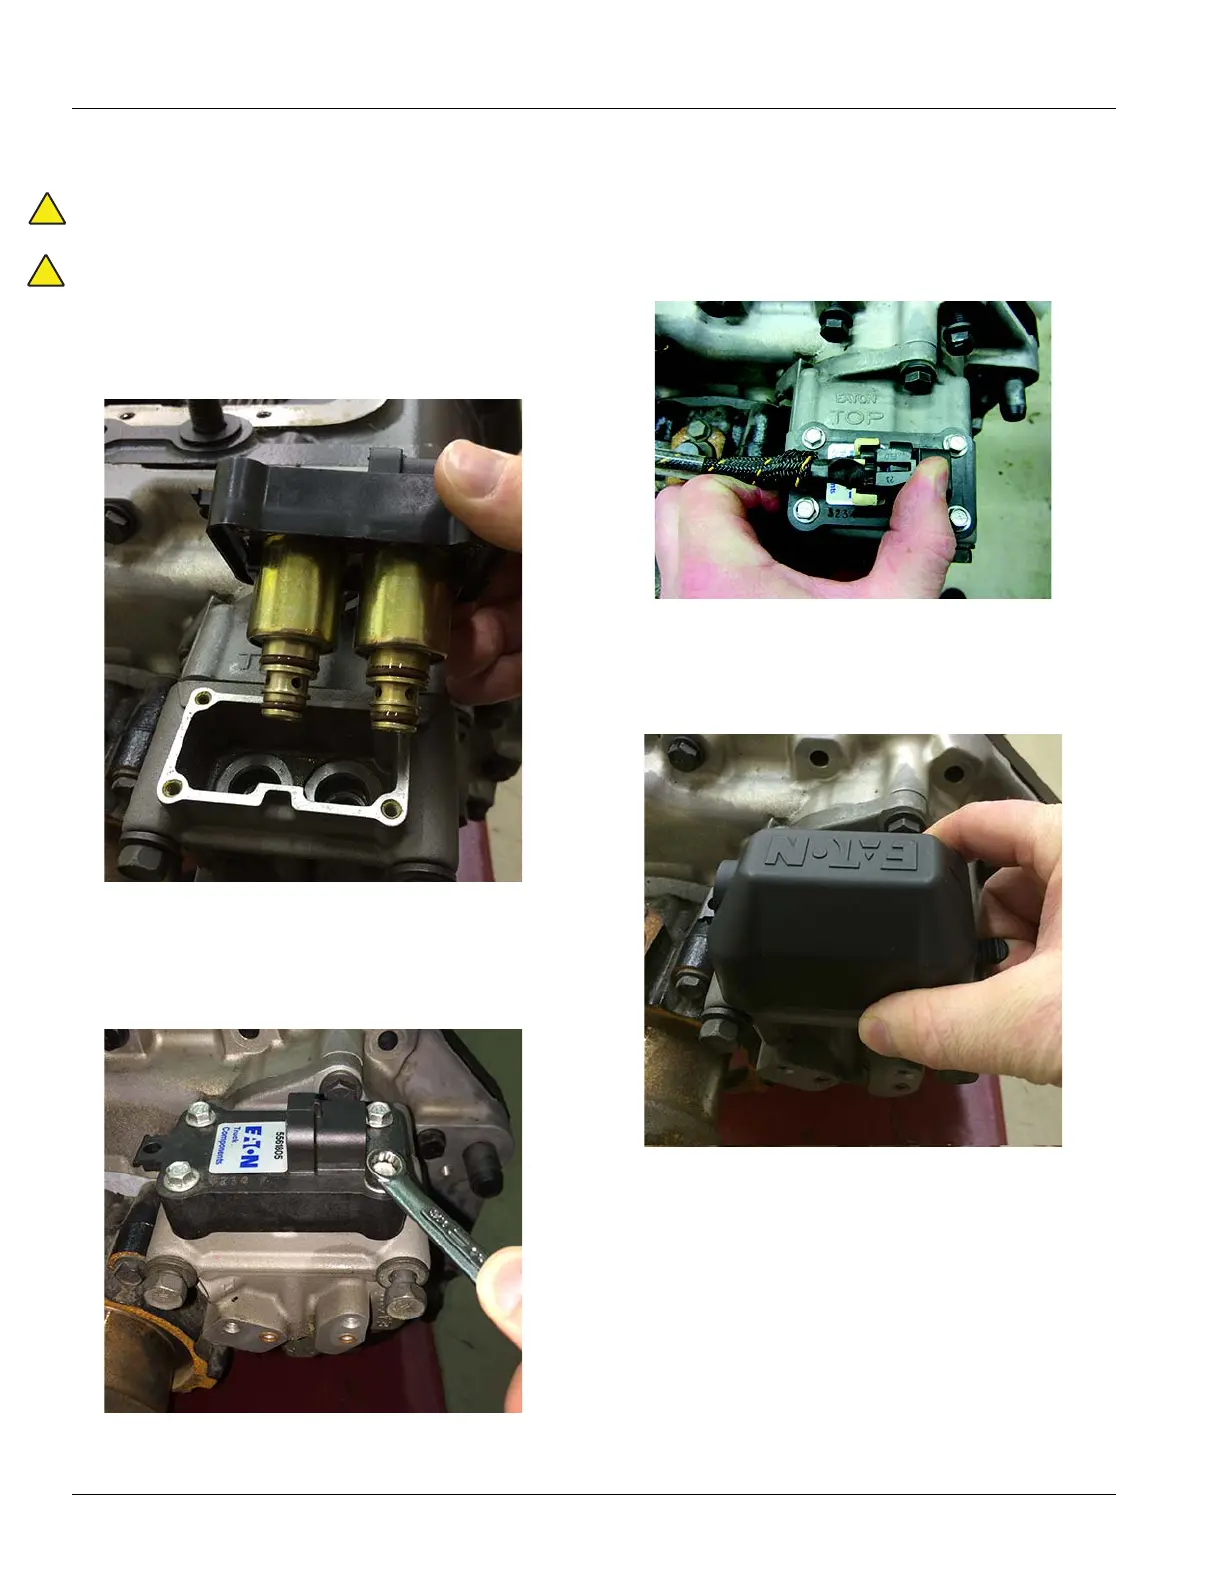
Important: The valve is keyed to fit its mounting location.
Take care to align the key with the notch in the housing.
1. Inst
all and push the Range Valve down into the hous-
ing.
2. Using a
5/16” socket, install the 4 Range Valve mount-
ing cap screws and tighten to 21–27 lb-in (2.3–3.0
N•
m) using a cross pattern.
3. Reconnec
t the Transmission Harness to the Range
Valve and close all air tanks drains.
Note: Install the
Range Harness back into the cable tie
on the Range Valve.
4. If equipped, install the Protective Cove
r. Push the cover
down by hand until it snaps into place.
 Loading...