28 Summit 200 Series Switch Installation and User Guide
Switch Installation
Following Safety Information
Before installing or removing any components of the switch, or before carrying out any maintenance
procedures, read the safety information provided in w of this guide.
Installing the Switch
The Summit 200 series switch switch can be mounted in a rack, or placed free-standing on a tabletop.
Rack Mounting
CAUTION
Do not use the rack mount kits to suspend the switch from under a table or desk, or to attach the switch
to a wall.
To rack mount the Summit 200 series switch:
1 Place the switch upright on a hard flat surface, with the front facing you.
2 Remove the existing screws from the sides of the case (retain the screws for Step 4).
3 Locate a mounting bracket over the mounting holes on one side of the unit.
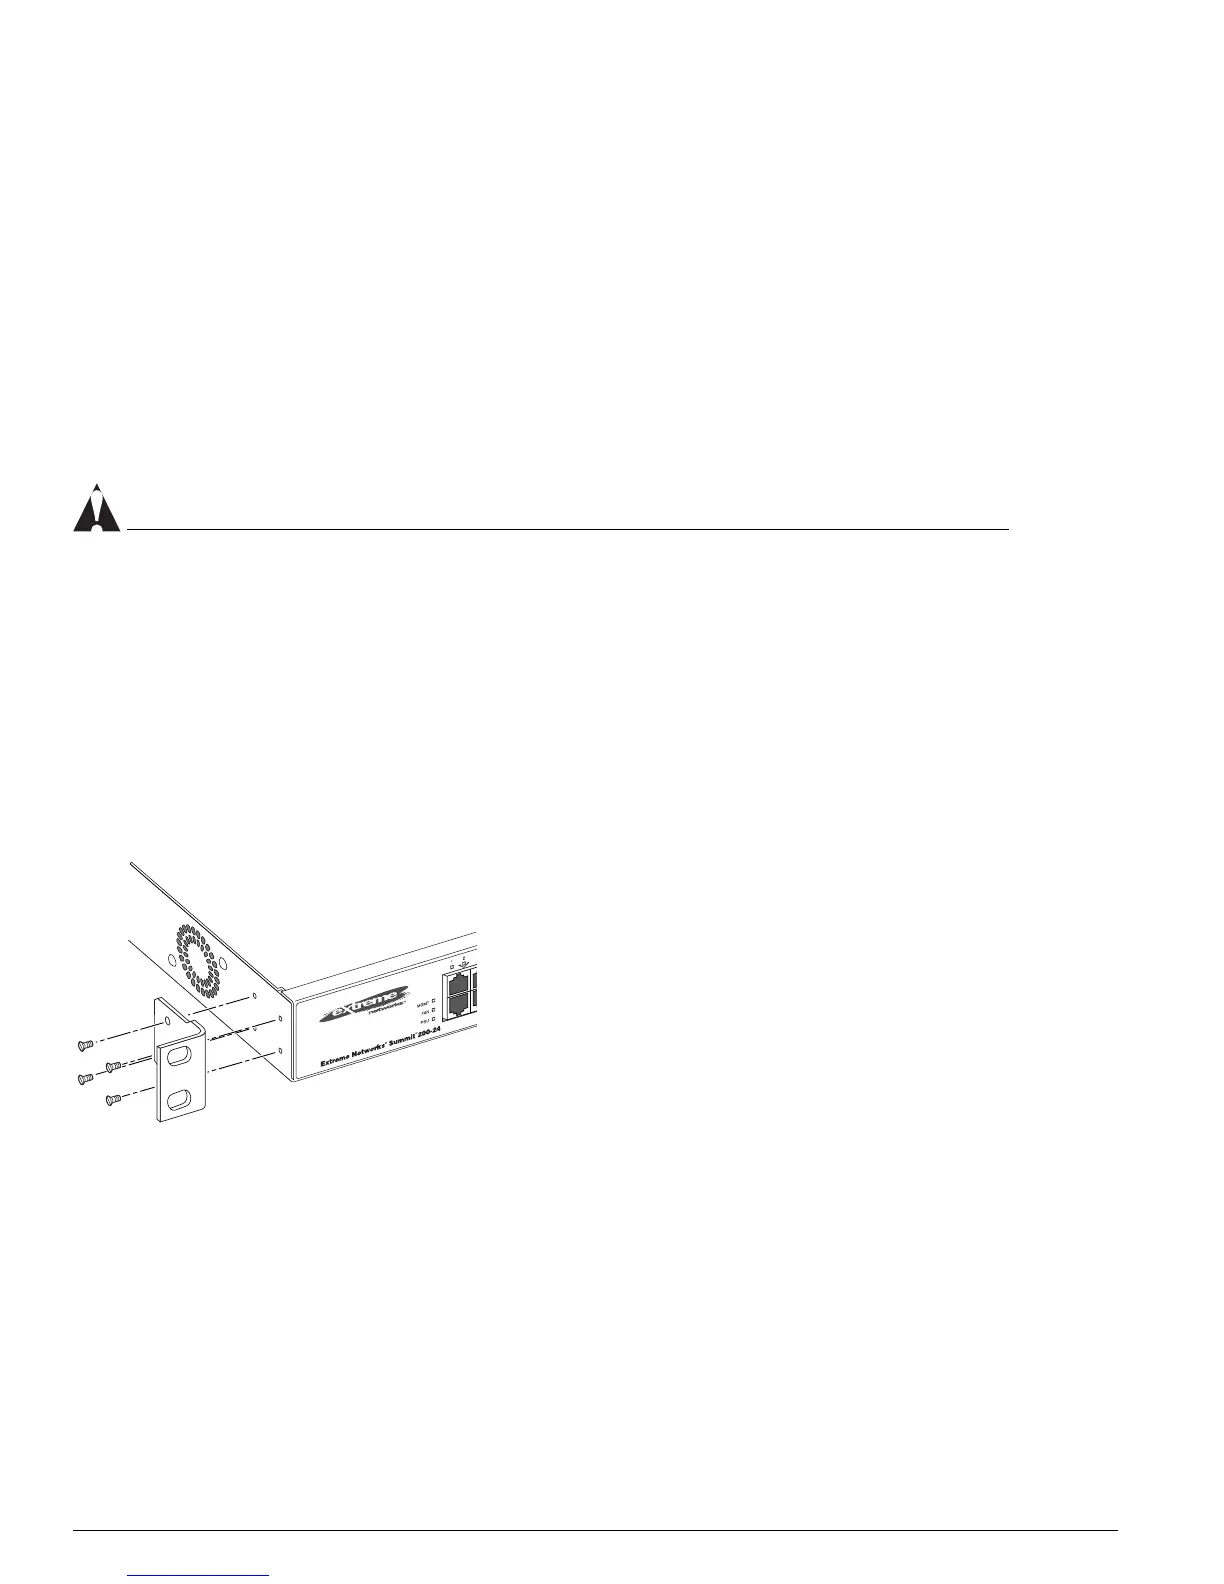
4 Insert the screws and fully tighten with a suitable screwdriver, as shown in Figure 6.
Figure 6: Fitting the mounting bracket
5 Repeat steps 2 through 4 for the other side of the switch.
6 Insert the switch into the 19-inch rack.
7 Secure the switch with suitable screws (not provided).
8 Connect the switch to the redundant power supply (if applicable).
9 Connect cables.
LC24003

 Loading...