Printer Connection and Software Installation 51
Network Connection
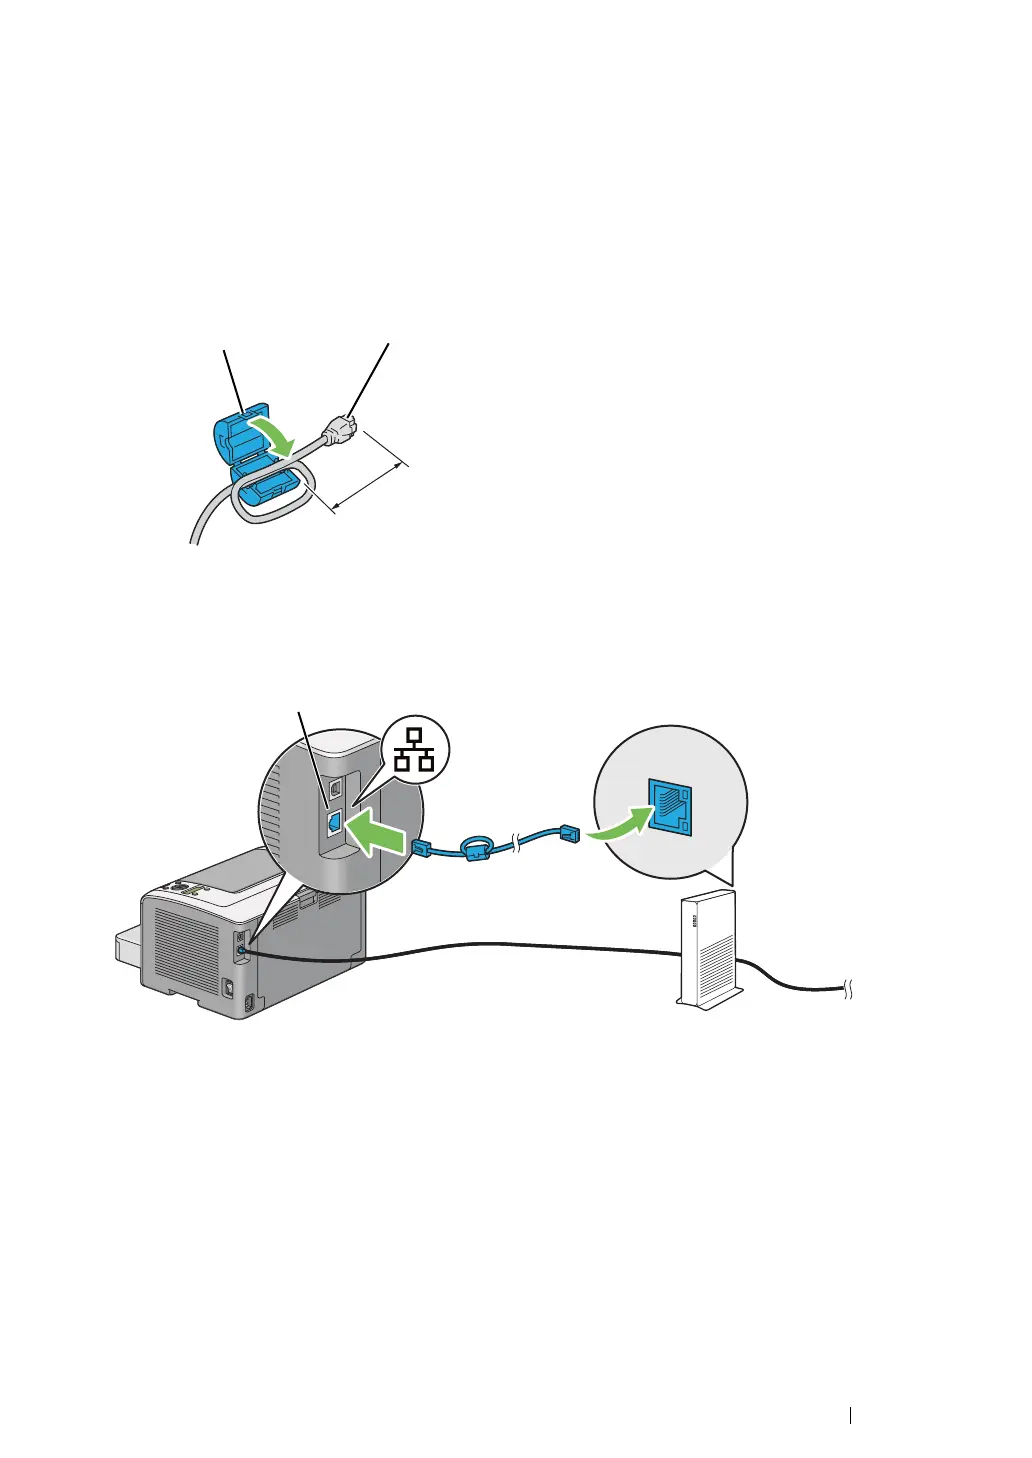
To connect the printer to an Ethernet network:
1 Ensure that the printer, computer and any other connected devices have been turned off and all
cables have been disconnected.
2 Twist the Ethernet cable around the ferrite core shipped with the printer as shown in the figure,
and then close the ferrite core.
IMPORTANT:
• Do not twist the Ethernet cable too tightly as it may break the cable.
3 Connect one end of an Ethernet cable to the Ethernet port on the rear of the printer, and the
other end to a LAN drop or hub.
NOTE:
• Do not connect the Ethernet cable when you intend to use the wireless network feature of the DocuPrint P255
dw model.
See also:
• "Configuring Wireless Network Settings (DocuPrint P255 dw only)" on page 62
Connector to be plugged into
the Ethernet port of the printer
Approx. 7 cm
Ferrite core

 Loading...


