120
5 Device
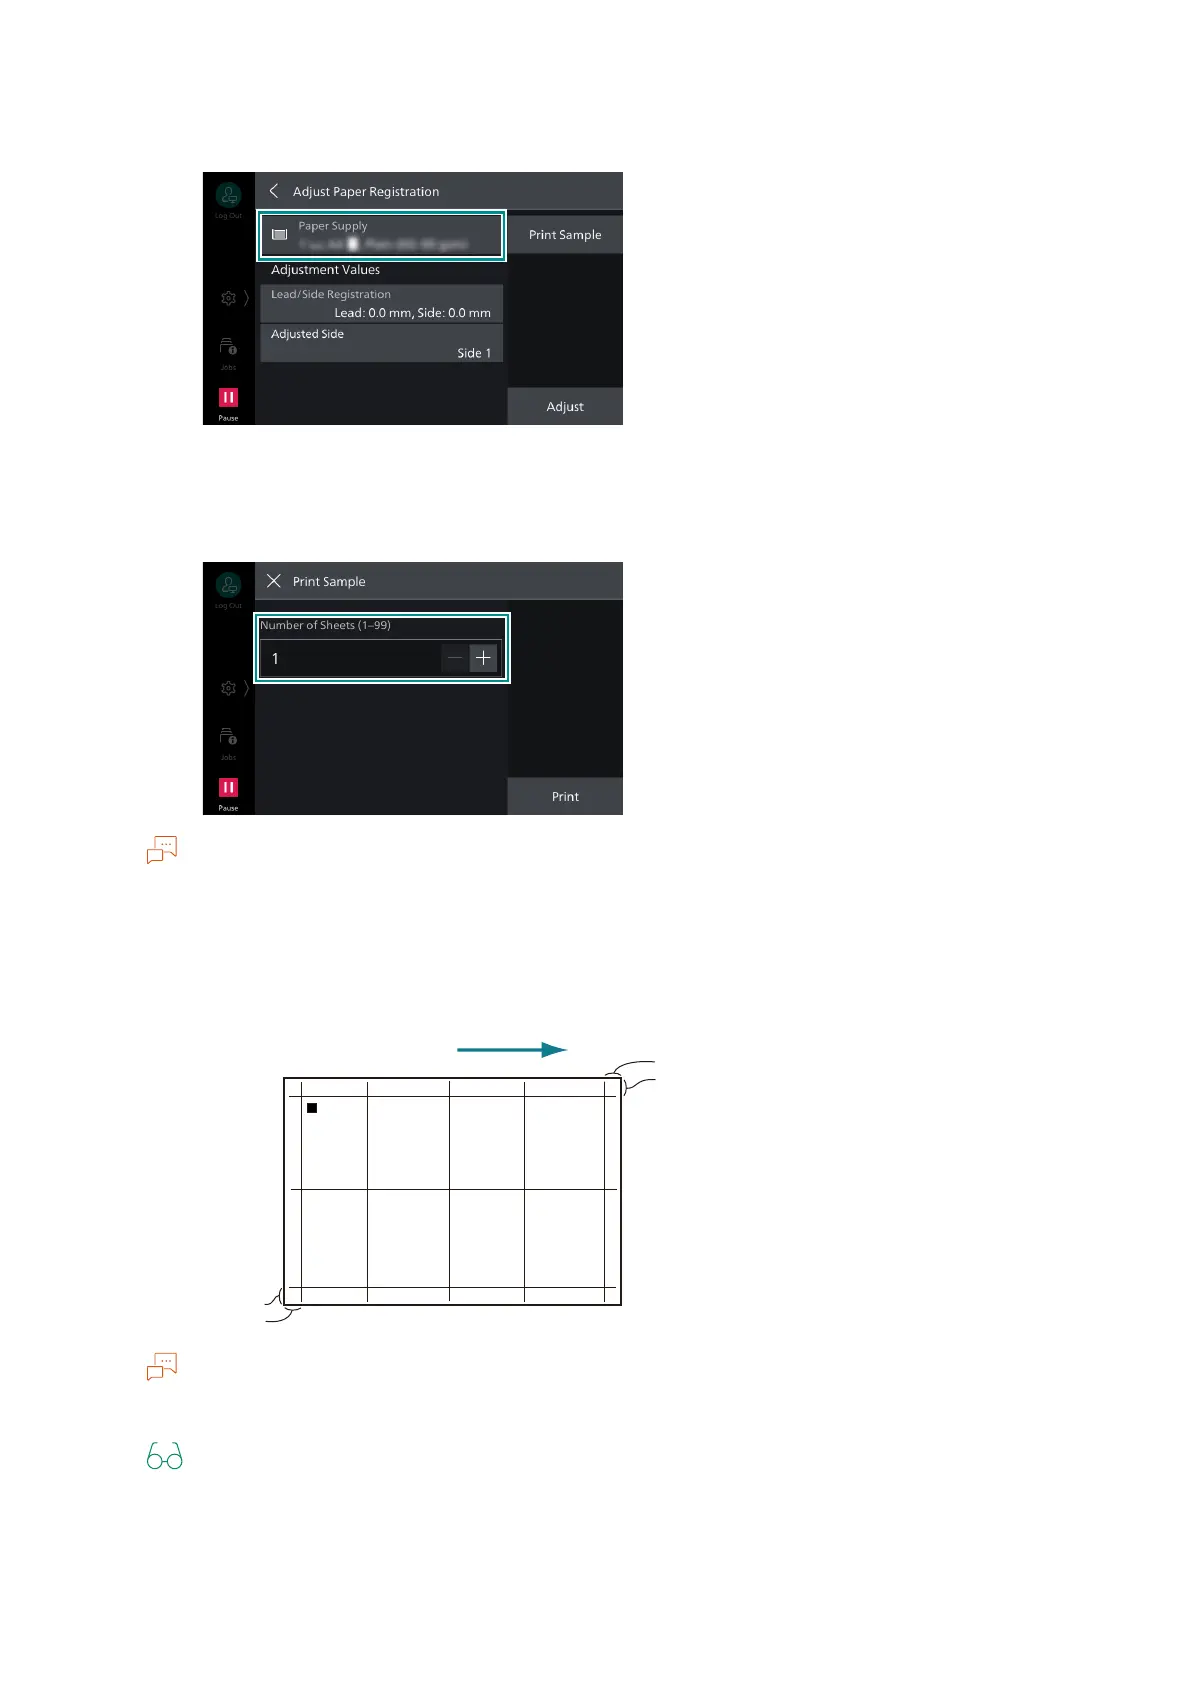
4. Tap on [Paper Supply], and select the tray where paper was loaded in step 1.
5. Select the printing side for adjustment with [Adjusted Side].
6. Tap on [Print Sample] to specify the number of prints of the sample.
Due to image variation, it is recommended to print 3 or more copies of the sample.
7. Tap on [Print].
8. Confirm the printed sample, and input the adjustment values.
Square black marks are printed at the back edge of the paper to indicate the paper feed direction. One
black square is printed on side 1, two black squares are printed on side 2.
"[Lead/Side Registration] Adjustment" (P.121)
9. Tap on [Adjust].
The adjustment values are applied.
Paper feed direction
10 mm
10 mm
10 mm
10 mm
 Loading...