4. INSTALLATION
4-4
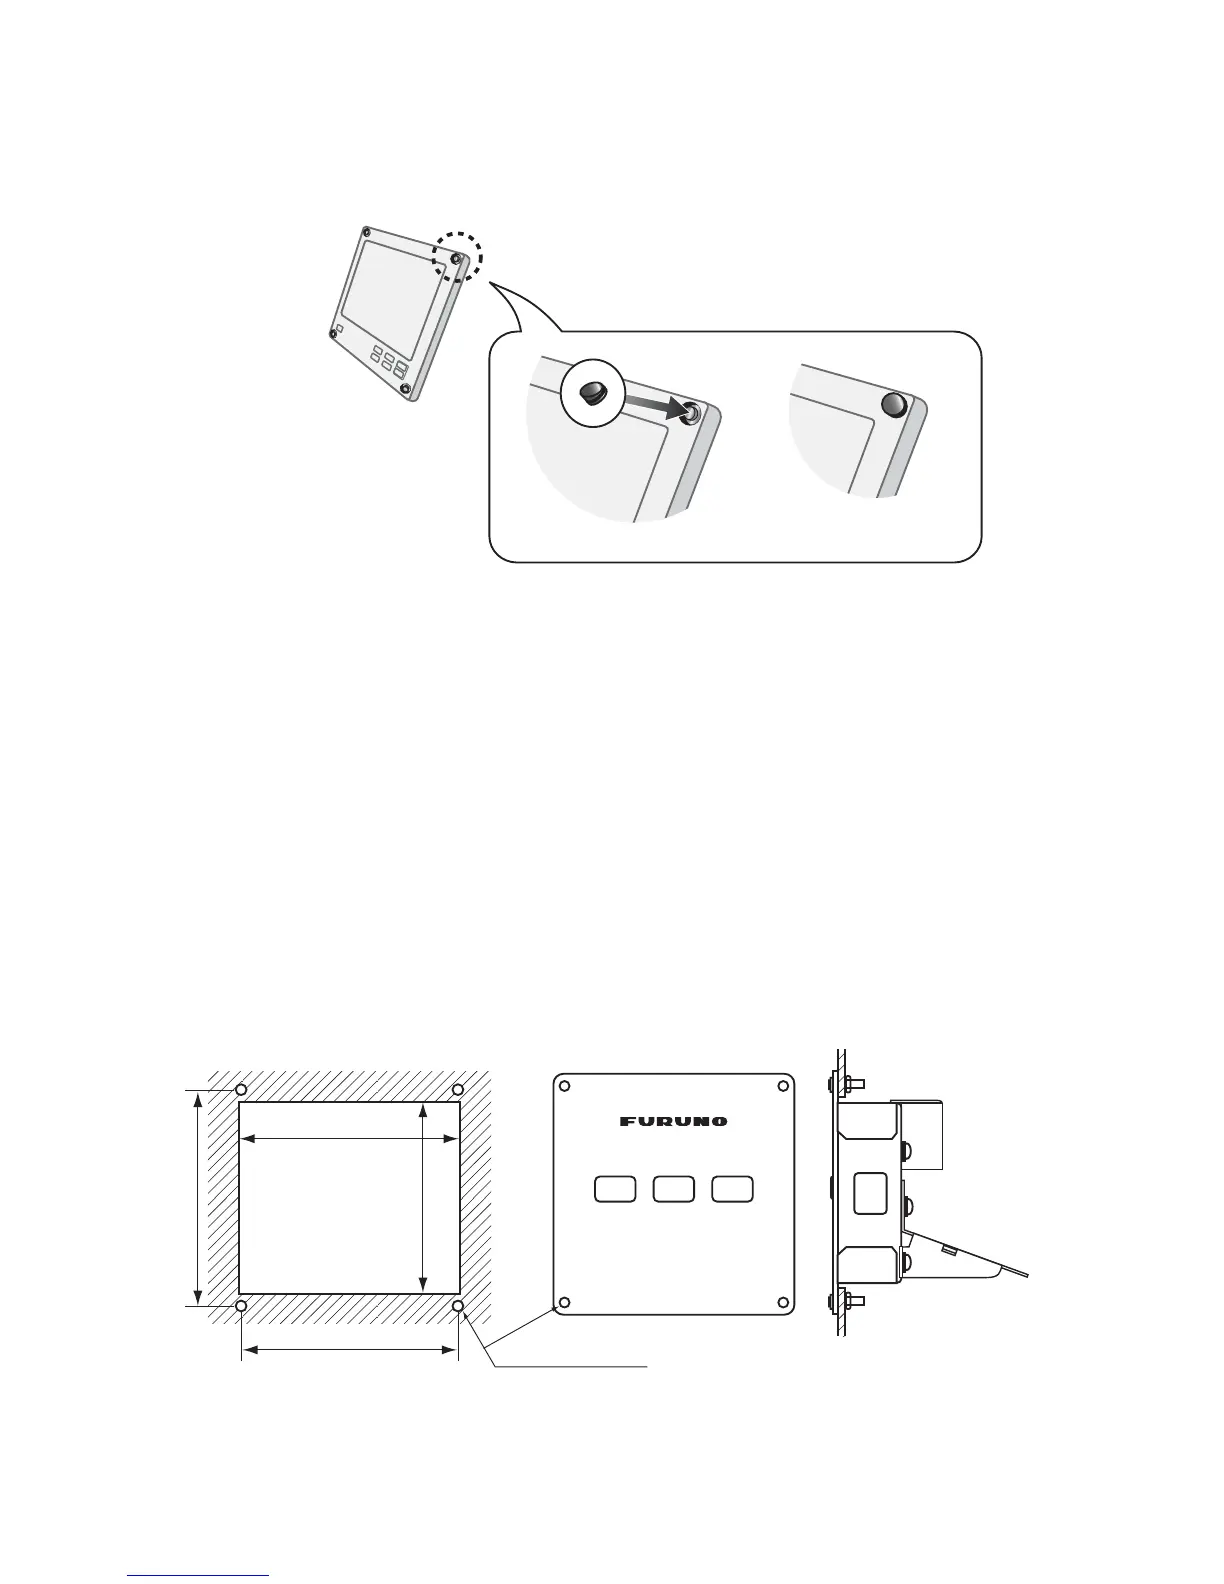
How to set the cosmetic cap
Set a cosmetic cap to each fixing hole on the front panel in reference to the following
illustration.
4.3 Installation of Remote Controller and Dimmer
Controller
The optional remote controller RD-501 and dimmer controller RD-502 can be flush
mounted in a panel. The size and the mounting procedure are shared by RD-501 and
RD-502. For the mounting location, refer to the mounting considerations for the re-
mote display in section 4.2.
Flush mounting
1. Make a cutout in the mounting location (88 mm (width) x 76 mm (height)).
2. Make four holes of φ4 in the locations indicated in the illustration below.
3. Set the remote controller or dimmer controller to the cutout. Insert four binding
head screws (M3x12) from the front side then fasten the unit with four sets of flat
washers, spring washers and hexagonal nuts from the rear side.
Note: When you fasten the remote controller or dimmer controller to the cutout af-
ter you connect the cable to the remote controller or dimmer controller, first con-
nect the cables referring to section 4.5.
Set cosmetic cap to hole so cap is flush with panel.
DISP
UNIT
MODE
REMOTE CONTROLLER
RD
-
501
88 ± 1.0 (3.46”)
86 ± 0.5 (3.39”)
76 ± 1.0 (2.99”)
Fixing hole (4-ø4)
86 ± 0.5 (3.39”)
 Loading...