4. INSTALLATION
4-15
4.6 Adjustments
After wiring all units, initialize each remote display as follows:
1. While you hold down the DISP key, press the PWR key to turn on the power.
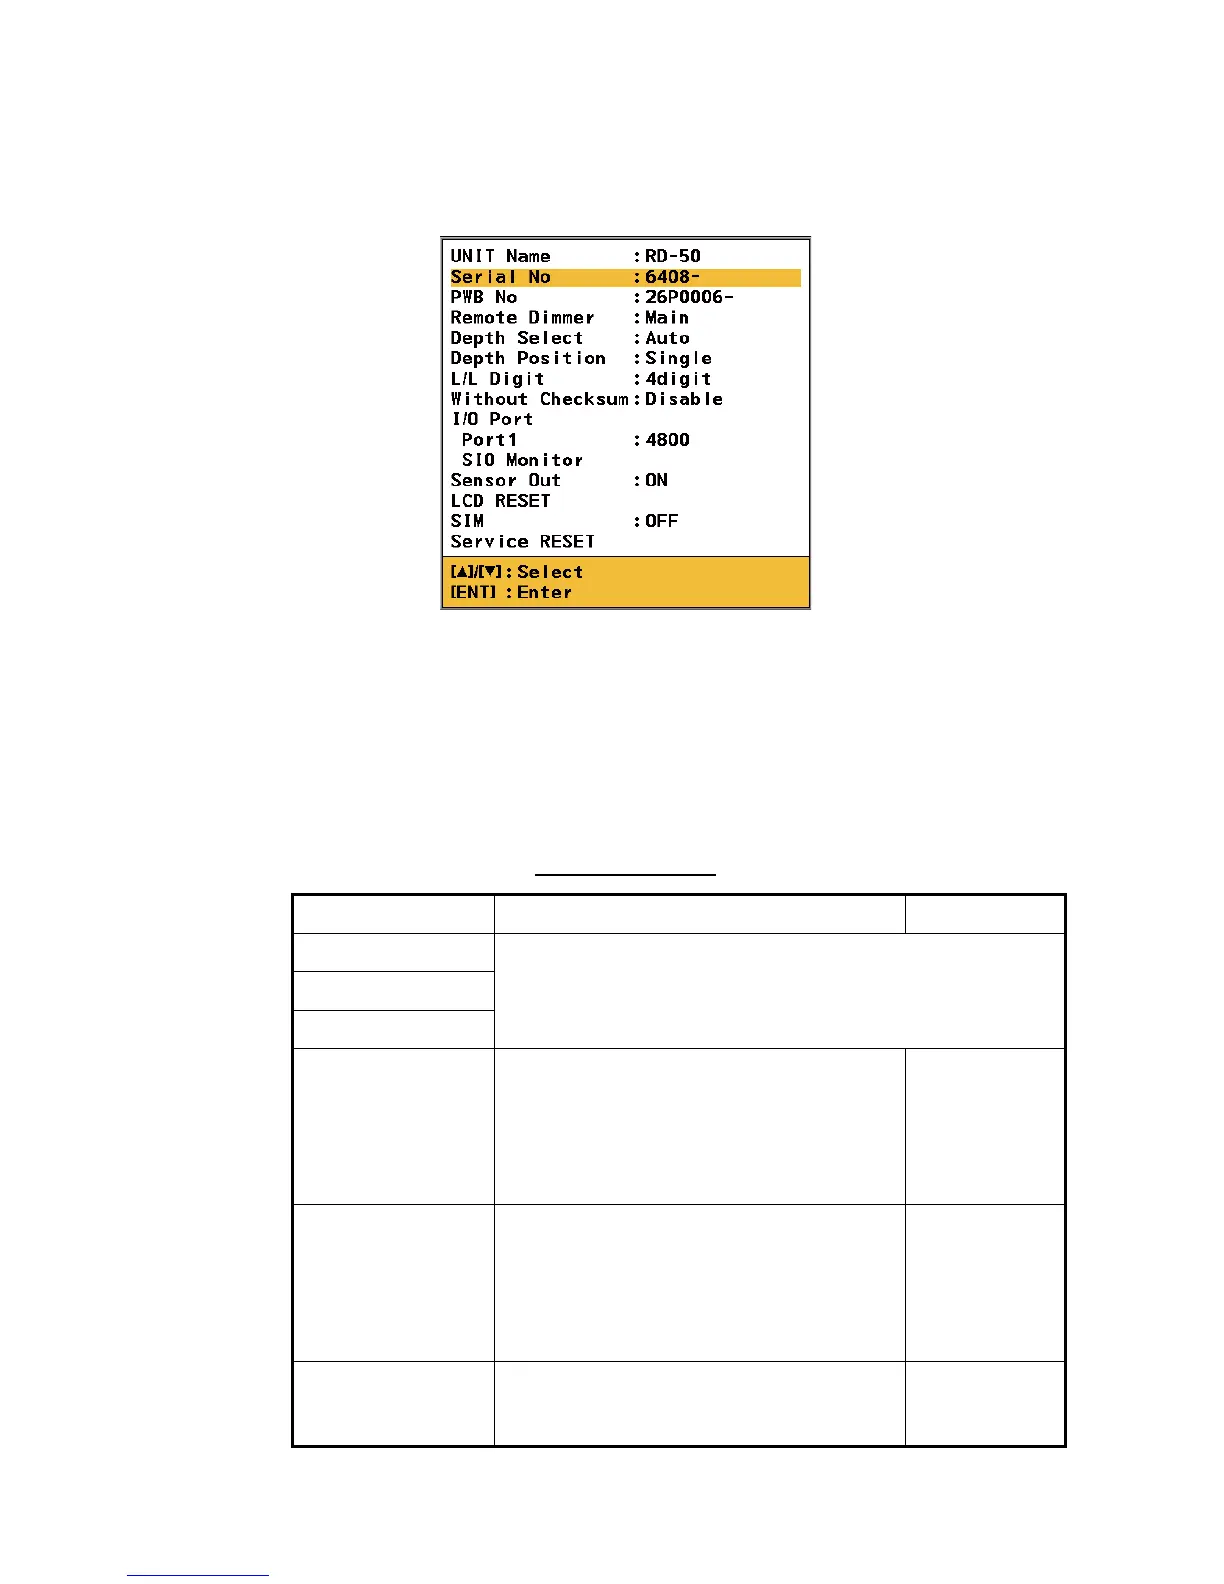
Service menu
2. Press S or T key to select a menu item and press the ENT key.
3. Press S or T key to select an option and press the ENT key.
4. Repeat steps 2 and 3 to set the menu items desired.
5. Press the PWR key to close the service menu and turn off the power.
Service menu items
Menu Description Default
UNIT Name
For serviceman.Serial No
PWB No
Remote Dimmer • [Main]: Set the unit which is connected to
the dimmer controller in the daisy chain
connection as the main unit.
• [Sub]: Set the unit which is not connected
to the dimmer controller in the daisy chain
connection as a sub unit.
[Main]
Depth Select Select the input sentence for depth from [Au-
to], [Keel (DBK)] (Depth below keel), [Trans-
ducer (DBT)] (Depth below transducer) or
[Surface (DBS)] (Depth below surface). In the
[Auto] mode, the highest priority data is [Keel
(DBK)] and the lowest is [Surface (DBS)].
[Auto]
Depth Position Select the mounting location of the transduc-
er from [Single], [FWD] (forward) or [AFT] (af-
ter).
[Single]
XXXX: Serial number
XX: Program version number
XXXX
XX

 Loading...