CHAPTER 3: INSTALLATION ADD DEVICE TO SOFTWARE
L90 LINE CURRENT DIFFERENTIAL SYSTEM – INSTRUCTION MANUAL 3-53
3
• Discover automatically UR devices within a network; see the Automatic Discovery of UR Devices section
Devices are listed in the order entered in the Device Setup window.
Devices are listed alphabetically in the main software window, for example B30, B90, T35. Use the Device Name to order
them as required, for example B30 Odessa, B30 Truro, B90, T35.
You cannot import a file to add a device to the software. You can import settings as outlined at the end of the chapter.
The Quick Connect button can also be used to add devices. The device is added to a Quick Connect menu item in the
Online Window area, cannot be moved from it to another grouping, and needs to be renamed in the Device Setup window.
GE instead recommends using the Device Setup window to add devices, as outlined here.
3.7.1 Set IP address in UR
The IP and subnet addresses need to be added to the UR for Ethernet communication.
For serial communication, for example using the front RS232 port and the Quick Connect feature, the addresses are not
required, but typically they are entered to add/configure devices for regular use.
1. On the front of the L90, press the
MENU key until the Settings menu displays.
2. Navigate to
Settings Product Setup Communications Network IP Address Setting.
3. Enter an IP address, for example “1.1.1.1,” and press the
ENTER key to save the value.
4. In the same menu, select the
Subnet IP Mask setting.
5. Enter a subnet IP address, for example “255.0.0.0,” and press the
ENTER key to save the value.
If using a blue or grey Ethernet cable, skip the rest of the this section. If using an orange cross-over Ethernet cable, the
computer needs to be set up as follows.
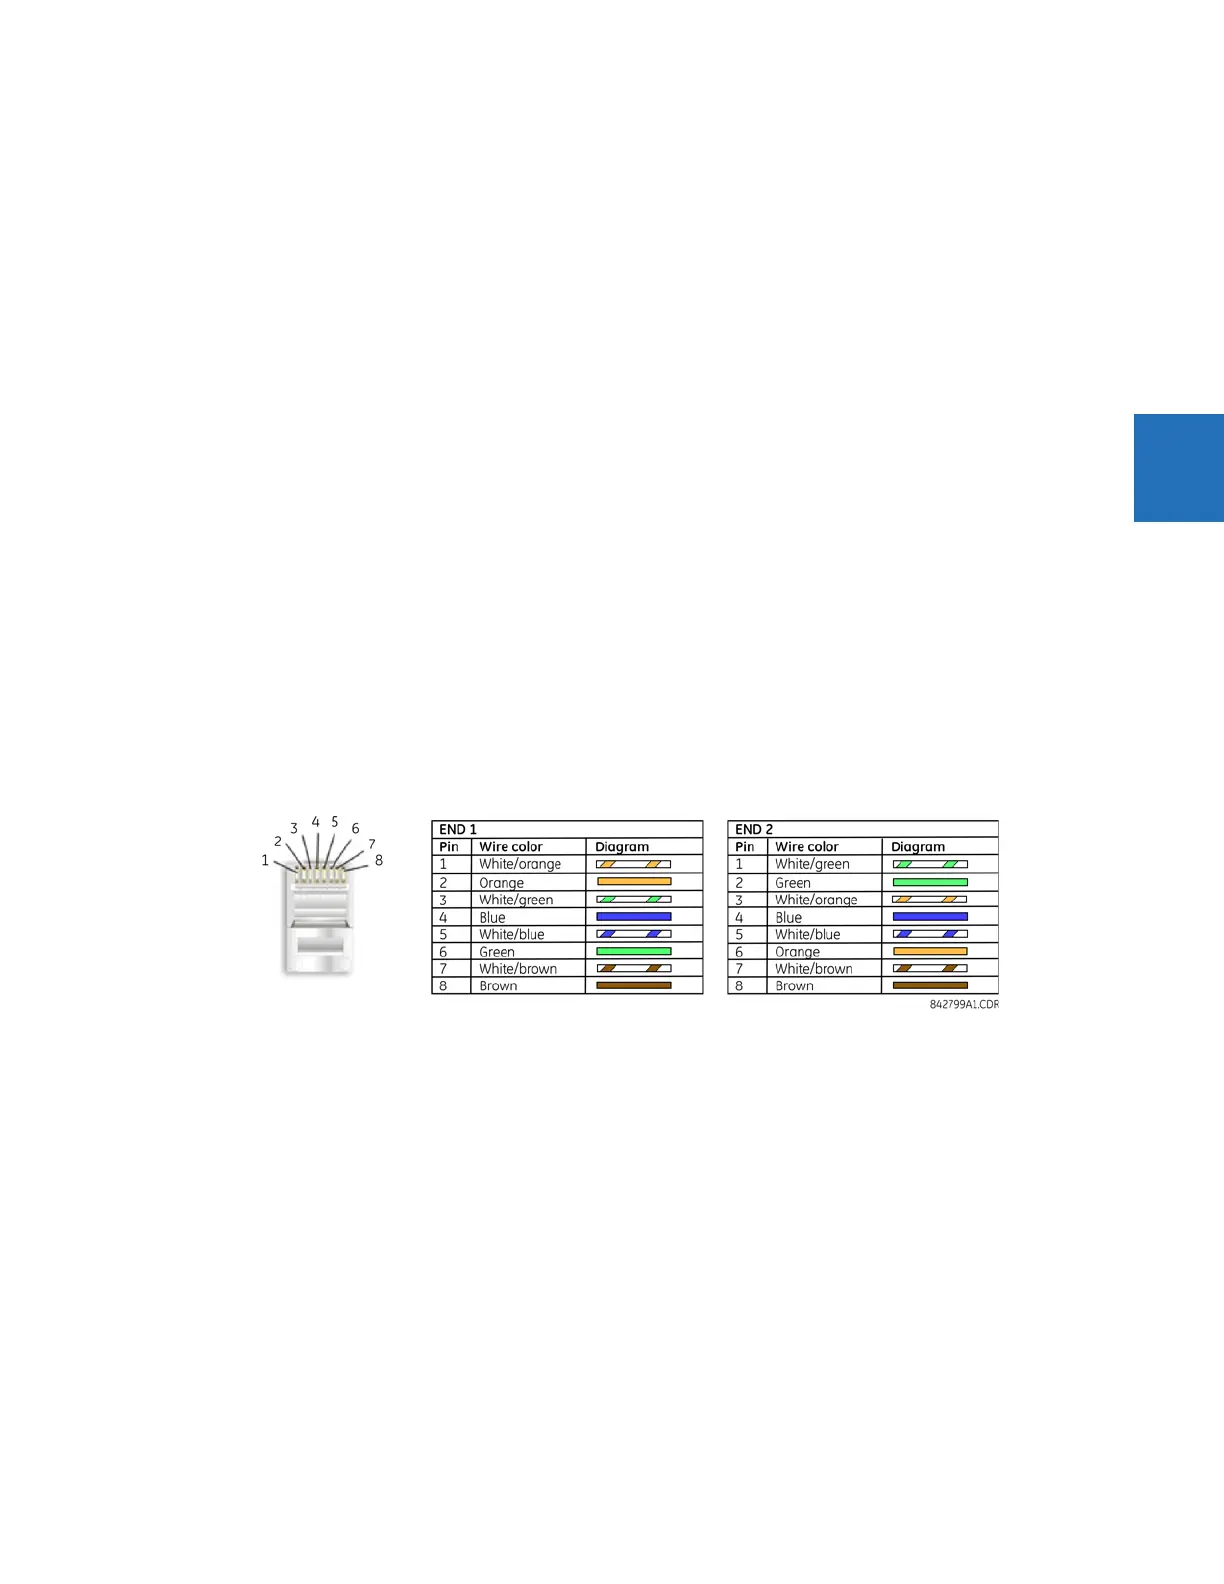
1. Use an orange Ethernet cross-over cable to connect the computer to the rear Ethernet port. In case you need it, the
following figure shows the pinout for an Ethernet cross-over cable.
Figure 3-59: Ethernet cross-over cable PIN layout
Next, assign the computer an IP address compatible with the relay’s IP address.
1. From the Windows desktop, right-click the My Network Places icon and select Properties to open the network