Chapter 15: Preferences
5495975-1EN Rev.9 15-25
© 2013-2017 General Electric Company. All rights reserved.
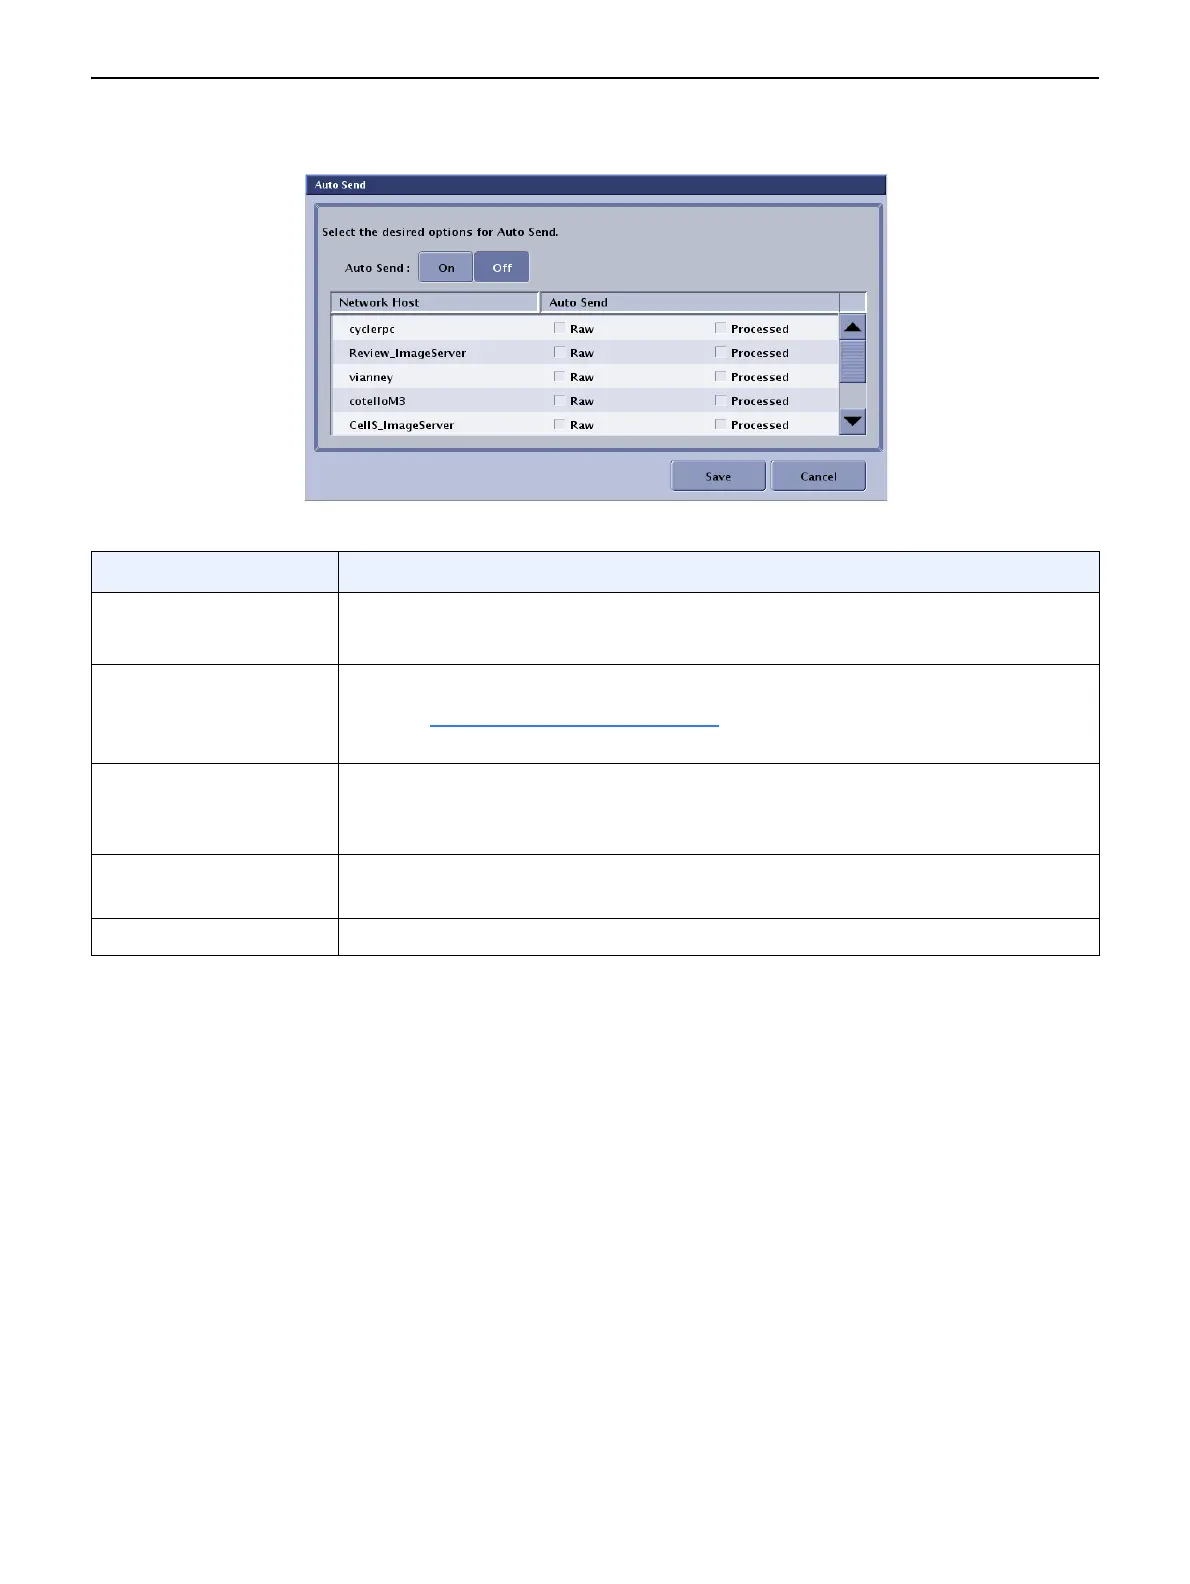
Figure 15-23 Auto Send
Auto Delete
Auto Delete automatically deletes images when the image database does not have enough space. Auto
Delete is enabled from the Utilities – Preferences screen.
Follow this process to configure Auto Delete.
1. From the Worklist screen, click [UTILITIES].
2. Select Preferences > Image Management.
3. Click Auto Delete [EDIT].
The Auto Delete screen appears (Figure 15-24).
4. Complete the information as described in Table 15-9.
5. When finished, click [SAVE] to retain your changes.
6. Click [CLOSE].
Table 15-8 Auto Send Functions
Function Description
Auto Send
[ON] [OFF]
Turns Auto Send on or off.
Selecting On allows you to configure the default Auto Send settings.
Network Host column Lists the available network locations where images may be transferred.
Refer to Network Connections
(p. 15-4) for information about how to
configure the available Network Hosts.
Auto Send column Allows you to choose which images are sent to each network host. You may
choose either Raw or Processed, both, or none. Leaving both choices
unselected means that no images will be sent to the network host.
[SAVE] Saves your selections as the default settings and closes the Auto Send
screen.
[CANCEL] Closes the screen without saving your changes.

 Loading...