1. Phased Array Operation—Keypad, Menus, and Displays
PHASOR XS Operating Manual Page 9
You’ll also find these keys and knobs on the instrument:
—Gain Step Key selects the amount of gain level
change that occurs with each click of the Gain Knob.
Press and hold to switch between digital (dBD) and analog
(dBA) gain. Section 3.5 explains gain setting and the use
of the dB REF feature.
—Mode Selector Key press to choose from Phased
Array or Conventional Ultrasonic Operating Modes
—View Select Key press and hold to change the dis-
played view in phased array mode. (choose from Sector
or Linear Scan, A-Scan, or A-Scan with Sector or Linear
Scan)
—Zoom Key press and hold to expand the displayed
image (A, Sector, or Linear Scan) to fill the entire screen.
Press again to return to normal view mode.
—Home Key immediately returns the instrument to
the Home Menu shown in
Figure 1-3 (Phased Array) or
Figure 4-3 (Conventional). If held for 3 seconds, automati-
cally performs a scan calculation. If pressed two times, all
functions are de-selected and the Function Knob controls
the beam cursor (
Section 3.3).
—Freeze Key freezes and unfreezes the display. If
held for 3 seconds, automatically generates a report
or stores a dataset.
(Sections 3.4 and 6.1)
—Power Key turns the instrument on and off.
—Knob Emulator Key switches from the Home Menu
to the Knob Menu, which allows you to perform Knob
functions using the keypad (both knobs are disabled).
Function Rotary Knob—Rotate to change the value
of the selected function. (See
Section 3.5 to disable
this knob)
Gain Rotary Knob—Rotate to change the instrument’s
gain. (See
Section 3.5 to disable this knob)
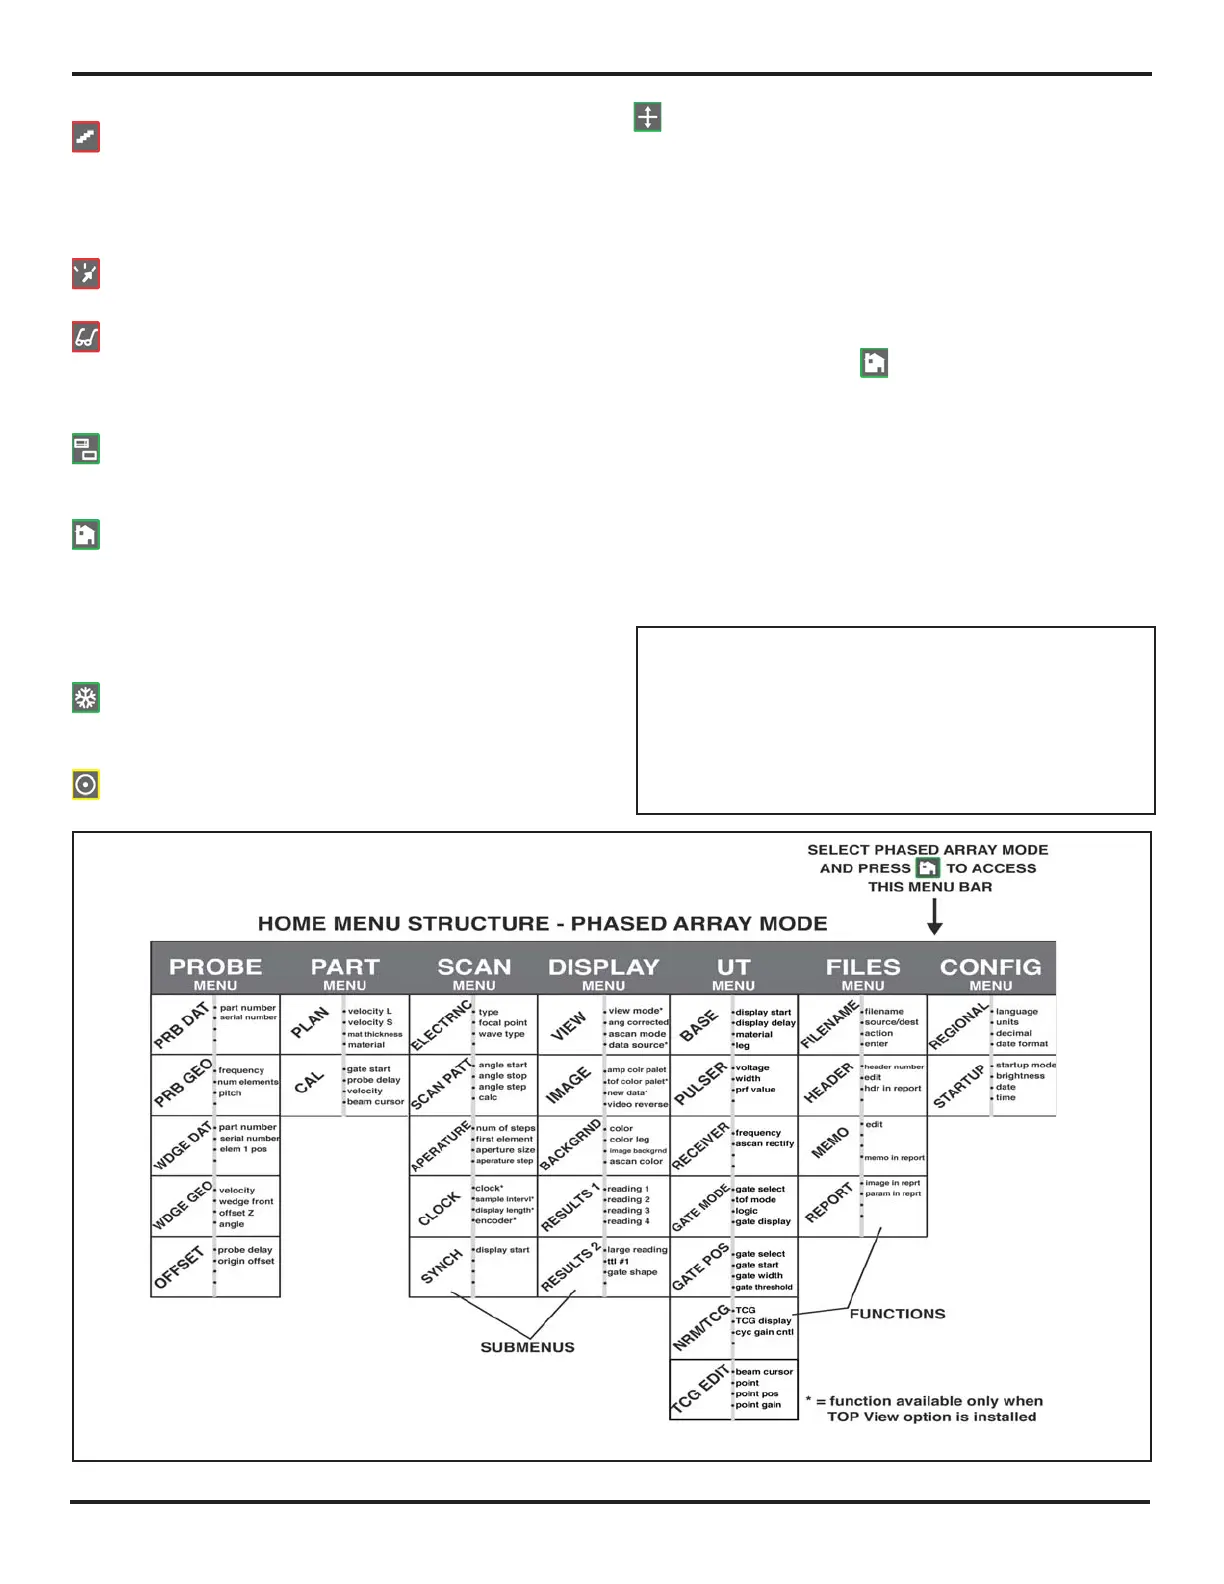
1.4 Home Menu
and Functions
The menu system allows the operator to select and adjust
various features and instrument settings. It includes:
Phased Array Home Menu—Several menus used to
configure and calibrate the instrument prior to test. Also
used to select pulser and receiver characteristics, position
gates, set alarms, specify operating mode and screen
appearance, adjust the A-Scan display, and control other
significant measurement features
NOTE:
Figure 1-3 shows the instrument’s Home Menu
structure. The information provided in the following two
manual sections explains what each function does and
shows how to access the function through the menu
system. You’ll also find operation-manual section ref-
erences that tell you where to turn in this manual for
more specific information on each function.
FIGURE 1-3—These menus, submenus, and functions are accessed through the Home Menu.

 Loading...