4. Conventional Operation: Menu System, Keypad, and Displays
PHASOR XS Operating Manual Page 53
REF ECHO Submenu (Refer to
Section 5.13)
• GATE A START—Sets A-Gate starting point
• REFERENCE TYPE—Select DGS reference reflector type
• REF SIZE—Set size of DGS reference reflector
• RECORD REF—Record reference reflector from which DGS curve is
built
REF CORR Submenu (Refer to
Section 5.13)
• REF ATTEN—Input sound attenuation of DGS reference material
• AMPL CORRECT—Input specified angle-beam-probe correction
value
• DELETE REF—Delete stored DGS reference and corresponding
curve
MAT ATTN Submenu (Refer to Section 5.13)
• TEST ATTEN—Input sound attenuation of test material
• TRANSFER CORR—dB compensation for differences between stan-
dard and test coupling
OFFSETS Submenu (Refer to Section 5.13)
• OFFSET 1—Displays a line at a fixed-gain offset from the DGS curve
• OFFSET 2—Displays a line at a fixed-gain offset from the DGS curve
• OFFSET 3—Displays a line at a fixed-gain offset from the DGS curve
• OFFSET 4—Displays a line at a fixed-gain offset from the DGS curve
GATE A Submenu (Refer to Section 5.1.1)
• GATE A START—Sets the beginning position of A gate on the A-
Scan.
• GATE A WIDTH—Sets the width of A gate on the A-Scan.
• A THRESHOLD—Sets the height of A gate.
• TOF MODE—Indicates whether an A-Scan echo’s flank, or peak is
evaluated by the A gate. (Refer to Section 5.1.2)
dB REF MENU
SETUP Submenu (Refer to Section 5.15)
• MODE—Turns dB REF feature ON or OFF after a reference is
stored
• REFERENCE—Indicates the amplitude of and dB gain level of the
recorded reference
• RECORD—Press to store the echo from which the gain level and all
reference amplitude results are based
• DELETE REF—Deletes the stored reference.
GATE A Submenu (Refer to Section 5.1.1)
• GATE A START—Sets the beginning position of A gate on the A-
Scan.
• GATE A WIDTH—Sets the width of A gate on the A-Scan.
• A THRESHOLD—Sets the height of A gate on the A-Scan.
• TOF MODE—Indicates whether an A-Scan echo’s flank or peak is
evaluated by the A gate.
AWS D1.1 MENU
SETUP Submenu (Refer to Section 5.16)
• A INDICATION—dB amplitude of the measured reflector in A gate
• B REFERENCE—Stores a reference reflector, then shows its dB
amplitude
• C ATTENUATION—Calculated dB attenuation to the reflector
• D D1.1 RATING—Calculated based on formula for D1.1 and D1.5
GATE A Submenu (Refer to Section 5.1.1)
• GATE A START—Sets the beginning position of A gate on the
A-Scan.
• GATE A WIDTH—Sets the width of A gate on the A-Scan.
• A THRESHOLD—Sets the height of A gate on the A-Scan.
• TOF MODE—Indicates whether an A-Scan echo’s flank or peak is
evaluated by the A gate.
JISDAC MENU
RECORD Submenu (Refer to
Section 5.17.1)
• GATE A START—Sets the beginning position of A gate on the
A-Scan.
• AUTO80—Press and hold to automatically adjust applied gain to set
the value of the highest peak in A gate to 80% of FSH.
• RECORD—Record the JISDAC reference point captured in A gate.
• FINISH—Complete the JISDAC reference point recording process.
GATE A Submenu (Refer to
Section 5.1.1)
• GATE A START—Sets the beginning position of A gate on the
A-Scan.
• GATE A WIDTH—Sets the width of A gate on the A-Scan.
• A THRESHOLD—Sets the height of A gate on the A-Scan.
• TOF MODE—Indicates whether an A-Scan echo’s flank or peak is
evaluated by the A gate.
SETUP Submenu (Refer to Section 5.17.2)
• JISDAC—Turns the feature on or off without deleting stored refer-
ence curves
• BOLD LINE—Indicates which JISDAC line (H, M, or L) to make bold
on the display screen. Reference measurements are then made with
respect to this bold line.
• DELETE CURVE—Deletes stored reference curves
MAT ATTN Submenu (Refer to Section 5.17.2)
• TRANSFER CORR—User input dB compensation for differences
between standard and test coupling
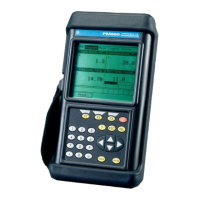
4.5 Display Screen Features
(Conventional)
The instrument’s display is designed to be easy to inter-
pret. In
Figure 4-5 you’ll find an example of the a display
configuration. This specific display includes the BASIC
menu bar and DISPLAY submenu. Refer to this figure
for an explanation of those screen features you’ll most
often encounter.
Definition of Display Icons
There are several graphical features (icons) which ap-
pear in the display screen’s icon bar for various reasons.
Figure 4-6 includes several of these icons along with an
explanation of their significance.
4.6 Initial Instrument Setup
In this part of the manual, you’ll learn how to configure the
instrument’s display and operating features. Follow these
procedures to turn it on and make initial adjustments to
the instrument control settings. Because the instrument
can be set to save the control settings when it’s turned off
and restore them when it’s turned on, you won’t have to
repeat these adjustments unless a change is required.

 Loading...