8. Working in TOP View (Optional Feature)
PHASOR XS Operating Manual Page 97
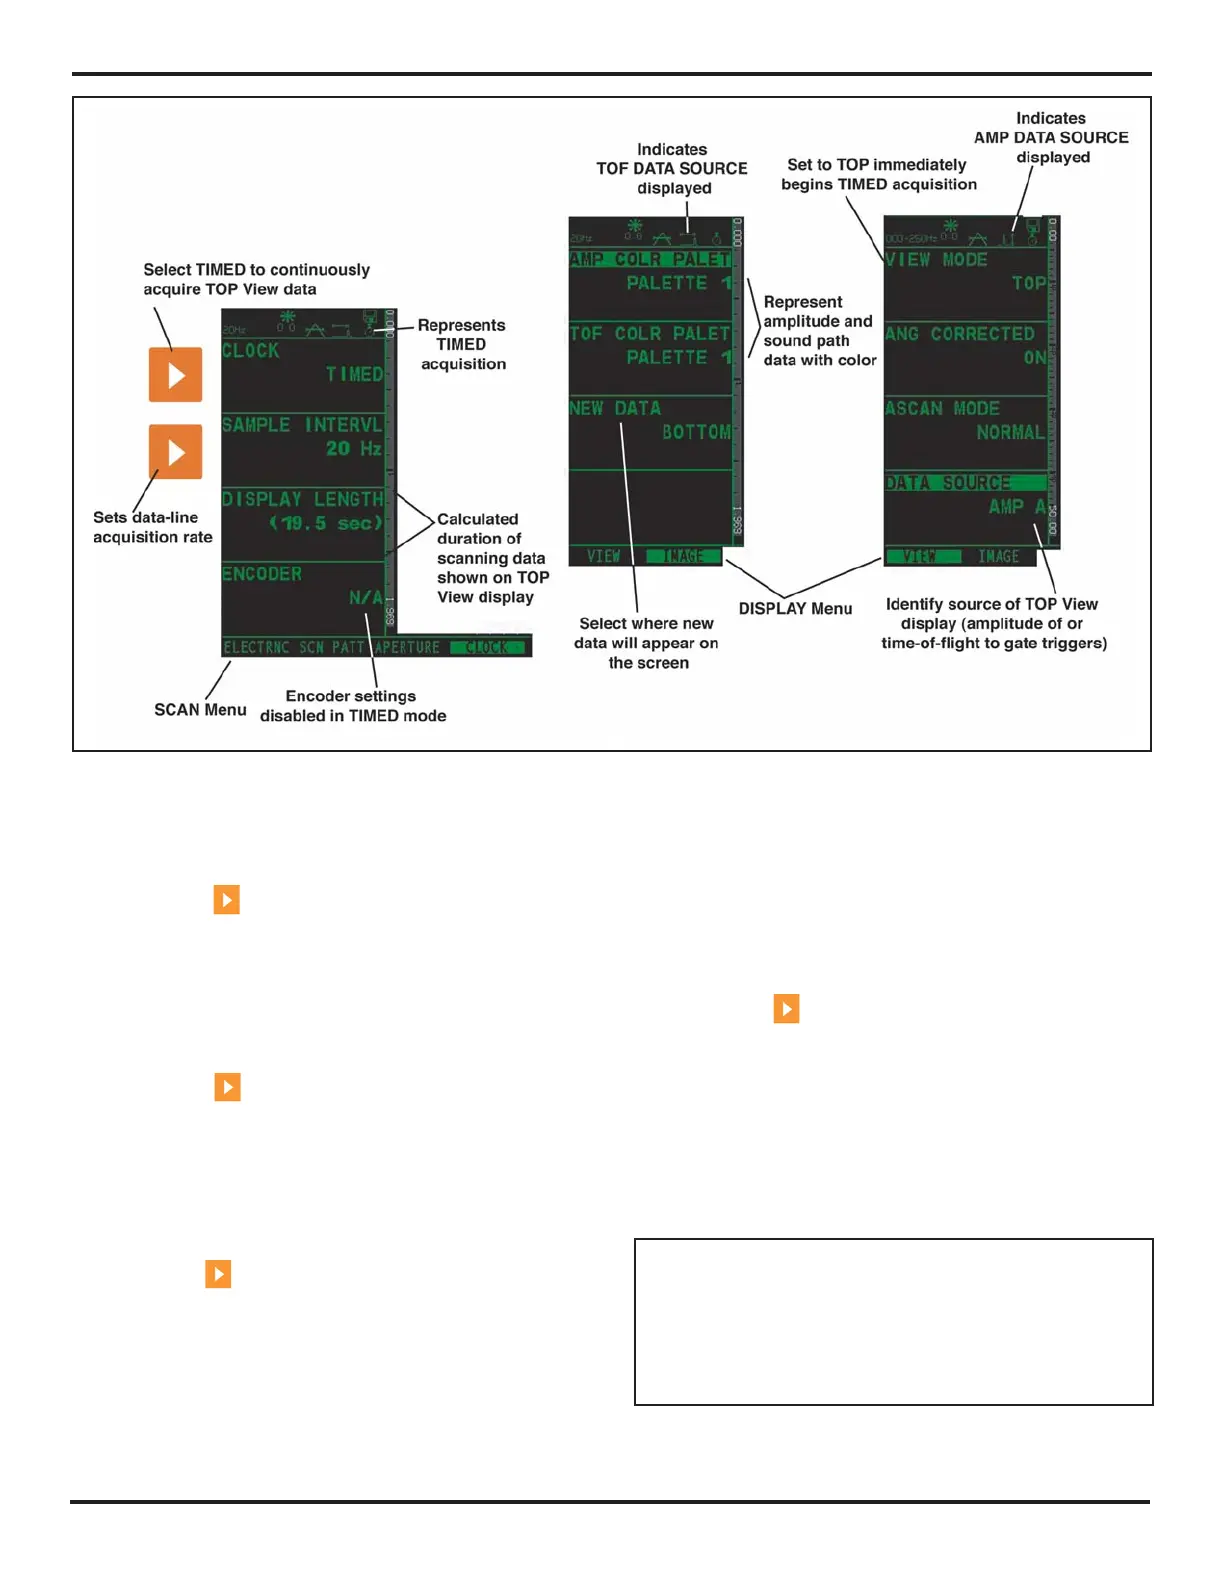
Step 6: Press to activate and set the AMP COLOR
PALETTE in the IMAGE Submenu (located in the DIS-
PLAY Menu). Select one of the four standard palettes
to represent with various color scales the amplitude of
echoes captured in A- or B-Gate. Alternatively, select
CUSTOM to choose the user inputted, remotely gener-
ated, customized color palette.
Step 7: Press
to activate and set the TOF COLOR
PALETTE in the IMAGE Submenu (located in the DIS-
PLAY Menu). Select one of the four standard palettes
to represent with various color scales the time-of-flight
measurement to the A- or B-Gate triggering echo. Alter-
natively, select CUSTOM to choose the user inputted,
remotely generated, customized color palette.
Step 8: Press
to activate and set the DATA SOURCE
Function in the VIEW Submenu (located in the DISPLAY
Menu). Select from four types of gated data to represent
in the TOP View including:
• AMP A – Amplitude of echoes captured in the
A-Gate
• AMP B – Amplitude of echoes captured in the
B-Gate
• SA – Time of flight duration to A-Gate triggering
echoes
• SB – Time of flight duration to B-Gate triggering
echoes
Step 9: Press
to activate TOP View by setting the
VIEW MODE Function in the VIEW Submenu (located
in the DISPLAY Menu) to TOP. The instrument will im-
mediately begin acquiring data and filling the TOP View
display.
8.1.3 Setting Up TOP View for ENCODED
Operation
NOTE: During TIMED TOP View operation, all func-
tions can be accessed and changed. However, during
ENCODED acquisition, most functions are blocked
from change. Therefore, most instrument settings that
are specific to TOP View must be adjusted in TIMED
mode prior to switching to ENCODED mode.
FIGURE 8-2—Make these settings for TIMED TOP View operation. Most TOP View specific settings are accessed from
the CLOCK, VIEW, and IMAGE Submenus.

 Loading...