4. Conventional Operation: Menu System, Keypad, and Displays
PHASOR XS Operating Manual Page 57
any time a probe of a different type is installed.
Selecting Probe Type
(SETUP-RECEIVER-DUAL)
Step 1: Activate the RECEIVER Submenu (located in the
SETUP Menu by pressing
below it.
Step 2: Press
next to the selection titled DUAL.
Step 3: To change the probe type, continue pressing
or turn the function knob. Each available probe type is rep-
resented by an icon that’s displayed in the Icon Bar (near
the upper left corner of the display) whenever that probe
type is indicated. The following types are available:
• ON—For dual-element probes ( will be
displayed)
• OFF—For single-element probes (
will be
displayed)
Step 4: The probe type will be set to the last one
displayed.
Specifying the Probe Frequency
(SETUP-RECEIVER-FREQUENCY)
Step 1: Activate the RECEIVER Submenu (located in the
SETUP Menu) by pressing
below it.
Step 2: Press
next to the selection titled
FREQUENCY.
Step 3: To change the specified frequency, continue
pressing
or turn the function knob. You’ll note that the
following frequency settings are available:
• 1, 2, 2.25, 4, 5, 10, 13 MHz—Set to match conven-
tional probe frequencies
• BROADBAND—Select to utilize a built-in broad-
band (BB) filter
Step 3: The probe frequency level will be set to the last
one displayed.
Modifying the Signal Ratio to Noise by
Changing the Damping Level
(SETUP-PULSER-DAMPING)
Step 1: Activate the PULSER Submenu (located in the
SETUP Menu) by pressing
below it.
Step 2: Press
next to the selection titled DAMPING.
Step 3: To change the specified damping level and op-
timize the A-Scan signal appearance, continue pressing
or turn the function knob. You’ll note that the following
damping levels are available:
• 50 or 1000 Ω (see
Figure 4-9)
Step 4: The damping level will be set to the one last
displayed.
4.7.3 Adjusting the Pulser Repetition
Frequency (PRF)
The Pulser fires at a frequency which can either be set
automatically or manually. To set the PRF mode and
frequency level
Step 1: Activate the SETUP Menu (located in the HOME
Menu) by pressing
below it.
Step 2: Select the PULSER Submenu by pressing
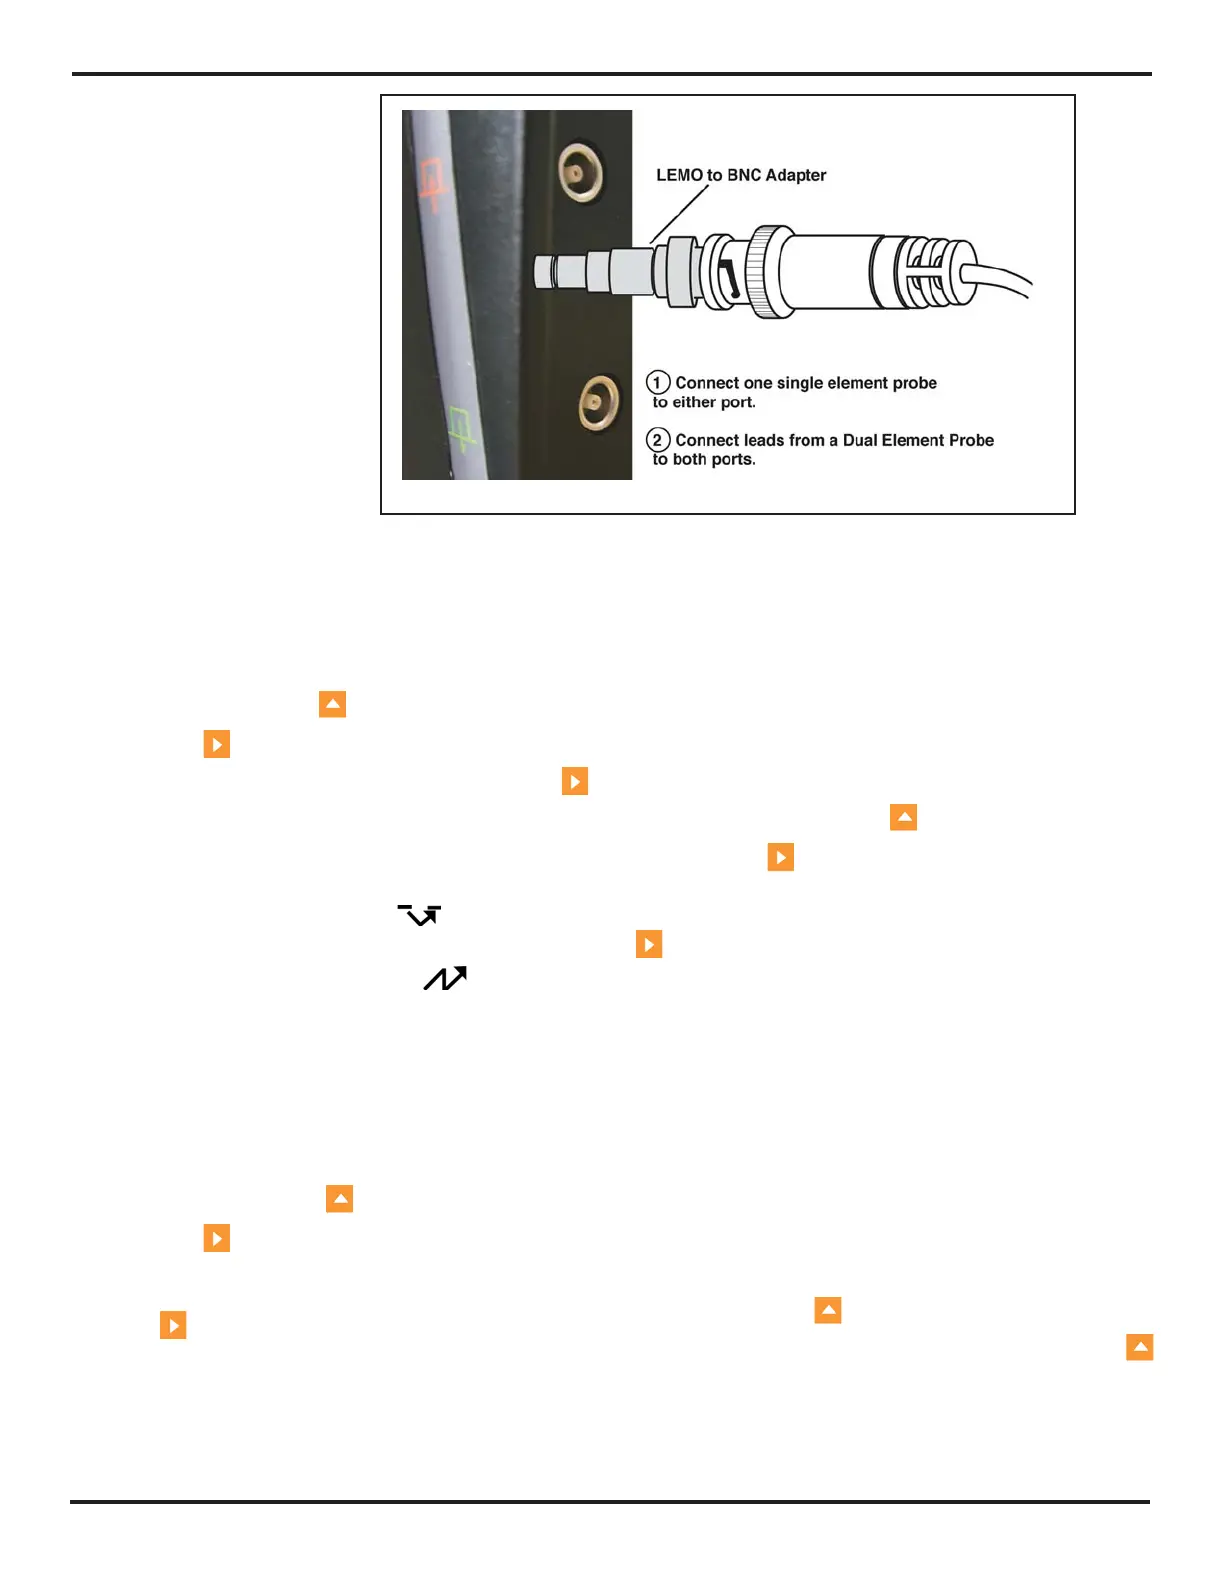
FIGURE 4-8—Probe Attachment
Locations

 Loading...