January 2008
5-16 Advanced Programming
Configuring the 4-20 mA
Analog Input (cont.)
Now, the XDP analog output is driven to exactly 20 mA.
To continue programming the setup menu, proceed to the appropriate
section for instructions. Otherwise, press
[ESC] four times to return to
live measurement mode.
Entering Factory
Calibration Data
To enter the factory calibration data, access the setup menu as
described on page 5-4 and complete the following steps:
At the next prompt, select the range to be calibrated (H2/AIR is used
as an example in this manual).
At the next prompt, enter the number of data points available for
calibrating the chosen gas curve.
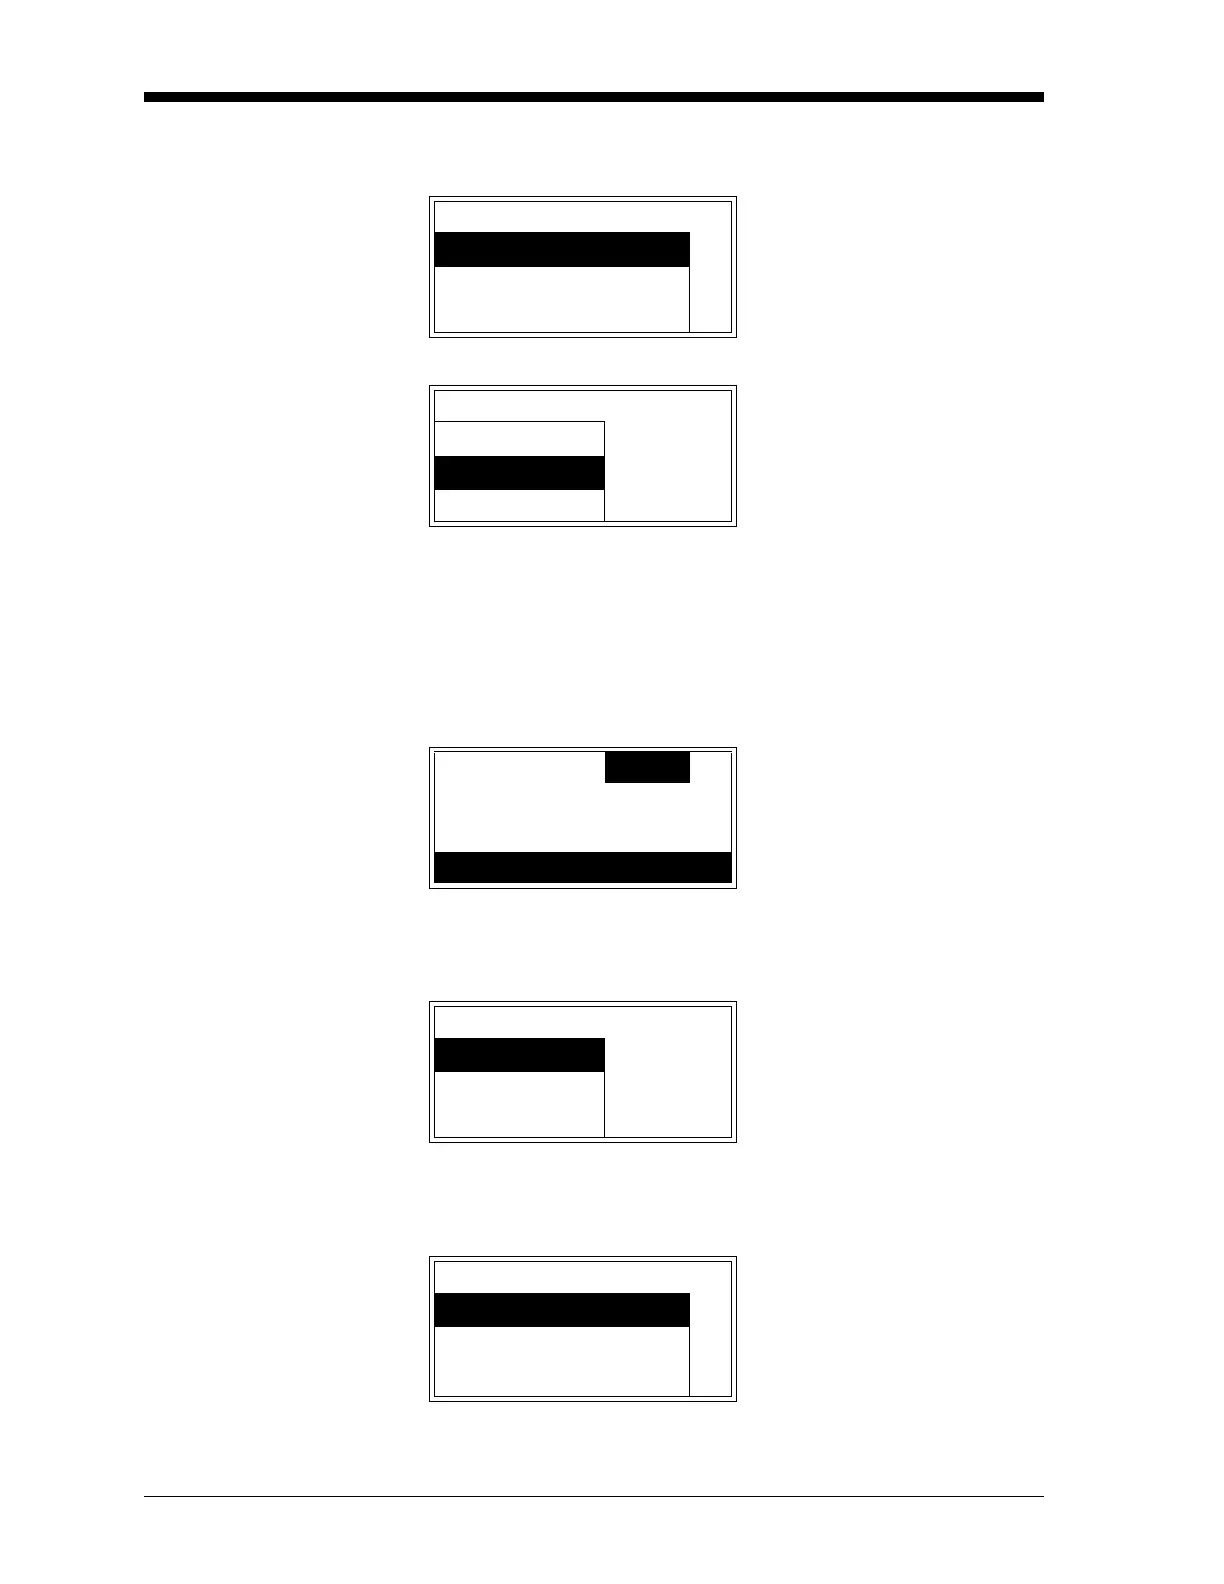
4-20mA-I..20mA-Trim Press the [
S] and [T] keys
until the meter reads exactly
20 mA. When done, press
[ENTER].
xx.xxx
s
xx
t
4-20mA-Input Press [ESC] to return to the
setup submenu.
Test
Trim
Range Cal Setup Use the [S] and [T] keys to
select
[Factory Calibration] and
press
[ENTER].
Serial Number
4-20mA-Input
Factory Calibration
Gas Curve: Use the [
S] and [T] keys to
select
[H2/AIR] and press
[ENTER].
H2/AIR
H2/CO2
AIR/CO2
Gas-Curve: H2/AIR Use [
W] and [X] to position the
cursor under the desired char-
acter. Then, use [
Œ] and [´] to
increment the value. Press
[ENTER] when done.
Enter # of Points
xx
s

 Loading...