User Manual of Network Video Recorder
49
8.3 Configuring Motion Detection
Purpose:
Follow the steps to set the motion detection parameters. In the live view mode, once a motion detection event takes
place, the NVR can analyze it and perform many actions to handle it. Enabling motion detection function can
trigger certain channels to start recording, or trigger full screen monitoring, audible warning, notify the
surveillance center and so on. In this chapter, you can follow the steps to schedule a record which triggered by the
detected motion.
Steps:
1. Enter Schedule Settings interface:
Configuration> Remote Configuraion> Camera Settings> Motion Detection
2. Set Motion Detection parameters.
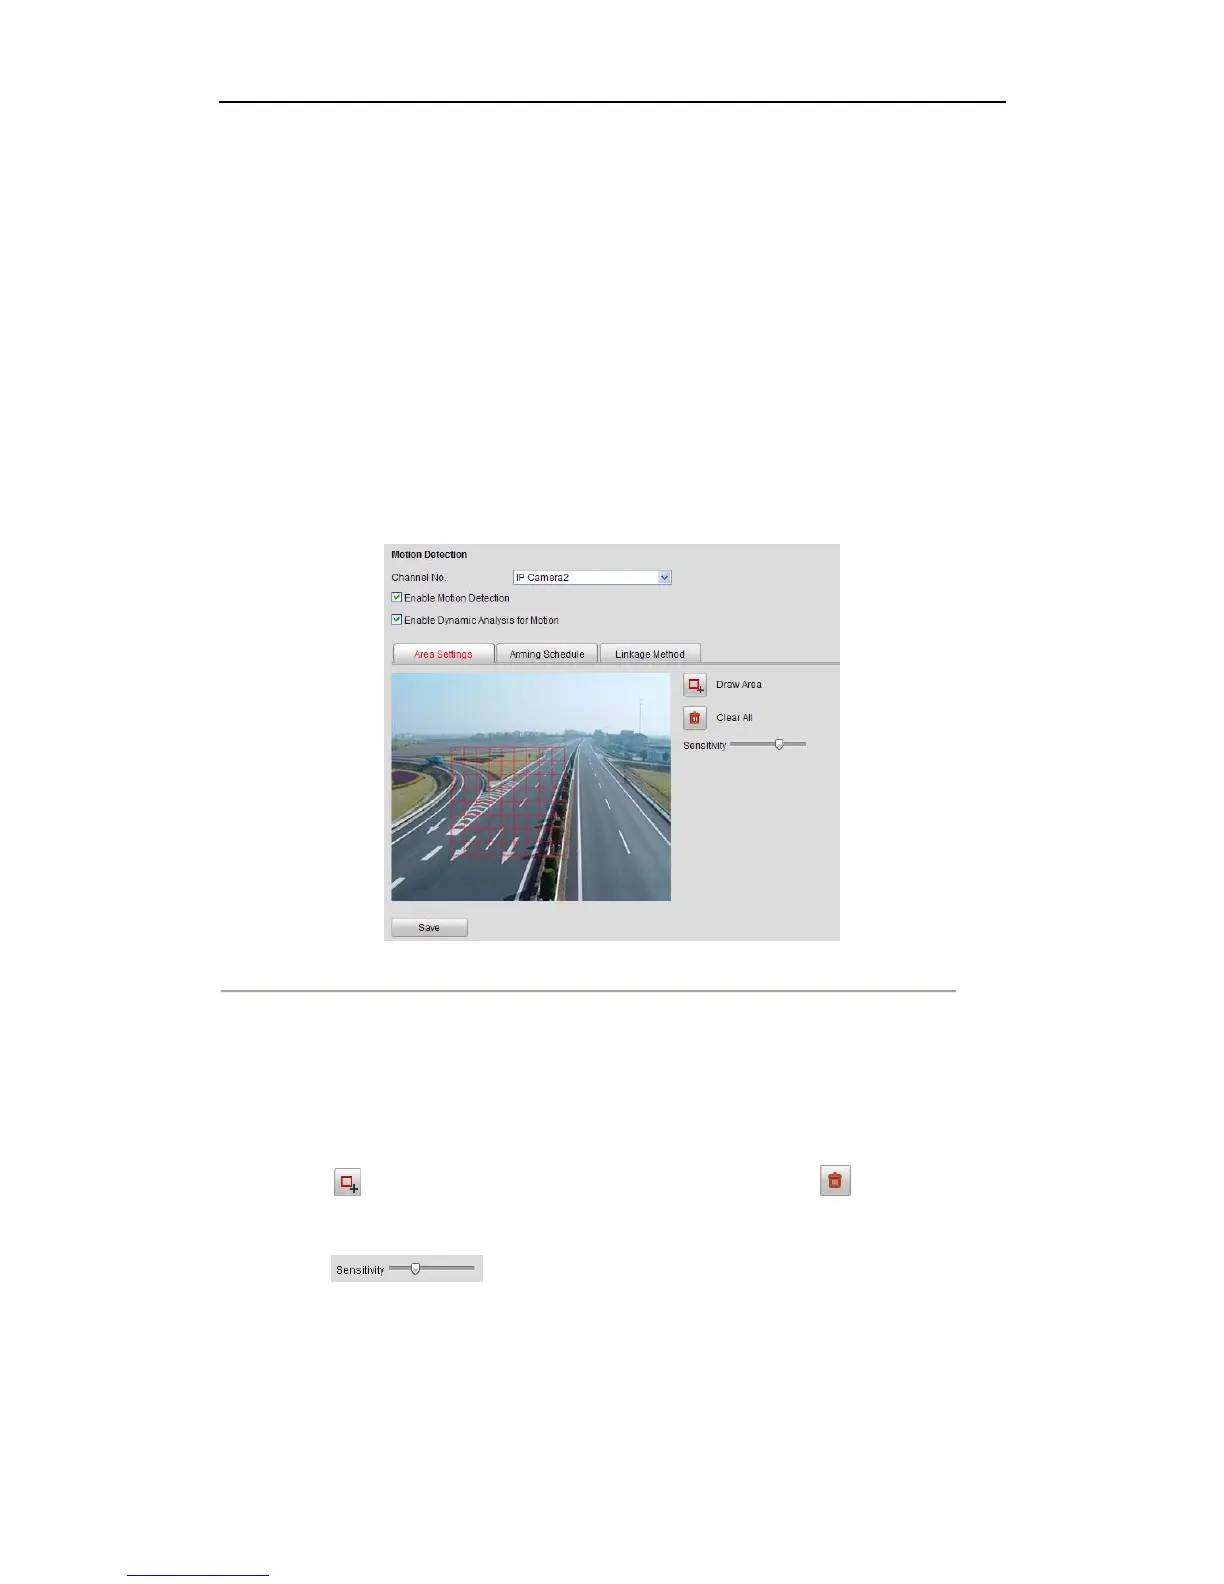
Figure 8. 5 Enable Motion Detection Interface
Steps:
(1) Select Channel No. for motion detection recording.
(2) Check the checkbox of Enable Motion Detection.
(3) (Optional) Check the checkbox of Enable Dynamic Analysis for Motion if you want the detected
moving object got marked with rectangle in the live view.
(4) Click button to draw area, you can click it again to stop drawing. Click button if you want to
clear all areas.
(5) Drag bar to adjust the sensitivity.
Notes:
Up to 8 areas can be configured.
If you are using IP camera that from third-party manufacturer, please set this function by using its own
software.
3. Set Arming Schedule.
 Loading...