S
MART
AXIS P
RO
/L
ITE
U
SER
'
S
M
ANUAL
FT9Y-B1378 3-3
3: I
NSTALLATION
AND
W
IRING
Mounting on DIN Rail
This section describes how to mount the SmartAXIS.
The SmartAXIS can be mounted directly on a DIN rail or in a control panel.
1. Firmly fasten the DIN rail to a panel using screws.
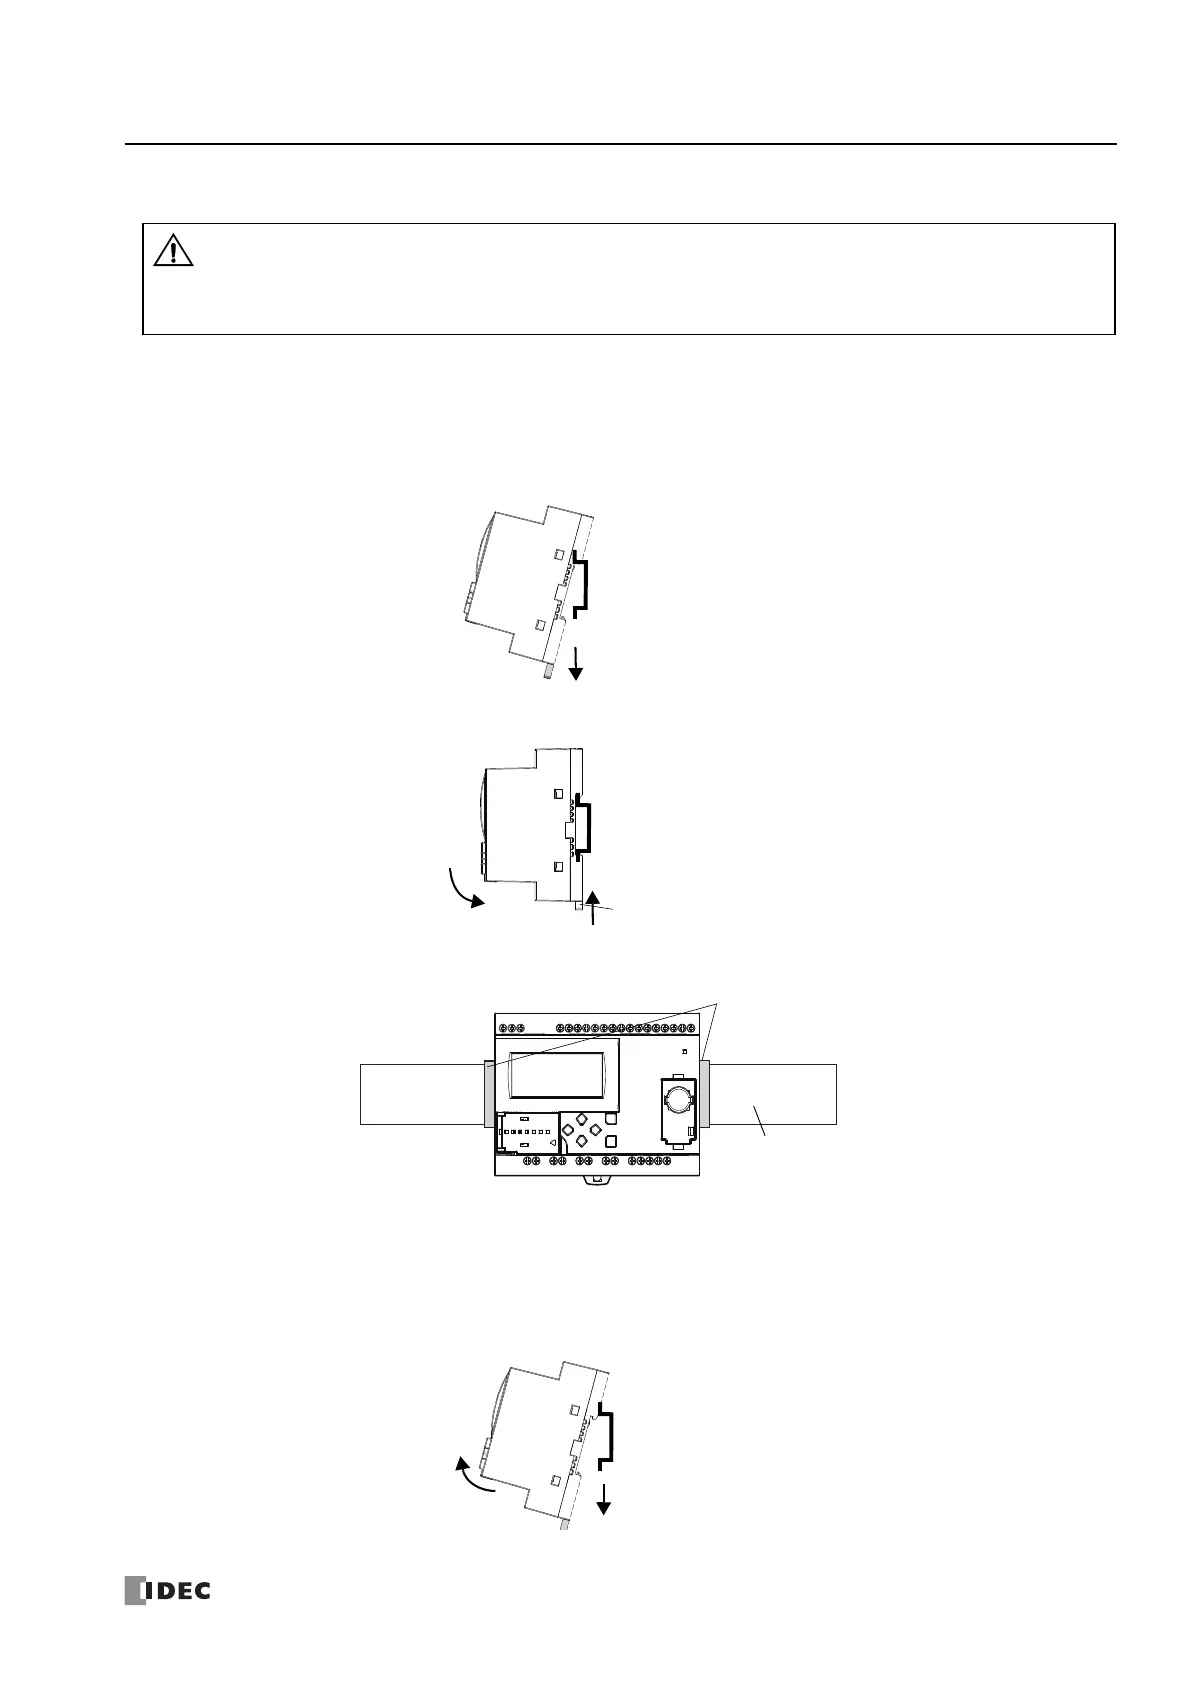
2. Using a flat head screwdriver, lower the DIN rail clamp and hang the SmartAXIS on the DIN rail.
3. Align the SmartAXIS with the DIN rail and raise the DIN rail clamp.
4. Secure both ends of the SmartAXIS using the DIN rail brackets.
Removing from DIN Rail
1. Using a flat head screwdriver, lower the DIN rail clamp on the SmartAXIS.
2. Pull the SmartAXIS outward and upward at the same time.
Note: The SmartAXIS supports 35mm wide DIN rails. Supported rails: IDEC BAA1000 (Length: 1000mm)
• Install the SmartAXIS modules according to instructions described in this user’s manual. Improper installation will
result in falling, failure, or malfunction of the SmartAXIS.
• Do not install the SmartAXIS when it is powered up. Doing so may result in electric shock and may damage the
product.
Caution
(2) Clamp SmartAXIS over DIN rail.
(1) Lower DIN rail clamp.
DIN Rail
DIN Rail
(2) Raise DIN rail clamp.
(1) Align with DIN rail.
DIN Rail Bracket (BNL6)
DIN Rail
DIN Rail
(2) Pull outward and upward.
(1) Lower DIN rail clamp.
 Loading...